
Intermediate
What the pattern's own author called it. Nothing here is graded again.
 Crochet·Rituals
Garments 19 Laid out for paper No account, no download
Front-tie cardigan: 2 front panels, back panel, 2 sleeves, tie neckline. 4mm hook, hdc throughout.
Crochet Rituals · retyped from the source and laid out for print · added 30 Sep 2026

What the pattern's own author called it. Nothing here is graded again.

What the sample was worked in. Any weight works; the size moves with it.

Each one is typed out whole and gets its own line.
This cardigan is built from four separate pieces worked flat in half double crochet: two front panels, one back panel, and two sleeves, joined afterward with a tie neckline finishing the front edges. Each panel is sized directly from your own chest measurement rather than a fixed gauge chart, so the chain length and row count adjust to fit before a single shoulder seam goes in. Have your bust measurement, a tape measure, and stitch markers ready before you chain, since the first round of both front panels and the back panel depends on math done from your own body, not a pattern-given number.
Listed by the pattern's own author, in their words.
Key to this pattern, 3 short forms
Measure your chest circumference; divide your bust by 4 to get front panel width; chain a length equal to panel width plus 2 extra chains; hdc in each stitch, starting from 3rd chain from the hook.
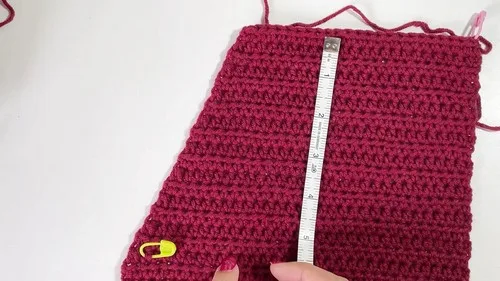
Chain 2, turn, and hdc across each row; repeat rows until the panel reaches your desired tie point.
Decrease Row Begin row with two stitches worked together (decrease).
Hdc across with no decreases.
Alternate decrease and regular rows until reaching the shoulder.
Shoulder Rows Add about 1.5 inches of rows for shoulder shaping.
Chain one and cut the yarn.Make a second front panel identical to the first.
Divide bust measurement by 2 for back panel width; chain this length plus 2 for turning.
Work in hdc rows until panel matches front panels' length up to shoulder.
Use stitch markers to mark shoulder sections.
Shoulder Rows Add same number of rows as front panel shoulders.
Try on piece and mark where armholes should begin before seaming.
With wrong side out, seam up to the marked armhole before working sleeve rounds.
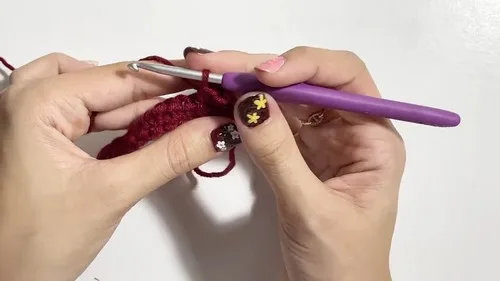
Turn right side out; hdc evenly around the armhole opening.
Chain 2, turn, and hdc around for each new round; repeat rounds until sleeves reach your elbow.
Optional Flare Alternate normal hdc rounds with increased rounds for a flared sleeve.
Continue rounds until desired length is achieved.Make the second sleeve using the same steps.
Work a round of hdc starting at a side seam around the cardigan opening.
When you reach tie placement, chain the desired length for the tie strap; slip stitch back down the chain to form the strap.
Resume hdc border and create the second tie on the opposite side.
Slip stitch to join, chain one, and cut yarn.
| Rounds | 19 |
|---|---|
| Parts | 4 |
| Level | Intermediate |
| Time | 4-6 hours |
| Hook | 4 mm |
| Yarn | Worsted |
The front panels carry a decrease row that alternates with plain hdc rows from Round 3 through Round 5, so the shaping narrows the panel gradually toward the shoulder rather than in one sharp cut.
Both front panels and the back panel are worked flat in turned hdc rows rather than in the round, which is what allows the back panel's shoulder sections to be marked with stitch markers and matched exactly to the front panels before seaming.
| Front Panels (2 panels, 7 rounds each) | about 2 to 3 hours because two identical panels must be worked with matching decrease shaping through the shoulder |
|---|---|
| Back Panel and shoulder seaming | about 1 hour because the 4-round back panel includes marking and matching shoulder sections to the front panels |
| Sleeves and neckline ties (2 sleeves, 4 | about 1.5 to 2 hours because each sleeve requires a try-on fitting step before seaming and rounds continue to elbow length |
Every one was taken by whoever published the pattern, in the order the source listed them.


These answers came from whoever first published the pattern, kept word for word.