Skip to the patterns
Crochet·Rituals
Menu

Wearables 3 Laid out for paper No account, no download

Granny square basketball shorts you build from two panels

Two 23-round granny squares joined into shorts with a ribbed waistband. 4.5 mm hook.

Jump to the rounds Pin it
Granny square basketball shorts you build from two panels
Wearables · Worsted
Skill
Intermediate
Time
4-6 hours
Yarn weight
Worsted
Hook
4.5 mm
Rounds
3

Intermediate

What the pattern's own author called it. Nothing here is graded again.

Worsted

What the sample was worked in. Any weight works; the size moves with it.

3

Each one is typed out whole and gets its own line.

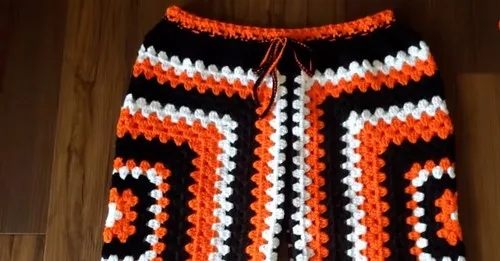
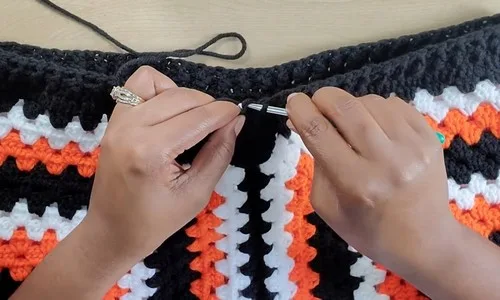
This piece starts as two granny squares, each grown to 23 rounds and roughly 22 inches wide, worked in a white center with two rounds of orange and two rounds of black repeating out to the edge. The squares fold in half and join along one side and the bottom, leaving a 10-inch gap at the top for the leg openings, then a ribbed waistband and braided drawstring finish the piece. Before the first magic ring, have your color sequence sorted and enough yarn in each color to see 23 rounds through per square. You can use the white, orange, and black sequence shown here or choose your own favorite color palette, from bold contrasting shades to a subtler retro mix.

Common mistakes and their fixes

Losing track of corner spaces
Place a marker in each ch-2 corner space as soon as Round 1 is done, and move the markers up each round so all four corners stay easy to spot through round 23.
Seaming past the leg opening mark
Measure and pin the 10-inch mark on both squares before you start slip stitching, and stop there rather than sewing straight to the top.

The materials list

  1. 4.5 mm crochet hook
  2. Scissors
  3. Darning needle
  4. Measuring tape
  5. Yarn in desired colors (e.g., black, white, orange)

Listed by the pattern's own author, in their words.

Key to this pattern, 3 short forms

Granny Square

Follow color pattern: white center, 2 rounds orange, 2 rounds black.

Each square has 23 rounds total (approx. 22" wide).

Round 1

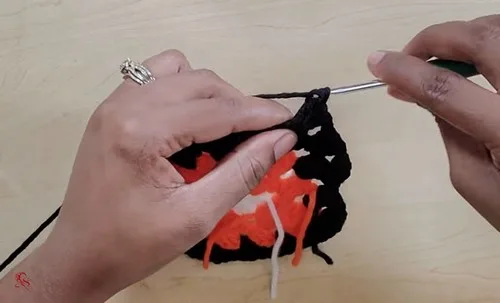
Begin with a magic ring; Ch 3 (counts as 1st dc), make 2 dc into ring; Ch 2, 3 dc —repeat 3 more times; Join with sl st to top of starting ch 3.

Round 2

(Change to orange): Ch 2, in each corner space: 3 dc, ch 2, 3 dc; Ch 1 between corners.

Rounds 3–23

(3 dc, ch 2, 3 dc) in each corner space; 3 dc in each ch-1 space.

Assembly, in order

Step 1Fold each square in half with right sides facing inward.
Step 2Pin both squares together, leaving 10" from the top for leg openings.
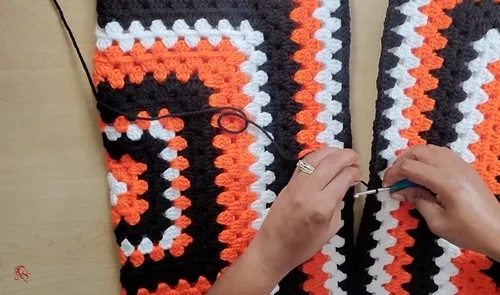
Step 3Slip stitch or sew the panels together from bottom up to the 10" mark.
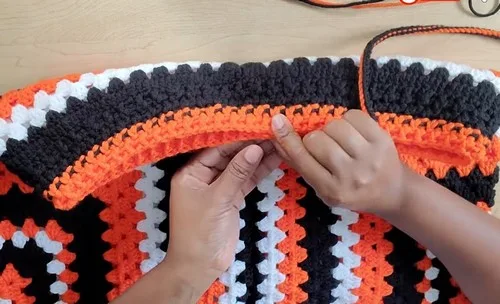
Step 4Waistband: With right side facing out, attach yarn to top; work in the round, decreasing slightly for fit; alternate front post and back post dc for ribbed texture; add more rows in desired colors.
Step 5Create a braided drawstring using leftover yarn by pulling loops through one another using a chain braid method.
Step 6Final drawstring should be about 26" unstretched, 39" when stretched.
Step 7Weave the drawstring through the waistband using a latch pin or similar tool, skipping two stitches at a time; adjust and secure ends as needed.

Check these before you start

  • Each corner space takes 3 dc, ch 2, 3 dc on every round after Round 1 — keep an eye on those four corners so the square grows square, not skewed.
  • Color changes happen at fixed points in the sequence (white center, then alternating pairs of orange and black rounds), so join new colors at the start of a round rather than mid-round.
  • Keep tension consistent across all 23 rounds on both squares; a looser or tighter square between the two will throw off the seam match during assembly.
  • Ch 1 sits between corners on Round 2 but shifts to 3 dc in the ch-1 space from Round 3 onward — check which round you're on before repeating a stitch pattern.
  • Color guidance: the white-center, then two-rounds-orange, two-rounds-black sequence used here is just one option. Choose your own favorite color palette to match your vibe, or go full retro with bold contrasting shades, keeping the same white-center-then-alternating-pairs structure.

On one line

Rounds3
LevelIntermediate
Time4-6 hours
Hook4.5 mm
YarnWorsted

Set-up

  • Read through the round pattern (white center, 2 rounds orange, 2 rounds black, repeating) so you know which round calls for a color change before you get there.
  • Work a small test square first to check that your 4.5 mm hook gives you a square close to the 22-inch target, since shorts sizing depends on it.
  • Measure and mark where 10 inches falls on your seam edge ahead of time, so the leg opening gap is easy to find during assembly.

Finishing

  1. Weave in all ends from the magic ring start and every color change before assembly, since the layered rounds make loose ends hard to reach later.
  2. Fold each finished square in half with right sides facing inward, pin together, and slip stitch or sew from the bottom up to the 10-inch mark for the leg openings.
  3. right side facing out, work the ribbed waistband in alternating front post and back post dc, decreasing slightly for fit, then braid the leftover yarn into a drawstring.

Construction

Each square grows entirely from four corner spaces established in Round 1 (ch 3, 2 dc, then ch 2, 3 dc repeated three more times) — every later round simply adds 3 dc into each corner ch-2 space and 3 dc into each ch-1 space, which is what keeps the square flat and square through all 23 rounds.

Joining with a sl st to the top of the starting ch 3 at the end of each round closes the loop before the next round begins, which is what allows the color change to land cleanly at the start of Round 2 rather than partway through a side.

Time per section

First granny square (23 rounds)about 2-2.5 hours because the round count is high and each round adds corner and side stitches around a growing perimeter
Second granny square (23 rounds)about 2-2.5 hours because it repeats the same 23-round color sequence as the first square
Assembly and waistbandabout 1 hour because seaming to the 10-inch mark, working the ribbed waistband, and braiding the drawstring are each quick once the squares are done

Photographs of this one

Every one was taken by whoever published the pattern, in the order the source listed them.
Granny square basketball shorts you build from two panels — photo 2
Granny square basketball shorts you build from two panels — photo 3
Granny square basketball shorts you build from two panels — photo 4
Granny square basketball shorts you build from two panels — photo 5

Common questions

Why does the square use a different color rule after Round 2?
Round 1 and Round 2 set up the corner and side spaces, and from Round 3 onward the pattern simplifies to 3 dc in each corner and 3 dc in each ch-1 space, repeated straight through to Round 23. The color sequence layers on top of that: white center, then alternating pairs of orange and black.
How do I know where the leg opening should sit?
Measure 10 inches from the top of the folded square along the seam edge and pin it before you start joining. Seam from the bottom up to that pin, then leave the rest open for the leg.
What is the drawstring made from?
It's a braided cord made from leftover yarn, pulling loops through one another rather than crocheting a separate chain. Save scraps from your color changes so you have enough length to braid.

These answers came from whoever first published the pattern, kept word for word.