
Intermediate
What the pattern's own author called it. Nothing here is graded again.
 Crochet·Rituals
Bags & Totes 12 Laid out for paper No account, no download
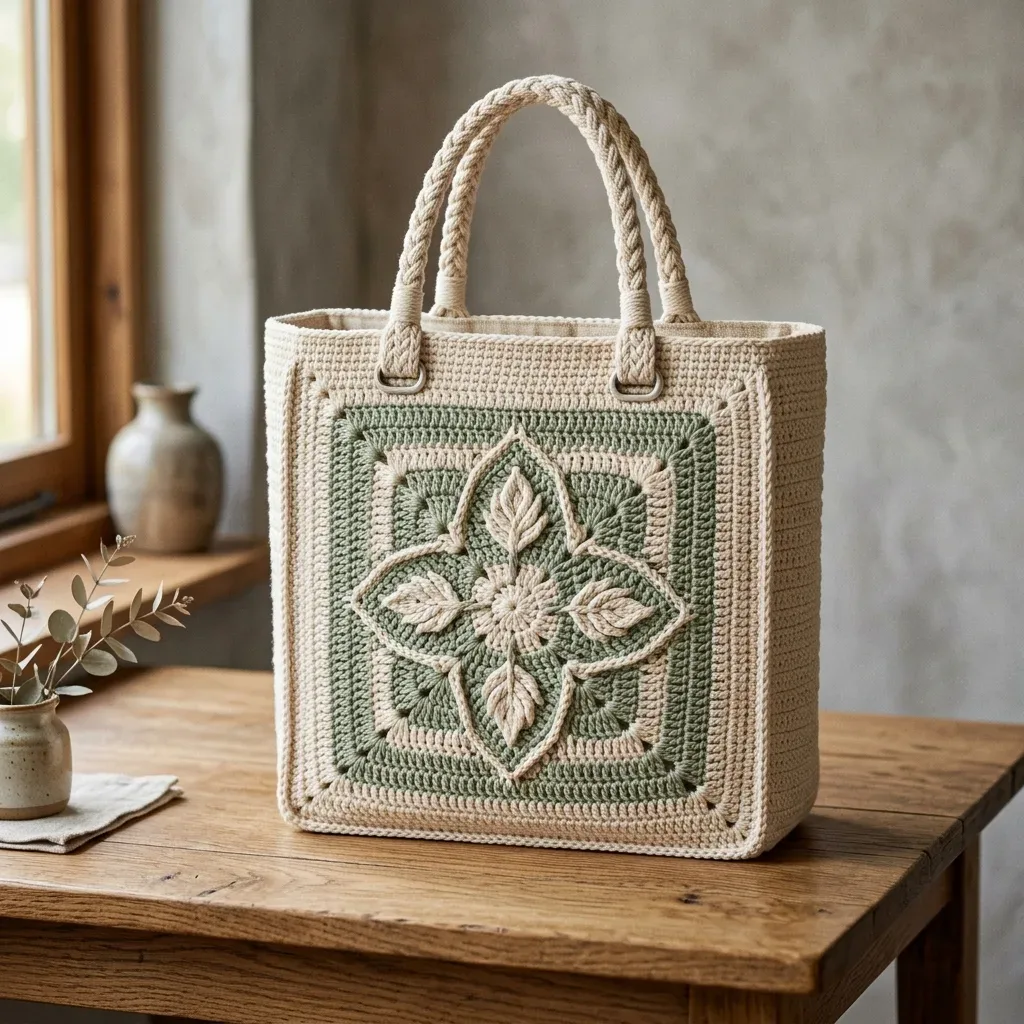
A boxy single crochet tote (36 joined rounds, H-8 hook) with raised botanical granny square panels.
Crochet Rituals · retyped from the source and laid out for print · added 20 Oct 2026
What the pattern's own author called it. Nothing here is graded again.

What the sample was worked in. Any weight works; the size moves with it.

Each one is typed out whole and gets its own line.
This tote builds a firm, boxy base from single crochet worked first in flat rows, then in thirty-six tight rounds that lend the fabric strength without the stretch most crochet bags lack. Sage green botanical granny squares, worked center-out with front post stitches for raised texture, are whip stitched onto the front and back panels afterward. Before starting, have both colors of cotton yarn wound, a G-6 and an H-8 hook on hand, four D-rings, and two lengths of rope ready for the braided handles threaded through sewn-on tabs.
Listed by the pattern's own author, in their words.
Key to this pattern, 21 short forms
Sc in 2nd ch from hook and in each ch across. Turn. (52 sc)
through 18: Ch 1, sc in each st across. Turn. (52 sc) Do not fasten off. Checkpoint: Your bottom panel should measure approximately 13 inches wide by 4 inches tall. If measurements are off, check your gauge and adjust hook size.
through 36: Ch 1, sc in each st around. Join with sl st to first sc. (140 sc) After Round 36, your side walls measure approximately 8 inches, giving a total bag height of 12 inches including the bottom.Do not fasten off.
Each tab wraps around a D-ring and attaches at the handle positions.
Position tabs at stitches 22, 68, 92, and 137 (3 stitches in from each corner on the front and back panels).
With Color A and H-8 hook, ch 8.
Sc in 2nd ch from hook and in each ch across. (7 sc)
through 4: Ch 1, turn. Sc in each st across. (7 sc) Fold the tab around a D-ring, aligning both edges. Whip stitch the tab to the inside of the bag at the marked position, sewing through both tab layers and the top two rounds of the bag body.Repeat for all four tabs.
Work with Color B (sage) and G-6 hook unless otherwise noted.
With Color B, make a magic ring. Ch 3 (counts as first dc), work 2 dc in ring, ch 2, (3 dc in ring, ch 2) 3 times. Join with sl st to top of beg ch-3. Tighten magic ring. (4 groups of 3 dc, 4 ch-2 corner spaces)
Join Color A in any ch-2 corner sp. Ch 3, (2 dc, ch 2, 3 dc) in same corner sp. Ch 1. (3 dc, ch 2, 3 dc) in each remaining corner sp. Ch 1 between each corner group. Join with sl st to top of beg ch-3. Fasten off Color A. (8 groups of 3 dc, 4 ch-2 corners, 4 ch-1 side spaces)
Join Color B in any ch-2 corner sp. Ch 3, (2 dc, ch 2, 3 dc) in same corner sp. Ch 1, 3 dc in ch-1 side sp, ch 1, (3 dc, ch 2, 3 dc) in corner sp, ch 1, 3 dc in ch-1 side sp, ch 1. Rep around. Join with sl st to top of beg ch-3. Fasten off. (12 groups of 3 dc, 4 ch-2 corners, 8 ch-1 side spaces)
through 8: Continue the granny square pattern, alternating Color A and Color B each round. Each round adds one 3-dc group per side.
Join Color B in any ch-2 corner sp. Ch 1, 3 sc in corner sp, sc in each dc and 1 sc in each ch-1 sp across each side, 3 sc in each corner sp. Join with sl st to first sc. Target: (144 sc)
Join Color A in any corner center stitch. Ch 3, (2 dc, ch 2, 3 dc) in same corner sc. Sk 1 sc, dc in each sc across to 1 sc before next corner, sk 1 sc, (3 dc, ch 2, 3 dc) in corner sc. Rep around. Join with sl st to top of beg ch-3. Fasten off.
Block square to 9 inches by 9 inches before adding the raised motif.
Crab Stitch Do not turn. Working from left to right (opposite direction), ch 1, reverse sc in each st around. Join with sl st to first reverse sc. (140 reverse sc)Fasten off. Weave in end.
| Rounds | 12 |
|---|---|
| Parts | 5 |
| Level | Intermediate |
| Time | 18-25 hours |
| Hook | 4.0 mm |
| Yarn | Worsted |
The D-ring tabs land at stitches 22, 68, 92, and 137, each three stitches in from a corner on the front and back panels, which keeps the four handle attachment points symmetrical on both sides of the bag.
| Bag body (bottom panel and 36 joined rounds) | about 6 to 8 hours, because the bottom panel works 18 rows flat before 36 rounds are joined for the sides. |
|---|---|
| Botanical granny square panels | about 4 to 6 hours each, because of the center-out construction, color changes, and raised front post stitches. |
| D-ring tabs and finishing assembly | about 2 to 3 hours, because four tabs must be made, folded around D-rings, and whip stitched through the top two rounds before the squares are attached. |
These answers came from whoever first published the pattern, kept word for word.