
Intermediate
What the pattern's own author called it. Nothing here is graded again.
 Crochet·Rituals
Garments 12 Laid out for paper No account, no download
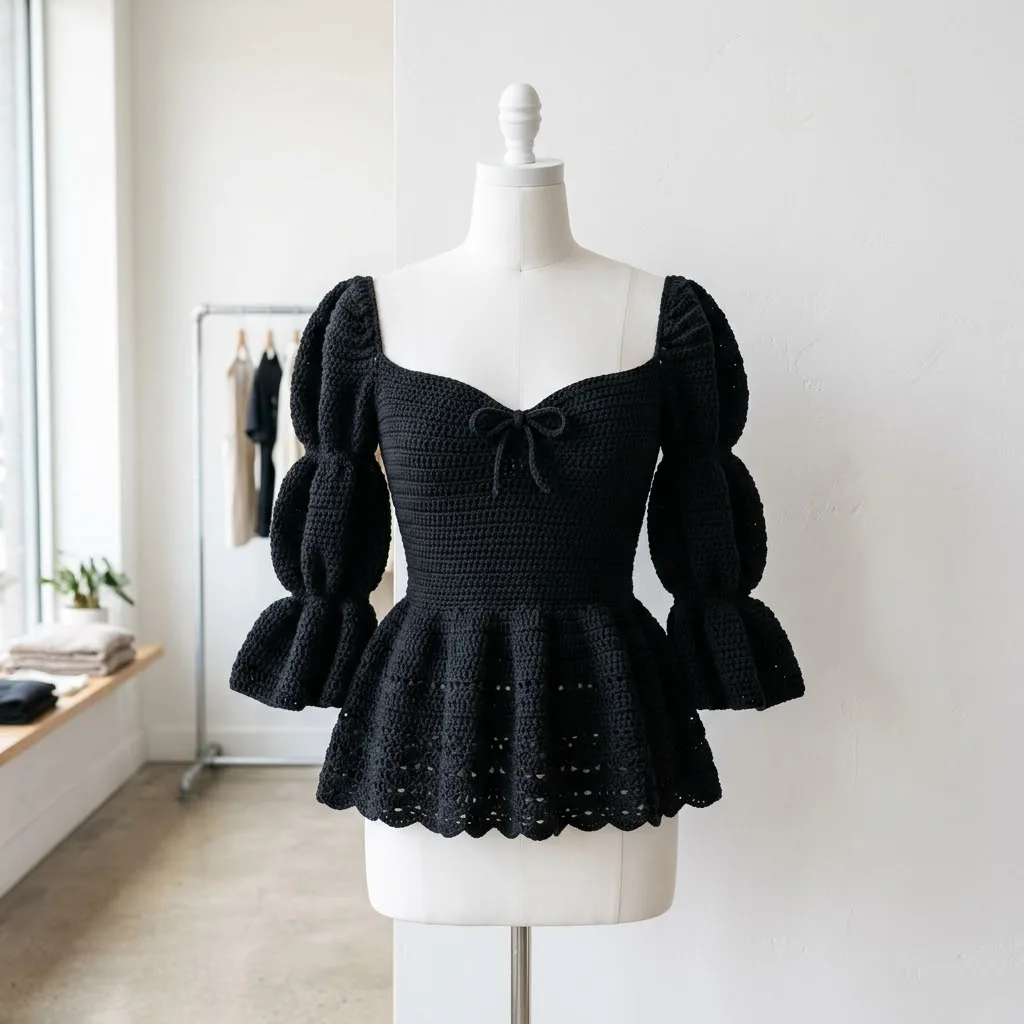
Ribbed peplum top: 40 rows BLO single crochet, mirrored cup shaping, 4.0mm and 4.5mm hooks.
Crochet Rituals · retyped from the source and laid out for print · added 14 Sep 2026
What the pattern's own author called it. Nothing here is graded again.

What the sample was worked in. Any weight works; the size moves with it.

Each one is typed out whole and gets its own line.
This peplum top begins as a single ribbed rectangle, worked back and forth in single crochet through the back loop only across 72 stitches. After forty rows of ribbing, the piece splits into two mirrored cups, each shaped with sc2tog decreases before narrowing into a shoulder strap, with four center stitches skipped to open the sweetheart gap between them. Work the bodice with a 4.0mm hook for firm stitch definition, and keep a 4.5mm hook ready for the softer-draping peplum below. Have 800 to 1000 yards of DK weight cotton blend on hand, along with stitch markers and a yarn needle for seaming and weaving ends.
Listed by the pattern's own author, in their words.
Key to this pattern, 6 short forms
Ch 73.
Sc in 2nd ch from hook and in each ch across. Turn. (72 sts)Step by step: to 50: Ch 1, sc in BLO of each st across. Turn. (72 sts).
to 40: Ch 1, sc in BLO of each st across. Turn. (72 sts) This creates the ribbed texture. Keep your tension even so the ribbing looks consistent.
Ch 1, sc in BLO of first 34 sts. Turn. Leave remaining sts unworked. (34 sts)
Ch 1, sc2tog, sc in BLO to end. Turn. (33 sts)Rows 43 to 50: Repeat Row 42. (25 sts after Row 50)
Ch 1, sc in BLO of first 20 sts. Turn. (20 sts)
to 55: Ch 1, sc2tog, sc in BLO to last 2 sts, sc2tog. Turn. After Row 55 you should have 12 sts remaining for the shoulder strap.
to 65: Ch 1, sc in BLO of each st across. Turn. (12 sts) Fasten off.
Skip 4 center stitches on Row 40. Join yarn to next stitch.
Ch 1, sc in BLO across remaining 34 sts. Turn. (34 sts)
Ch 1, sc in BLO to last 2 sts, sc2tog. Turn. (33 sts)Rows 43 to 50: Repeat Row 42. (25 sts after Row 50)
Ch 1, skip first 5 sts, sc in BLO of remaining 20 sts. Turn. (20 sts)
to 55: Ch 1, sc2tog, sc in BLO to last 2 sts, sc2tog. Turn. After Row 55 you should have 12 sts remaining.
to 65: Ch 1, sc in BLO of each st across. Turn. (12 sts) Fasten off.
Step by step: Ch 1, sc in BLO of first 12 sts. Fasten off. Skip center 48 sts. Join yarn to next st; Ch 1, sc in BLO across remaining 12 sts. (12 sts).
Step by step: Ch 73.
4.0mm (G/6) crochet hook for bodice 4.5mm (7) crochet hook for peplum (larger hook creates softer drape)
Yarn needle for weaving ends and seaming Stitch markers Measuring tape Blocking mats and pins
You will now work each cup separately.
| Rounds | 12 |
|---|---|
| Parts | 6 |
| Level | Intermediate |
| Time | 4-6 hours |
| Hook | 4.0 mm |
| Yarn | DK |
Rows 2 through 40 are worked straight across all 72 foundation stitches in back-loop-only single crochet, building a single ribbed rectangle before any shaping begins; the split into two cups only happens at Row 40 to 41.
Right Cup decreases at the start of each row (sc2tog, then sc in BLO to end) while Left Cup decreases at the end of each row (sc in BLO to last 2 sts, sc2tog); this mirrored placement, plus the 4 center stitches skipped between them, keeps the sweetheart shaping symmetric across the piece.
| Foundation | about 2 to 3 hours, because it covers 40 rows of BLO ribbing across 72 stitches before any shaping starts |
|---|---|
| Right Cup | about 1 to 1.5 hours, because of two stages of decreasing across 15 rows down to the 12-stitch strap |
| Left Cup | about 1 to 1.5 hours, because the mirrored shaping needs careful stitch counting to match the Right Cup |
These answers came from whoever first published the pattern, kept word for word.