
Intermediate
What the pattern's own author called it. Nothing here is graded again.
 Crochet·Rituals
Garments 8 Laid out for paper No account, no download
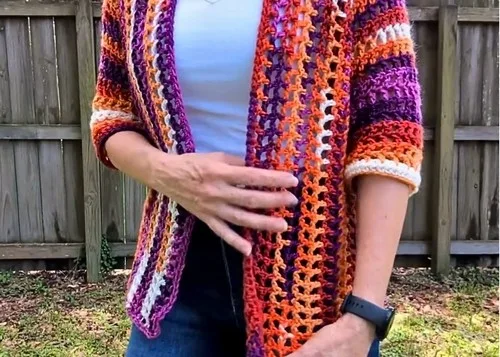
Sleeve-to-sleeve sweater, 49 rows, DC Ch1 Sk1 pattern, 8mm hook, one seam.
Crochet Rituals · retyped from the source and laid out for print · added 12 Sep 2026
What the pattern's own author called it. Nothing here is graded again.

What the sample was worked in. Any weight works; the size moves with it.

Each one is typed out whole and gets its own line.
This sweater grows from one sleeve cuff to the other, with the body worked flat between them in a DC Ch1 Sk1 pattern. Each sleeve begins at the cuff and widens into the sleeve body before chained stitches open onto the front and back panels. A center marker splits the back panel from the second half of the piece, which continues through row 49. The whole thing closes with a single slip stitch seam under the sleeve and down the body. Have medium weight yarn, an 8mm hook, stitch markers, and a yarn needle on hand before starting.
Listed by the pattern's own author, in their words.
Key to this pattern, 4 short forms
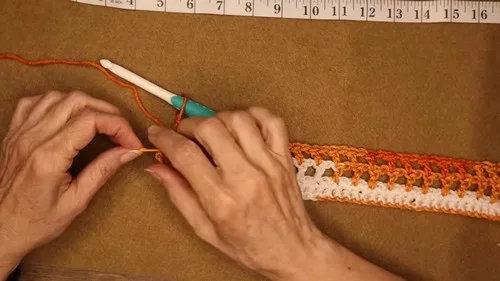
Chain an even number until it reaches your preferred sleeve width (around 13 inches for M/L)
SC in second chain from hook and across
Ch 1, turn, SC across
Ch 4 (counts as DC + Ch1), turn, skip first stitch, DC in next, repeat [Ch1 Sk1 DC]
Ch4 turn, repeat pattern [Sk1 DC Ch1] across Continue until sleeve measures about 6.5 inches total
At end of row 11, chain length needed for front panel (approx. 55 ch)
Turn work
Skip 5 chains, begin DC Ch1 Sk1 pattern in 6th ch and work across chain + sleeve stitches
At sleeve end, chain same number as front panel (approx. 55 ch)
Turn and begin DC Ch1 Sk1 pattern into 6th chain
Continue working full-length rows until panel section measures about 10 inches (approx. 16 rows)
Count stitches across row, find the center, mark
Work pattern until marker to create center back panel (about 4 rows wide)
From center point, chain stitches equal to half count +5 (example: 70 +5 = 75)
Turn and work pattern from 6th chain
Continue repeating rows until row 49 is complete
Count stitches equal to first sleeve width (example 21 DC), mark
Work repeat until marker to shape sleeve
Continue pattern for 9 rows
Ch1 turn, SC across sleeve
Ch1 turn, SC across again
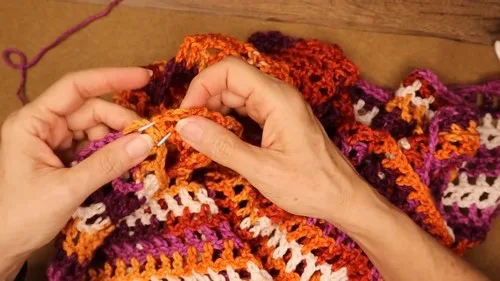
Fold sweater and align sleeves + side seams
Slip stitch seam under sleeve and down body
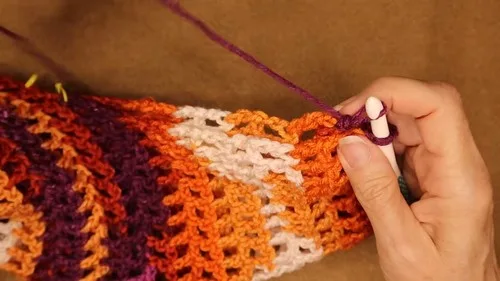
SC across bottom panel Place 2 SC at corner to turn smoothly Continue SC up front, around neckline, down other side, across back bottom
Join with slip stitch and finish off
| Rounds | 8 |
|---|---|
| Parts | 9 |
| Level | Intermediate |
| Time | 4-6 hours |
| Hook | 8 mm |
| Yarn | Worsted |
The front panel is worked flat rather than in the round because it grows directly out of live sleeve stitches through a chained extension, which only works row by row.
The single side-and-underarm seam exists because the piece is built as one continuous flat section from cuff to cuff, so only one closing seam is needed to bring it into sweater shape.
| First Sleeve Cuff and Body | about 45-60 minutes because the cuff and body together run only 4 rounds before the panel begins |
|---|---|
| Front panel to row 49 | about 2-3 hours because this stretch covers the bulk of the piece, from the chained cast-on through row 49 |
| Second Sleeve and seaming | about 1 hour because the second sleeve mirrors the first and the single seam runs the length of the underarm and body |
Every one was taken by whoever published the pattern, in the order the source listed them.
These answers came from whoever first published the pattern, kept word for word.