
Intermediate
What the pattern's own author called it. Nothing here is graded again.
 Crochet·Rituals
Sweaters 17 Laid out for paper No account, no download
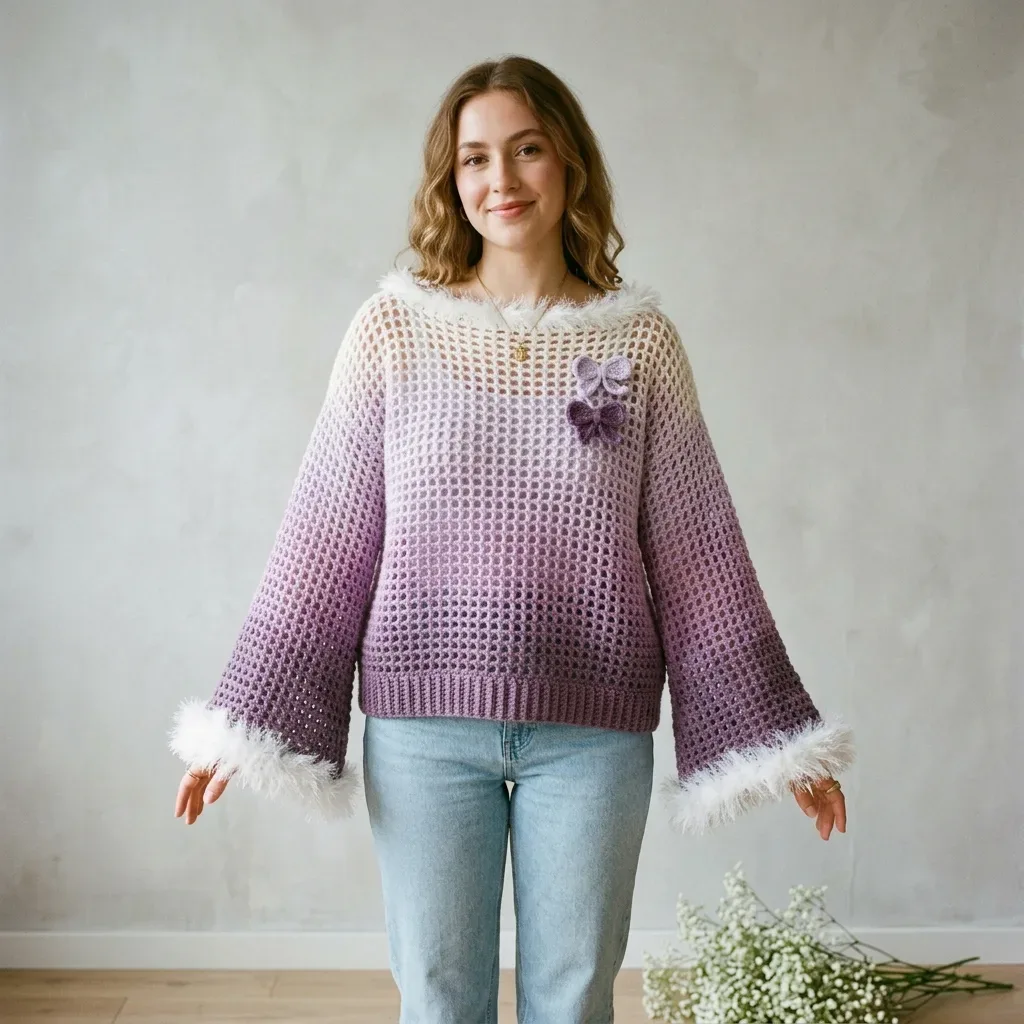
Open-mesh gradient sweater, 4 panels, G-6 hook, 56 rows body, E-4 ribbing, eyelash trim.
Crochet Rituals · retyped from the source and laid out for print · added 15 Sep 2026
What the pattern's own author called it. Nothing here is graded again.

What the sample was worked in. Any weight works; the size moves with it.

Each one is typed out whole and gets its own line.
This oversized pullover builds from four flat mesh panels: a front body, a back body, and two sleeves, each worked in a repeating chain-space grid that reads as an open, airy fabric once blocked. A gradient DK yarn carries the color shift from cream through lavender to dusty purple across the body, while a separate deep purple yarn forms the hem and cuff ribbing and a contrast eyelash yarn finishes the neckline and cuffs. Before starting, have the G-6 hook for the mesh and eyelash trim, the E-4 hook for ribbing, stitch markers for the neckline division, and blocking mats ready, since the mesh will not show its true width or drape until wet blocked.
Listed by the pattern's own author, in their words.
Key to this pattern, 12 short forms
Using Yarn C (deep purple) and E-4 hook, ch 7.
Sc in 2nd ch from hook and in each ch across. (6 sc) Ch 1, turn.to 28: Sc in BLO of each st across. (6 sc) Ch 1, turn. The cuff ribbing strip should measure approximately 7 inches (18 cm) long. Fasten off, leaving an 18-inch tail.
to 48: Sc in BLO of each st across. (6 sc) Ch 1, turn. The ribbing strip should measure approximately 12 inches (30 cm) long to match your body panel hem width. Fasten off, leaving an 18-inch tail for seaming.
(WS): Ch 2, turn. Sc into first ch-sp, (ch 1, sc into next ch-sp) across, ending with sc into the tch-sp. (46 mesh units) Ch 2, turn.
to 56: Rep Row 2, maintaining pattern. (46 mesh units each row) Follow the gradient color placement notes above. Continue until the piece measures approximately 22 inches (56 cm) from the foundation chain, or 56 rows total are complete.Fasten off and weave in ends.
Checkpoint: The Back Body should measure approximately 23 inches (58 cm) wide and 22 inches (56 cm) tall before blocking.
Increase Row: (16 mesh units)Rows 6 to 8: Work even. (16 mesh units)
Increase Row: (18 mesh units)Rows 10 to 12: Work even. (18 mesh units)
Increase Row: (20 mesh units)Rows 14 to 16: Work even. (20 mesh units)
Increase Row: (22 mesh units)Rows 18 to 20: Work even. (22 mesh units)
Increase Row: (24 mesh units)Rows 22 to 24: Work even. (24 mesh units)
Increase Row: (26 mesh units)Rows 26 to 28: Work even. (26 mesh units)
Increase Row: (28 mesh units)Rows 30 to 32: Work even. (28 mesh units)
Increase Row: (30 mesh units)Rows 34 to 36: Work even. (30 mesh units)
Increase Row: (32 mesh units)Rows 38 to 40: Work even. (32 mesh units)
Increase Row: (34 mesh units)Rows 42 to 44: Work even. (34 mesh units)
Increase Row (36 mesh units) Continue even until sleeve measures 18 inches (46 cm) total from foundation row or 50 rows total. The last several rows should be in cream/white following the gradient schedule.Fasten off.Checkpoint: The completed sleeve should measure approximately 9 inches (23 cm) wide at the cuff end and approximately 18 inches (46 cm) wide at the top, and 18 inches (46 cm) long from foundation to final row.Right Sleeve: Work identically to Left Sleeve.
(RS): Ch 2, turn. Sc into first ch-sp, (ch 1, sc into next ch-sp) 14 times, ch 1, sc into next ch-sp. (15 mesh units) Ch 2, turn. Leave remaining stitches unworked.Rows 48 to 52: Work in pattern over 15 mesh units only. (15 mesh units each row) Ch 2, turn.Rows 53 to 56: Work in pattern over 15 mesh units, switching to cream/white yarn per gradient schedule. (15 mesh units) Fasten off.
Skip the center 16 mesh units. This creates the open boat neck. With RS facing, join yarn in the 33rd mesh unit from the right edge.
(RS): Ch 2, sc in same ch-sp where you joined, (ch 1, sc in next ch-sp) 14 times. (15 mesh units) Ch 2, turn.Rows 48 to 56: Work in pattern over 15 mesh units. (15 mesh units each row) Fasten off.
Step by step: Using Yarn C and E-4 hook, ch 7.
All ribbing is worked in rows in BLO sc. Working only in the back loop creates horizontal ridges and stretchy, elastic texture.
Row setup: Ch the required number, sc in 2nd ch from hook and in each ch across. Ch 1, turn.
Subsequent rows: Sc in BLO of each st across. Ch 1, turn.
| Rounds | 17 |
|---|---|
| Parts | 6 |
| Level | Intermediate |
| Time | 20-25 hours |
| Yarn | DK |
The Back Body's main mesh section holds a flat 46 mesh units across all 54 remaining rows, with no shaping until the shoulder line, which keeps the gradient stripes running straight and unbroken.
The foundation row's ch-1 spaces plus first sc set the mesh unit count for every following row, so each working row simply repeats into the previous row's ch-sps and closes into the turning-chain space.
| Hem and cuff ribbing (make 2 each) | about 2-3 hours, because each strip runs up to 48 short BLO rows worked on a smaller E-4 hook |
|---|---|
| Back and Front mesh panels | about 8-10 hours, because each panel holds 56 rows of 46 mesh units to reach the full 22-inch length |
| Sleeve shaping and trims | about 4-5 hours, because the increase rows come every four rows and the neckline and cuff eyelash trims are worked separately |
These answers came from whoever first published the pattern, kept word for word.