
Intermediate
What the pattern's own author called it. Nothing here is graded again.
 Crochet·Rituals
Sweaters 13 Laid out for paper No account, no download
Top-down granny square sweater: 4-round collar, V-stitch yoke, granny body. 5 mm hook, worsted yarn.
Crochet Rituals · retyped from the source and laid out for print · added 8 Oct 2026

What the pattern's own author called it. Nothing here is graded again.

What the sample was worked in. Any weight works; the size moves with it.

Each one is typed out whole and gets its own line.
This sweater starts at the neck and grows outward: a short-row ribbed collar seamed into a circle, a V-stitch yoke worked in the round with four corner increases, and a granny-stitch body split at two underarm chains for the sleeves. Before picking up the hook, have worsted weight yarn and a 5 mm hook on hand, along with stitch markers for the yoke corners and a yarn needle for seaming the collar and weaving ends. Because collar rows and yoke rounds are sized by trying the piece on, expect to stop and check fit more than once. It's a great pattern for customizing color, adding stripes, or keeping it classic in one solid shade.
Listed by the pattern's own author, in their words.
Key to this pattern, 7 short forms
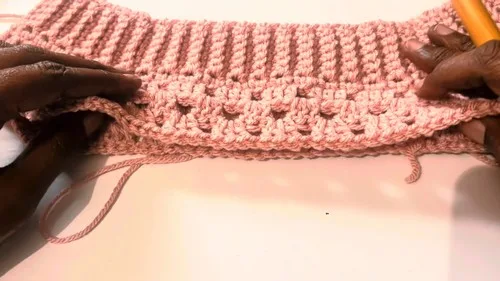
Neck ribbing rows depend on your fit; example sizing used about 100 ribbing rows for a 2X.
Chain 8; sc in 2nd chain from hook and in each chain across. (7 sc)
Ch 1 and turn; sc in both loops in the first stitch; sc in back loop only across the middle stitches; sc in both loops in the last stitch; repeat this row until the ribbing wraps comfortably around your neck.
Fold ribbing with short ends together; join the short ends using sl st or sc through both edges, keeping the seam straight and maintaining 7 stitches across; turn right side out.
Ch 1; sc evenly around the top edge of the collar, working 1 sc per ribbing row so the edge lays flat and even; sl st to the first ch 1 to join.
Yoke rounds depend on your fit; example sizing used about 14 yoke rounds for a 2X.
Setup Round Ch 3 (counts as dc); dc in the same stitch to form a V stitch (Corner 1); ch 1, skip 1 stitch, dc in next 3 stitches, repeat ch 1 skip 1 dc in next 3 stitches across the shoulder section (Shoulder Panel 1); ch 1, work V stitch (dc, ch 1, dc) in the next stitch (Corner 2); ch 1, skip 1 stitch, dc in next 3 stitches, repeat across the front section (Front Panel); ch 1, work V stitch in the next stitch (Corner 3); ch 1, skip 1 stitch, dc in next 3 stitches, repeat across the shoulder section (Shoulder Panel 2); ch 1, work V stitch in the next stitch (Corner 4); ch 1, skip 1 stitch, dc in next 3 stitches, repeat across the back section, ending with ch 1 skip 1 dc in next 2 stitches because the starting ch 3 counts as the third dc (Back Panel And Join); sl st to the top of the beginning ch 3 to join.
and up (repeat): Ch 3 and turn; dc in the same corner space to form the corner V stitch; work 3 dc in the first ch 1 space next to the corner, ch 1, work 3 dc in the next ch 1 space, repeat ch 1 and 3 dc in each ch 1 space until you reach the next corner; at each corner work ch 1, V stitch (dc, ch 1, dc) into the center of the previous round's corner V stitch; continue around all four sides; sl st to the top of the beginning ch 3 to join; repeat this round until the yoke fits across chest and back and corners meet comfortably under the armpits.
Separation Round Ch 3 and turn; work 3 dc in the same space; continue granny stitch across until you reach the first corner V stitch; work 1 dc into the center of the corner V stitch; ch 3 to form the underarm chain; skip all stitches across the sleeve section; sl st to the opposite corner V stitch; continue by working 3 dc into the first ch 1 space of the body section; work granny stitch across the back; repeat the underarm bridge to connect the other two corners for the second armhole; join the round with sl st.
and on (Body Rounds): Ch 3 and turn each round; work granny stitch around the body only; work 3 dc into each underarm ch 3 space on every round; do not make corner V stitches anymore.
Optional fitted cuff decrease (dc2tog over two spaces): yarn over, insert hook into first ch 1 space, pull up a loop; yarn over, pull through 2 loops; yarn over, insert hook into next ch 1 space, pull up a loop; yarn over, pull through 2 loops; yarn over, pull through all 3 loops on hook.
Decrease placement: on the third-from-last sleeve round, decrease on every 5th cluster space; on the second-from-last sleeve round, decrease on every 6th cluster space; on the last sleeve round, decrease on the 7th cluster space only.
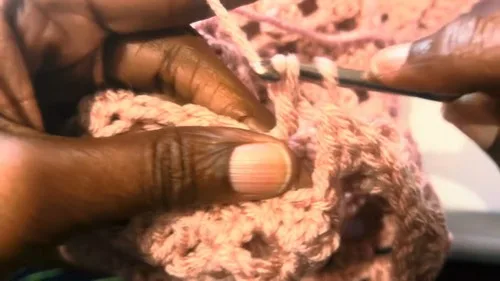
Join yarn at the underarm ch 3 space; ch 3; work 3 dc in the next space; continue granny stitch around the armhole; sl st to the top of the beginning ch 3.
and on (repeat): Ch 3 and turn each round; work granny stitch around; repeat until sleeve reaches your desired length.
Wrist band: work ribbing rows until it fits your wrist comfortably.
Bottom band: work ribbing rows until it fits around your hip or hem circumference.
Work sc evenly around each cuff edge and around the bottom edge.
Chain 8; sc in 2nd chain from hook and across. (7 sc)
Ch 1 and turn; sc in both loops in first stitch; sc in back loop only across middle stitches; sc in both loops in last stitch; repeat rows until the strip fits the opening.
| Rounds | 13 |
|---|---|
| Parts | 5 |
| Level | Intermediate |
| Time | 4-6 hours |
| Hook | 5 mm |
| Yarn | Worsted |
All shaping above the underarms happens at the four corner V-stitches placed in Yoke Round 1; every later yoke round simply rebuilds a V-stitch over the previous round's corner center, which is why the corners stay aligned as the piece grows.
The Body Separation Round turns the yoke's four corners into two underarm bridges by chaining 3 and skipping the sleeve stitches entirely, so the sleeves are worked later as separate pieces while the body and back close into one continuous round.
| Ribbed collar | about 45-60 minutes because fit-based row counts mean working, trying on, and adjusting before seaming |
|---|---|
| V-stitch yoke | about 1.5-2 hours because the setup round places four corners and panels in one pass, and every later round repeats across all four sides |
| Body and sleeves | about 2-3 hours because the body works in continuous granny rounds while two identical sleeves are worked separately |
Every one was taken by whoever published the pattern, in the order the source listed them.


These answers came from whoever first published the pattern, kept word for word.