Skip to the patterns
Crochet·Rituals
Menu

Hats 5 Laid out for paper No account, no download

A ribbed crochet beanie worked flat and seamed into shape

Ribbed beanie worked flat in hdc and sc, 54 rows, 5.0mm or 5.5mm hook, seamed into a tube.

Jump to the rounds Pin it
A ribbed crochet beanie worked flat and seamed into shape
Hats · Worsted
Skill
Intermediate
Time
4-6 hours
Yarn weight
Worsted
Hook
5.0 mm
Rounds
5

Intermediate

What the pattern's own author called it. Nothing here is graded again.

Worsted

What the sample was worked in. Any weight works; the size moves with it.

5

Each one is typed out whole and gets its own line.

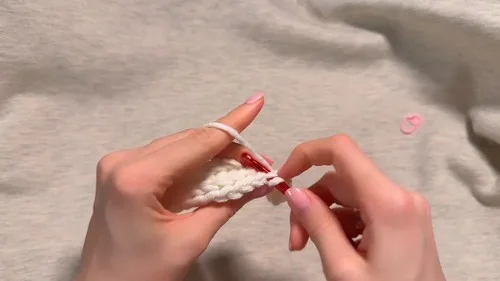
This beanie starts as a flat rectangle, not a round crown. A foundation chain of 51 sets the height from crown to brim, and every following row works into the back loop only, building a ridged rib that runs the length of the piece. Once the rectangle reaches head circumference with a slight stretch, the two short ends fold together and slip stitch into a tube. The folded brim adds warmth and a polished finish, and the pattern is easy to customize in any color or yarn weight. Before starting, have worsted weight yarn, a 5.0mm or 5.5mm hook, scissors, and a tapestry needle on hand, along with a measuring tape to check head circumference against the growing rectangle.

Common mistakes and their fixes

Drifting off the 50-stitch count
Count stitches at the end of each row, especially where the hdc and sc sections meet, and recount before turning if the total feels off.
Working into both loops instead of back loop only
Check that the working loop is the back loop only on every row from Row 2 onward, since skipping this flattens the rib texture the pattern is built on.
Seaming through the wrong loop
Slip stitch through the front loop only of the last row and the chain loops of the foundation chain, not through both loops, or the tube will twist at the seam.

The materials list

  1. Worsted weight yarn (approx. 90g/150m)
  2. 5.0mm or 5.5mm crochet hook
  3. Scissors
  4. Tapestry needle

Listed by the pattern's own author, in their words.

Key to this pattern, 6 short forms

Working the Rows

Foundation Chain

Chain 51 (50 for the height, plus 1 turning chain).Make a slipknot, then chain 51. Adjust the number of chains up or down to match the desired beanie length from crown to brim before working Row 1.

Row 1

Half double crochet in the 2nd chain from hook and in the next 44 chains, single crochet in the last 5 chains (50 stitches total).

Row 2

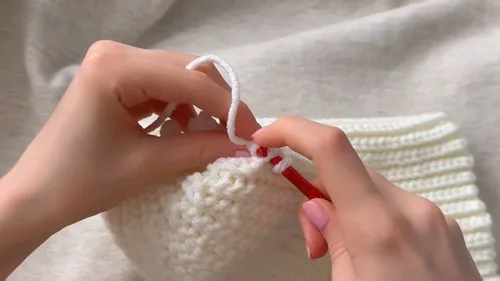
Chain 1, turn. Single crochet in the back loop only for the next 5 stitches, half double crochet in the back loop only for the last 45 stitches (50 stitches total).

Row 3

Chain 1, turn. Half double crochet in the back loop only for the next 45 stitches, single crochet in the back loop only for the last 5 stitches (50 stitches total).

Rows 4–54

Repeat Rows 2 and 3 until the rectangle wraps around your head with a slight stretch. End on a half double crochet row.

Check these before you start

  • Keep the stitch count at 50 on every row; losing track in the back-loop-only sections is the easiest way to drift off pattern over 54 rows.
  • End the rectangle on a half double crochet row before seaming, as instructed, so the tube join lines up correctly on both edges.
  • This pattern is easy to customize in any color or yarn weight; adjust the foundation chain and hook size to suit the yarn and look you choose.

On one line

Rounds5
LevelIntermediate
Time4-6 hours
Hook5.0 mm
YarnWorsted

Set-up

  • Measure head circumference and compare it to the rectangle's width as rows build, since the pattern tells you to stop once it wraps with a slight stretch rather than at a fixed row count.
  • Confirm yarn amount against the 90g/150m estimate before starting the chain, since a flat ribbed rectangle this size uses yarn steadily across 54 rows.
  • Work a short back-loop-only swatch first to see how tight or loose your hdc and sc rows sit, since back loop only crochet pulls up differently from standard crochet.
  • Read Rows 1 through 3 before chaining, since the stitch split (hdc block plus 5-stitch sc block) must stay in the same place on every row to keep the rib column aligned.

Finishing

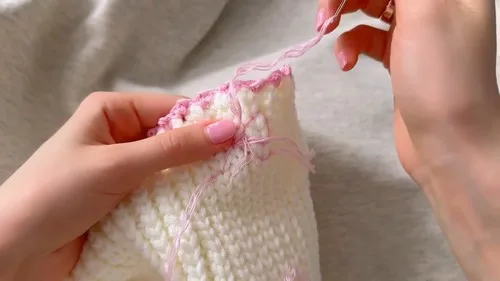
  1. Chain 1, turn. Fold the finished rectangle in half so the first and last rows meet, then slip stitch through the front loop only of the last row and the chain loops of the foundation chain to close the side seam into a tube.
  2. Fasten off leaving a 25- to 30-inch tail, thread it onto a tapestry needle, and weave it in and out of the top edge through every other row around the opening.
  3. Pull the tail tight to cinch the crown closed, tie a secure double knot, weave in the remaining tail and any other loose ends, and trim excess yarn. Turn the beanie right-side out and fold the brim for a finished look.

Construction

Stitch count holds at 50 through all 54 rows with no increases or decreases; the beanie gets its shape from the flat rectangle's dimensions and the final crown cinch, not from crown shaping.

The 5-stitch single crochet block stays on the same edge of the rectangle in every row, while the remaining 45 stitches alternate between half double crochet; that fixed narrow column marks the fold line used when seaming the tube.

Time per section

Foundation chain and Row 1about 15 minutes, because it is a single chain of 51 plus one row of hdc and sc to set up the stitch pattern
Rows 2 through 54about 3 to 4 hours, because the back-loop-only rib repeats across roughly 53 rows until the rectangle fits the head
Seaming and crown closureabout 20 to 30 minutes, because the slip stitch seam and the woven tail closure both need careful loop placement

Photographs of this one

Every one was taken by whoever published the pattern, in the order the source listed them.

A ribbed crochet beanie worked flat and seamed into shape — photo 1
A ribbed crochet beanie worked flat and seamed into shape — photo 3
A ribbed crochet beanie worked flat and seamed into shape — photo 4
A ribbed crochet beanie worked flat and seamed into shape — photo 5

Common questions

How do you adjust this beanie for a different head size?
Change the number of chains in the foundation chain, since the chain length sets the crown-to-brim height before the rectangle is seamed into a tube. Keep the hdc and sc stitch counts the same per row; only the chain length and the number of repeated rows change.
Should you use a 5.0mm or a 5.5mm hook?
Either works with worsted weight yarn; the choice comes down to how firm or drapey you want the ribbed fabric. Work a small swatch in back loop only crochet with both sizes and pick the one that matches the stretch you want around the head.
How tight should the top closure be pulled?
Pull the tail firmly enough that the top opening closes completely with no gap, since this closure replaces crown decreases. Weave the tail through every other row evenly around the opening before pulling, so the gather sits flat rather than puckered to one side.

These answers came from whoever first published the pattern, kept word for word.