
Beginner
What the pattern's own author called it. Nothing here is graded again.
 Crochet·Rituals
Hats 16 Laid out for paper No account, no download
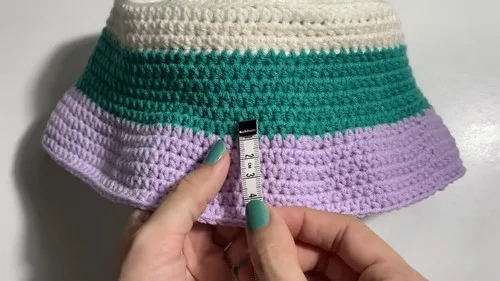
Beginner bucket hat worked in 25 joined rounds with a 3.5mm hook and half double crochet throughout.
Crochet Rituals · retyped from the source and laid out for print · added 13 Sep 2026
What the pattern's own author called it. Nothing here is graded again.

What the sample was worked in. Any weight works; the size moves with it.

Each one is typed out whole and gets its own line.
This bucket hat starts at a magic circle and builds outward in joined rounds, each one slip stitched closed rather than worked in a spiral. Half double crochet carries the entire piece, with evenly spaced increases shaping the crown before the sides run straight. A back loop only round marks the turn from crown to side, and the brim flares out again at the base before finishing flat. Have 4-ply milk cotton yarn, a 3.5 mm hook, stitch markers, a tape measure, and scissors on hand before starting.
Listed by the pattern's own author, in their words.
Key to this pattern, 5 short forms
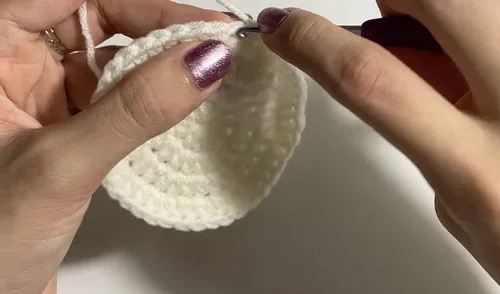
Start with a magic circle and place 10 half double crochets into it. Slip stitch to join.
Chain one, place two half double crochets in each stitch for a total of 20 stitches. Slip stitch to join.
Chain one, alternate between one half double crochet and an increase for a total of 30 stitches. Slip stitch to join.
Chain one, make one half double crochet in the first two stitches, and an increase in the third stitch for a total of 40 stitches. Slip stitch to join.
Chain one, make one half double crochet in the first three stitches, and an increase in the fourth stitch for a total of 50 stitches. Slip stitch to join.
Chain one, make one half double crochet in the first four stitches, and an increase in the fifth stitch for a total of 60 stitches. Slip stitch to join.
Chain one, make one half double crochet in the first five stitches, and an increase in the sixth stitch for a total of 70 stitches. Slip stitch to join.
Chain one, make one half double crochet in the first six stitches, and an increase in the seventh stitch for a total of 80 stitches. Slip stitch to join.
Chain one, make one half double crochet in the first seven stitches, and an increase in the eighth stitch for a total of 90 stitches. Slip stitch to join.
Chain one, make one half double crochet in every stitch. Total 90 stitches. Slip stitch to join.
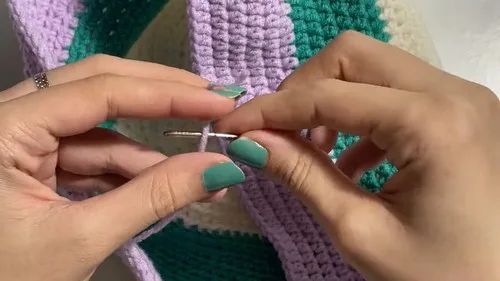
Chain one, make one half double crochet in the back loop only of each stitch. Total 90 stitches. Slip stitch to join.
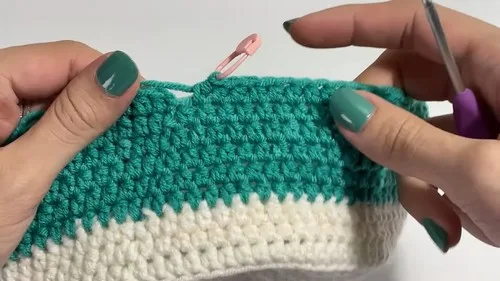
Chain one, make one half double crochet in each stitch. Slip stitch to join at the end of each round. Change color as desired.
Chain one, make six half double crochets, and an increase in the seventh stitch. Repeat around.
Chain one, make eight half double crochets, and an increase in the ninth stitch. Repeat around.
Chain one, make 10 half double crochets, and an increase in the eleventh stitch. Repeat around.
Chain one, make one half double crochet in each stitch. Slip stitch to join at the end of each round.
| Rounds | 16 |
|---|---|
| Parts | 2 |
| Level | Beginner |
| Time | 2-3 hours |
| Hook | 3.5 mm |
| Yarn | 4-Ply |
Rounds 1 through 9 each add exactly 10 stitches by spacing a single increase further apart every round, which keeps the crown flat instead of cupping or ruffling.
Round 11 works in the back loop only, leaving the front loops free as a ridge; this ridge is where the crown stops shaping and the straight sides begin.
| Hat Construction (Rounds 1-6) | about 30-40 minutes, because increases happen every round and stitch counts need tracking closely |
|---|---|
| Sides (Rounds 7-12 and beyond) | about 45-60 minutes, because rounds hold at 90 stitches with no shaping, which makes them slower simply from stitch volume |
| Brim (Rounds 20-25) | about 45-60 minutes, because three increase rounds flare the edge before three straight rounds set the finished brim |
Every one was taken by whoever published the pattern, in the order the source listed them.
These answers came from whoever first published the pattern, kept word for word.