Skip to the patterns
Crochet·Rituals
Menu

Bags & Purses 17 Laid out for paper No account, no download

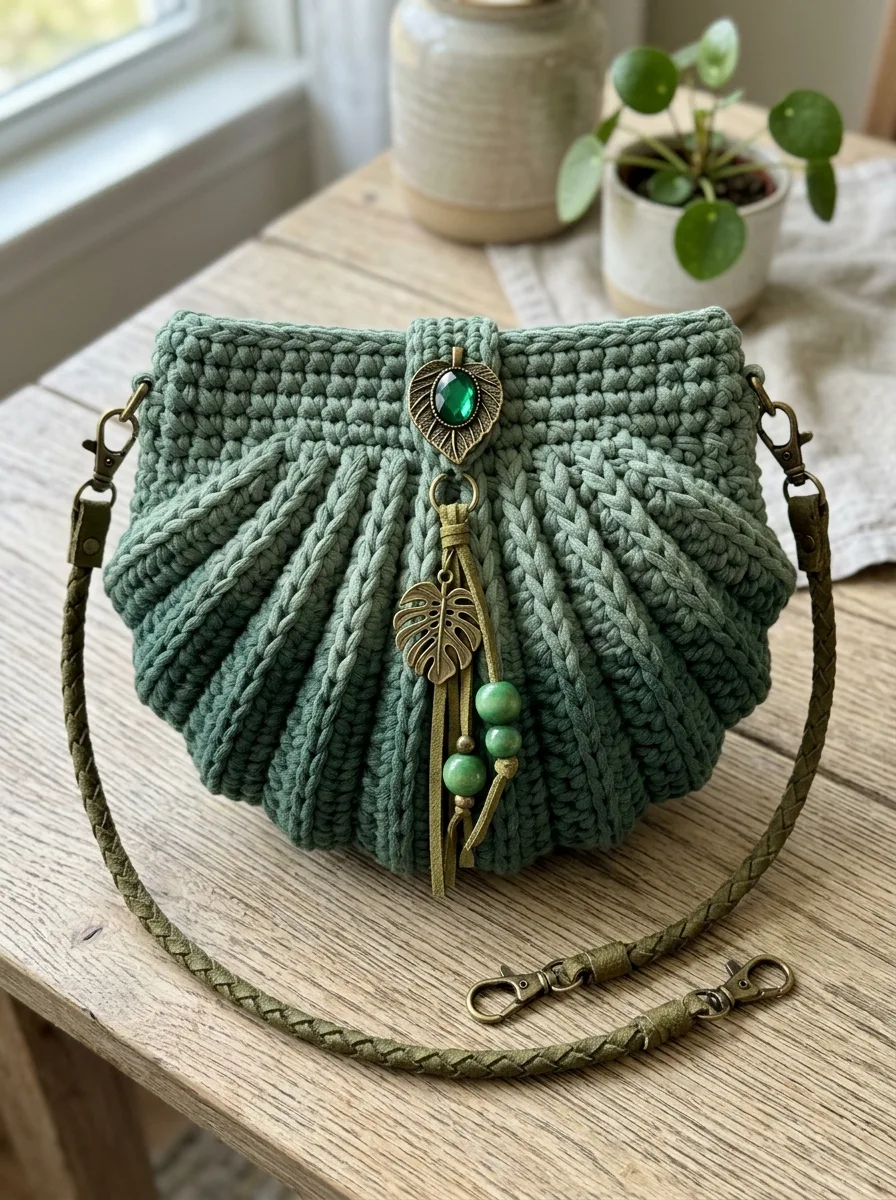
Ribbed shell purse with gathered top and post stitches

Sage green shell purse: 6-round base, ribbed FPdc/BPdc body, 9mm hook, gathered top.

Jump to the rounds Pin it
Ribbed shell purse with gathered top and post stitches
Bags & Purses · T-shirt Yarn / Super Bulky
Skill
Intermediate
Time
4-6 hours
Yarn weight
T-shirt Yarn / Super Bulky
Hook
5 mm
Rounds
17

Intermediate

What the pattern's own author called it. Nothing here is graded again.

T-shirt Yarn / Super Bulky

What the sample was worked in. Any weight works; the size moves with it.

17

Each one is typed out whole and gets its own line.

This purse starts flat with a six-round magic ring base, then rises into a ribbed body built entirely from alternating front post and back post double crochet. That alternation is what gives the sides their vertical texture, and a single gathering pass at the top pulls the opening into the shell shape that gives the bag its name. Before you begin, have your t-shirt yarn, 9mm or 10mm hook, stitch marker, and two D-rings on hand, along with a strap and closure for finishing.

Common mistakes and their fixes

Losing track of FPdc and BPdc placement
Check the previous round before each stitch: a front post stitch should sit on top of a front post, and a back post on top of a back post, or the rib will skew.
Working into the top loops in Round 7
Round 7 calls for back loops only to form the visible ridge between base and body; working into both loops erases that transition line.
Gathering the top too tightly or unevenly
Weave under every stitch top around the opening before pulling, and tighten gradually in small sections rather than yanking from one point.

The materials list

  1. T-shirt yarn or tube yarn in sage green or your preferred color. You will need approximately 200 to 250 grams (about 130 to 150 yards).
  2. T-shirt yarn is that thick, stretchy yarn made from jersey fabric strips. It creates the substantial, sturdy fabric perfect for bags. Look for brands like Hoooked Zpagetti, Yarn Art Maccheroni, or any recycled cotton t-shirt yarn.

Substitution option

  1. You could use bulky cotton cord (5mm to 7mm) or macrame rope, though your gauge may differ slightly.
  1. Size 9mm or 10mm crochet hook (US M/N or N/P)
  2. This larger hook creates the slightly loose, drapey fabric that allows the gathering to work properly. If your stitches feel too tight and stiff, go up a hook size.
  1. Tapestry needle for weaving ends
  2. Stitch marker (a safety pin works fine)
  3. 2 D-rings or swivel clasps (approximately 15mm to 20mm)
  4. 1 decorative button or charm for front closure (leaf design shown)
  5. 1 decorative tassel or charm cluster (optional)
  6. Braided leather or faux leather strap with lobster clasps (approximately 45 to 50 inches for crossbody length)
  7. Sewing needle and coordinating thread for attaching hardware

Listed by the pattern's own author, in their words.

Key to this pattern, 11 short forms

Base of the Bag

We begin with a circular base that forms the bottom of your purse.

Magic ring.

Round 1

Work 8 sc into magic ring. Pull tail to close. Join with sl st to first sc. (8 sts)

Round 2

Ch 1 (does not count as stitch here and throughout). Work 2 sc in each st around. Join with sl st. (16 sts)

Round 3

*Sc in first st, 2 sc in next st.* Repeat from * around. Join. (24 sts)

Round 4

*Sc in next 2 sts, 2 sc in next st.* Repeat from * around. Join. (32 sts)

Round 5

*Sc in next 3 sts, 2 sc in next st.* Repeat from * around. Join. (40 sts)

Round 6

*Sc in next 4 sts, 2 sc in next st.* Repeat from * around. Join. (48 sts) Your base should measure approximately 5 to 6 inches across. If it looks cupped or wavy, adjust your hook size and try again. A flat circle means correct tension.

Hardware Tabs (Make 2)

These small tabs anchor your strap hardware to the bag.

Chain 8.

Round 1

Sc in 2nd ch from hook and each ch across. (7 sts)

Round 2

through 4: Ch 1, turn. Sc across. (7 sts) Fasten off, leaving a long tail for sewing.Fold each tab in half, thread through a D-ring or swivel clasp, and sew the ends together. Attach one tab to each upper side of your bag, positioning them at the side seams approximately 1 inch below the top edge.

Body of the Bag: Ribbed Section

Now we build the walls. This is where the magic happens.

Round 7

(Transition Round): Ch 2 (counts as first hdc). Working in BACK LOOPS ONLY, hdc in each st around. Join with sl st to top of ch-2. (48 sts)Working in back loops only creates a visible ridge that marks the transition between base and body. It also helps the walls stand up straight.

Round 8

Establish Ribbing Ch 2. *FPdc around next st, BPdc around next st.* Repeat from * around. Join. (48 sts)

Round 9

through 20: Repeat Round 8. Important: Each round, work FPdc around the FPdc from the previous round, and BPdc around the BPdc. This stacks the stitches vertically and creates those beautiful raised ribs running from base to top.Keep your tension relaxed. The fabric should feel soft and drapey, not stiff. If it feels rigid, go up a hook size.After Round 20, your bag body should measure approximately 5 to 6 inches tall.

Upper Band: Single Crochet Section

The top portion transitions to single crochet for a cleaner edge and provides structure for the gathered closure.

Round 21

Ch 1. Sc in each st around. Join. (48 sts)

Round 22

through 26: Ch 1. Sc in each st around. Join. (48 sts) You now have 5 rounds of single crochet forming a smooth band at the top.

Creating the Gathered Shell Shape

This step transforms your cylinder into that gorgeous shell silhouette. We will decrease and then gather the top.

Round 27

Decrease Round Ch 1. *Sc in next 4 sts, sc2tog.* Repeat from * around. Join. (40 sts)

Round 28

Ch 1. Sc in each st around. Join. (40 sts)

Round 29

Decrease Round Ch 1. *Sc in next 3 sts, sc2tog.* Repeat from * around. Join. (32 sts)

Round 30

Ch 1. Sc in each st around. Join. (32 sts) Fasten off, leaving a 12-inch tail for finishing.

Assembly, in order

Step 1Gathering the Top: Thread your tapestry needle with the remaining tail. Weave the yarn in and out through the top edge stitches, going under each stitch top around the entire opening. Pull gently to gather the top closed to approximately 4 inches across. Secure with a few small stitches. Leave a small opening in the center. This creates the characteristic shell shape with a gathered, slightly open top.
Step 2Attaching the Decorative Closure: Position your decorative button or leaf charm at the center front of the gathered top. Use coordinating thread and a sewing needle to secure it firmly. The charm shown features an antique brass leaf with a green gem center.
Step 3Adding the Tassel or Charm Cluster: Thread your tassel or charm cluster through a small jump ring. Attach it to the decorative button or sew it directly below the closure. The shown version includes a monstera leaf charm, green beads, and leather fringe.
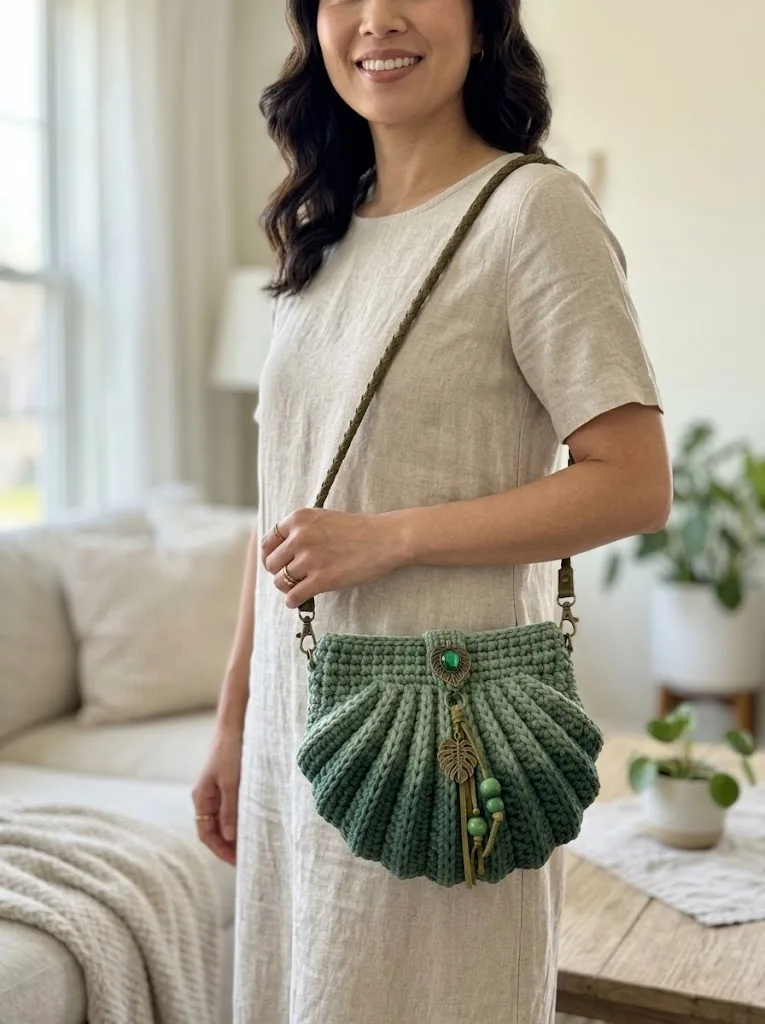
Step 4Attaching the Strap: Clip your braided strap to the D-rings or swivel clasps on each hardware tab. Adjust the length for crossbody wear or shorten for shoulder carry.

Check these before you start

  • Use the 9mm or 10mm hook as directed; a smaller hook stiffens the fabric and resists the gathering step at the top.
  • Keep tension consistent through Rounds 9 through 20 by always working FPdc around the previous FPdc and BPdc around the previous BPdc, never swapping which post you target.
  • Leave a long tail at the end of the ribbed body section; you will need it later to weave through the top edge for gathering.

On one line

Rounds17
Parts5
LevelIntermediate
Time4-6 hours
Hook5 mm
YarnT-shirt Yarn / Super Bulky

Set-up

  • Confirm you have 200 to 250 grams of t-shirt yarn on hand; running short mid-body means an awkward join in the ribbing.
  • Set a stitch marker in round 1 of the base and move it up each round so you never lose track of the join point.
  • Work a small FPdc/BPdc swatch first if you have never worked post stitches, so the alternating pattern feels automatic before round 8.
  • Read Round 7 fully before starting it: working in back loops only there is what creates the ridge separating base from body, and it is easy to miss on a first pass.

Finishing

  1. Weave in any short ends from the base and hardware tabs with a tapestry needle before gathering the top.
  2. Thread the remaining long tail through the top edge stitches and pull gently to gather the opening to approximately 4 inches across, leaving a small center opening.
  3. Sew the two folded hardware tabs to the upper side seams, then attach the strap, decorative button or leaf charm, and optional tassel by hand with coordinating thread.

Construction

The base increases from 8 to 24 stitches over the sample rounds shown, spacing increases evenly around each round so the circle lies flat rather than cupping or rippling.

The hardware tabs are worked flat in short rows rather than in the round because they need two straight edges to fold over the D-ring and sew closed.

Time per section

Base of the Bagabout 45 minutes because the 6 rounds increase steadily and each round takes longer to complete than the last
Ribbed Body (Rounds 7 through 20)about 2 hours because tracking FPdc and BPdc placement over 14 rounds slows the pace until the rhythm sets in
Upper Band, Gathering, and Hardwareabout 1.5 hours because the single crochet band, top gathering, tab assembly, and closure attachment all require careful hand-finishing

Photographs of this one

Every one was taken by whoever published the pattern, in the order the source listed them.

Ribbed shell purse with gathered top and post stitches — photo 2
Ribbed shell purse with gathered top and post stitches — photo 3

Common questions

What if a magic ring feels too fiddly to manage?
Chain 4 and join with a slip stitch to form a ring instead. It leaves a small hole at the center, but that hole sits at the base of the bag and stays hidden once the purse is finished.
Can bulky cotton cord replace t-shirt yarn for this purse?
Yes, cotton cord or macrame rope in the 5mm to 7mm range works, though the gauge may come out slightly different from the t-shirt yarn original. Keep the 9mm or 10mm hook and adjust by swatching the ribbed section first.
How do you know the FPdc and BPdc are stacking correctly?
Look at the previous round: each front post stitch should sit directly above the front post below it, and each back post above the back post below it. If the ribs start to lean or merge, the stacking has slipped and is worth checking before continuing.

These answers came from whoever first published the pattern, kept word for word.