
Intermediate
What the pattern's own author called it. Nothing here is graded again.
 Crochet·Rituals
Garments 12 Laid out for paper No account, no download
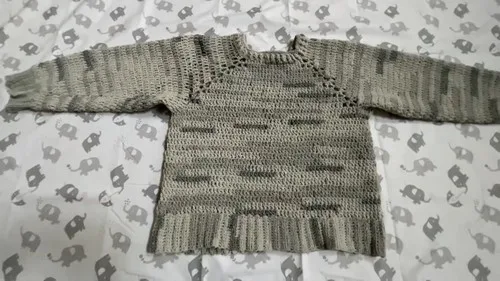
Top-down crochet pullover with a square yoke, worked in one piece with a 5.0 mm hook; sleeves are set aside at the
Crochet Rituals · retyped from the source and laid out for print · added 6 Oct 2026
What the pattern's own author called it. Nothing here is graded again.

What the sample was worked in. Any weight works; the size moves with it.

Each one is typed out whole and gets its own line.
This pullover starts at the neck and grows outward in one piece: a starting chain joined into a ring, then a square yoke built from corner increases until it reaches the width you need. From there, the body splits off at two underarm chains while each sleeve is set aside and worked separately in its own decreasing tube. Have both skeins wound and accessible, the 5.0 mm hook on hand, and four stitch markers ready to flag the yoke corners before Round 2 begins.
Listed by the pattern's own author, in their words.
Key to this pattern, 5 short forms
Chain 80 and join with a slip stitch to form a ring.
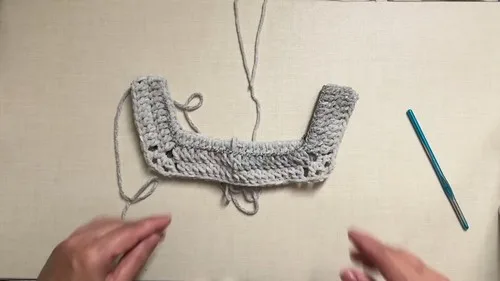
Chain 3 and work double crochet in the next 9 chains; chain 3 for the corner and double crochet in the next 20 chains; chain 3 for the next corner and double crochet in the next 20 chains; chain 3 for the third corner and double crochet in the next 20 chains; chain 3 for the final corner and double crochet in the remaining 10 chains; slip stitch to join the round.
Chain 3 and work double crochet across the round; before each corner chain 1 and skip 1 stitch; in each corner chain space work double crochet, chain 2, double crochet, chain 2, double crochet; chain 1 after the corner and skip 1 stitch; continue double crochet across each side.
On the next round work double crochet in each stitch; at each corner work 2 double crochet, chain 3 skipping the center stitch, then 2 double crochet.Repeat Round 3 and Round 4 until the yoke reaches your desired size.
Double crochet across to the corner; in the corner work 2 double crochet and 1 double crochet in the tip; chain 8 for the underarm and skip the entire sleeve section; double crochet into the next corner tip; continue double crochet across the back; chain 8 for the second underarm.
Join the round and chain 3; work double crochet in every stitch and every underarm chain.Repeat Round 2 until the body reaches your desired length.
Attach yarn at the underarm; double crochet evenly around the arm opening.
Chain 3 and work double crochet two together at the start of the round; double crochet in the remaining stitches and join.
Chain 3 and double crochet across until the last two stitches; work double crochet two together at the end of the round.Alternate Round 2 and Round 3 as decrease rounds to keep the seam straight.Continue until the sleeve reaches your desired length.
Chain 13 and single crochet in the second chain from the hook and across.
Slip stitch into the next three stitches of the sleeve edge; turn and single crochet in the back loop only across the cuff.
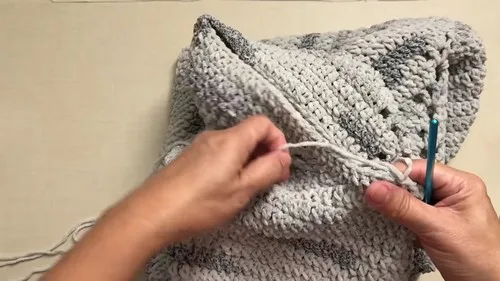
Use the starting yarn tail to work front post and back post double crochet around the neckline to form a ribbed collar.Repeat the ribbing around the sleeve and sew the ends together.Repeat the same ribbing method along the bottom edge of the pullover.
| Rounds | 12 |
|---|---|
| Parts | 4 |
| Level | Intermediate |
| Time | 4-6 hours |
| Hook | 5.0 mm |
| Yarn | Worsted |
The square yoke gets its shape from four corner increase points worked every round (Round 3's chain-2 corner spaces alternating with Round 4's paired double crochet and chain-3 corners), which is what turns a flat round into a square rather than a circle.
The underarm chains of 8 stitches in Body Round 1 are what separate the sleeve stitches from the body stitches at the join, letting the body continue around the torso while each sleeve is picked up and finished on its own afterward.
| Neckline and yoke | about 1.5 to 2 hours, because the repeated corner rounds require careful counting even though there are only 4 rounds |
|---|---|
| Body | about 1 to 1.5 hours, because the round count is low but each round covers the full 21-inch width |
| Sleeves and cuffs | about 1.5 to 2 hours for both sleeves, because each sleeve alternates decrease rounds and is worked twice |
Every one was taken by whoever published the pattern, in the order the source listed them.
These answers came from whoever first published the pattern, kept word for word.