
Intermediate
What the pattern's own author called it. Nothing here is graded again.
 Crochet·Rituals
Garments 13 Laid out for paper No account, no download
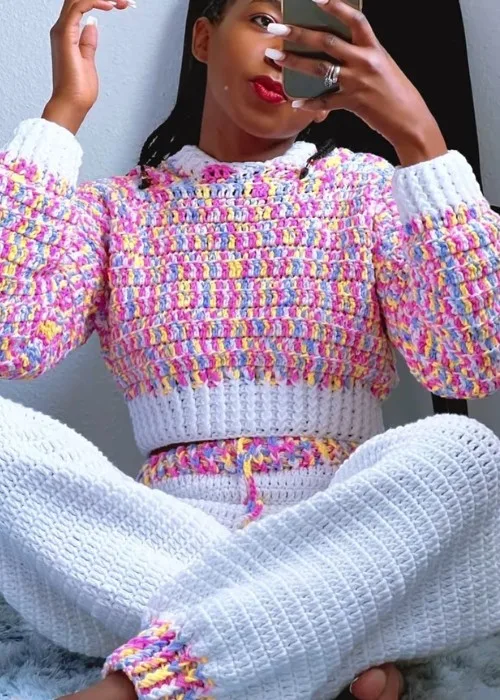
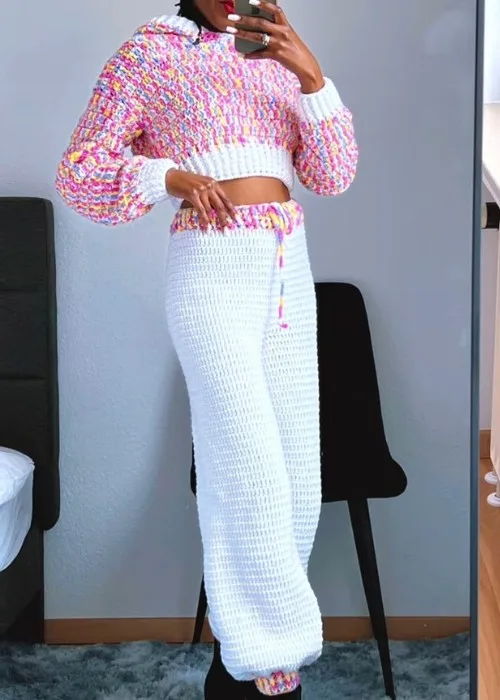
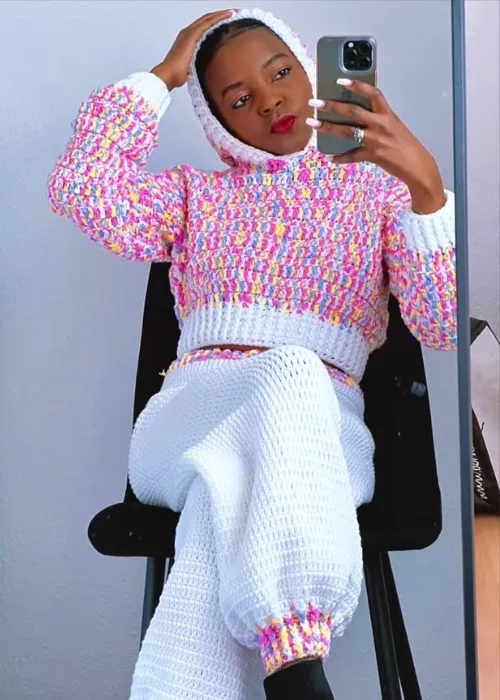
Pullover hoodie: 6-round front panel, 2-round sleeves and cuffs, worked with a 4.0 mm hook.
Crochet Rituals · retyped from the source and laid out for print · added 2 Oct 2026

What the pattern's own author called it. Nothing here is graded again.

What the sample was worked in. Any weight works; the size moves with it.

Each one is typed out whole and gets its own line.
This pullover hoodie starts as a single front panel worked flat in turned rows of back-loop double crochet, with the chain length set by your own bust measurement. Stitch markers split the top of the panel to open a 7-inch neckline, after which the sleeves are attached at the underarm and worked in rounds to length. Ribbed cuffs finish each sleeve in single crochet decreases, with an optional color change. Have your tape measure, stitch markers, and a 4.0 mm hook ready before the first chain.
Listed by the pattern's own author, in their words.
Key to this pattern, 3 short forms
Measure from the beginning of the first row to the desired length for your sweater body.
Leave out 7 inches in the middle for the neckline; divide the remaining inches by 2 to determine the number of stitches on each side of the neckline (Example: if you have 11 inches remaining, leave 5.5 inches on each side).
Place stitch markers at the beginning of the row and at the 5.5-inch mark on each side.
Chain a number of stitches equal to half your bust measurement plus 2 inches (Example: for a 32-inch bust, chain 18 inches); skip the first two chains and double crochet in the third chain; double crochet in each stitch across the row.
Chain 2, turn your work; double crochet in the back loop of the first stitch; double crochet in the back loop of each stitch across the row.
Continue crocheting rows of double crochet in the back loop until you reach the desired length for your sweater body.
Crochet double crochets in the back loop until you reach the stitch marker on each side.
Chain 2, turn your work, and double crochet in the first stitch; continue crocheting double crochets in the back loop until you reach the end of the row.
Repeat Rounds 4 and 5 for the desired number of rows for the shoulder sections.
Attach your yarn to the first stitch of the underarm row; chain 2 and double crochet in the first stitch; double crochet in the back loop of each stitch around the entire sleeve.
Continue crocheting rows of double crochet in the back loop until your sleeve reaches the desired length.
Change to a different color yarn if desired.
Single crochet in the first stitch, then skip the next stitch and single crochet in the following stitch; repeat this pattern around the entire cuff.
Crochet a few more rows of single crochet decreases for the desired cuff width.
Pick up stitches along the neckline and sides of the sweater body; work double crochets in the back loop of each stitch around the entire body.
Increase stitches at the back of the sweater for the hoodie shape.
Continue crocheting rows of double crochet in the back loop until you reach the desired length for the hoodie.
| Rounds | 13 |
|---|---|
| Parts | 4 |
| Level | Intermediate |
| Time | 4-6 hours |
| Hook | 4.0 mm |
| Yarn | Worsted |
The Front Panel is worked flat in turned rows rather than joined rounds because the neckline split in Round 4 requires two independent sides that are no longer worked continuously around.
The Sleeves join to the underarm row and are then worked in the round, which is why their stitch count stays constant across both rounds instead of increasing.
| Front Panel | about 2 to 3 hours because it runs 6 rows total, including the measured body length and the neckline division at Round 4 |
|---|---|
| Sleeves | about 45 minutes to 1 hour per sleeve because each one is only 2 rounds, worked straight to length once attached at the underarm |
| Cuffs | about 20 to 30 minutes per cuff because the decrease pattern is short at 2 rounds, though an optional color change adds a few extra minutes |
Every one was taken by whoever published the pattern, in the order the source listed them.

These answers came from whoever first published the pattern, kept word for word.