Skip to the patterns
Crochet·Rituals
Menu

Hats 8 Laid out for paper No account, no download

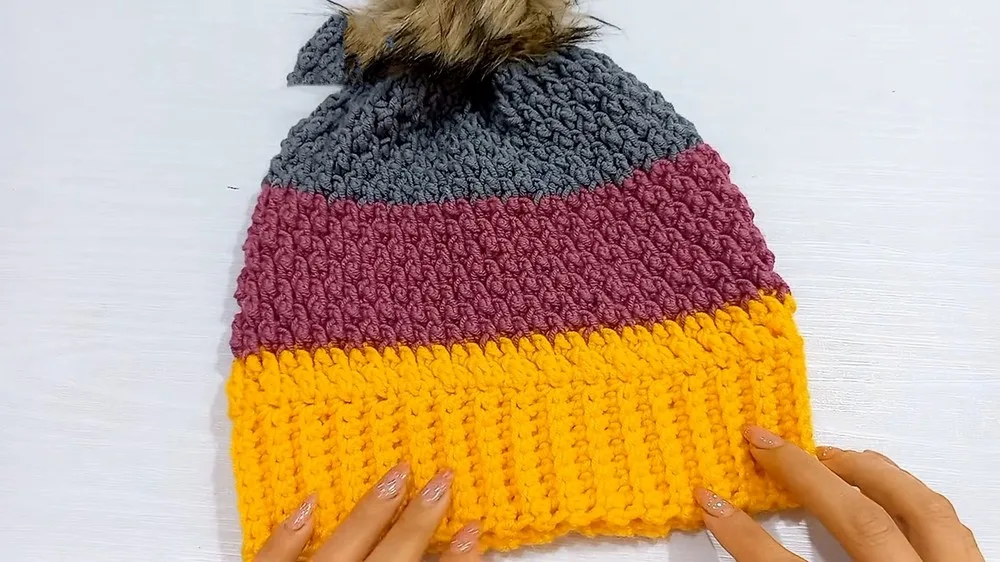
Alpine stitch beanie with a flat brim and post stitch crown

Beanie with flat sc brim, FPdc alpine crown. 4.5mm and 5mm hooks. Decrease rounds shape the top.

Jump to the rounds Pin it
Alpine stitch beanie with a flat brim and post stitch crown
Hats · Worsted
Skill
Intermediate
Time
4-6 hours
Yarn weight
Worsted
Hook
4.5 mm
Rounds
8

Intermediate

What the pattern's own author called it. Nothing here is graded again.

Worsted

What the sample was worked in. Any weight works; the size moves with it.

8

Each one is typed out whole and gets its own line.

This beanie starts flat as a narrow strip, joins into a ring to form the brim, then builds upward in the alpine stitch — a rhythm of front post and regular double crochets that reads as a column of knit-like ribs around the crown. Before picking up a hook, have both hook sizes on hand, worsted weight yarn in one to three colors, and a tapestry needle ready for closing the top. The smaller hook keeps the brim snug; the larger hook opens up the body so the post stitches have room to stand forward.

Common mistakes and their fixes

Losing track of back-loop-only rows on the brim
Check each stitch before inserting the hook — only the 7 marked stitches between the two regular single crochets take the back loop. Mixing in a full stitch there will flatten the ridge the ribbing depends on.
Skipping a stitch count check before decreasing
Count stitches around at the end of the last full Body round before starting the First Decrease Round. An uneven count here throws off every later decrease round and the final closure.

The materials list

  1. Worsted weight yarn in three colors (optional more or just one)
  2. 4.5 mm crochet hook (for the brim)
  3. 5 mm crochet hook (for the body)

Listed by the pattern's own author, in their words.

Key to this pattern, 10 short forms

Starting

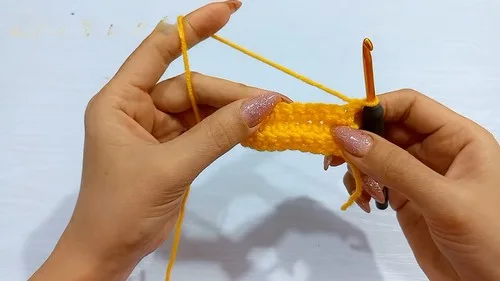
With the first yarn and smaller hook, make a slip knot and chain 10.

Round 1

Skip the first chain. Insert the hook into the second chain and make one single crochet in each chain across. You should have 9 stitches.

Round 2

onwards: Chain 1 and turn your work. Make one single crochet into the first stitch. For the next 7 stitches, work a single crochet into the back loop only. Make one regular single crochet into the last stitch.

Body

Round 1

Using the larger hook, chain 3 (counts as the first double crochet). Make one double crochet in the top of each row around the brim. Join with a slip stitch to the top of the beginning chain.

Round 2

Chain 3 (counts as the first double crochet). Make one front post double crochet around the next stitch, then a double crochet in the top of the next stitch. Repeat from to around and join.

Crown Decreasing

Round 1

First Decrease Round:

Round 2

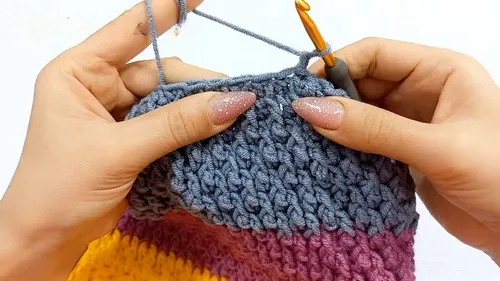
Chain 1, make a decrease by single crocheting two stitches together across the round. Join with a slip stitch.

Round 3

Further Decrease:

Round 4

Continue with the decrease pattern by reducing the number of stitches per round until only a few remain.

Assembly, in order

Step 1Close the Top:: Cut the yarn, leaving a long tail. Thread a tapestry needle with the tail and weave through the remaining stitches. Pull to close.
Step 2Secure and Weave in Ends:: Secure the end and weave in all loose ends.
Step 3Pom-pom:: Attach a pom-pom if desired by fixing it to the top of the hat.
Step 4Final Touches:: Turn the beanie right side out when all weaving and securing are completed.

Check these before you start

  • Front post double crochets pull the fabric in slightly, so keep tension even across the repeat rather than snugging each post stitch down to match the regular double crochets.
  • If working more than one color, plan the change at the join of a round so the color break falls at a slip stitch rather than mid-repeat.

On one line

Rounds8
Parts3
LevelIntermediate
Time4-6 hours
Hook4.5 mm
YarnWorsted

Set-up

  • Confirm you have both the 4.5 mm and 5 mm hooks on hand before starting — the brim and body are worked at different gauges on purpose.
  • Decide on your color plan now (one, two, or three colors) so you know where to change yarn going into the Body round.
  • Work the 9-stitch starting row first and check your count before turning, since every later row depends on that number holding steady.
  • Read through Body Round 2 once before starting it, since the front post / regular double crochet repeat is what every later crown round follows.

Finishing

  1. Weave in any loose ends from color changes or the starting chain before closing the crown.
  2. Cut the working yarn leaving a long tail, thread it onto a tapestry needle, and draw it through the remaining crown stitches to close the top.
  3. Secure that closing tail, weave in the rest, turn the beanie right side out, and attach a pom-pom to the top if desired.

Construction

The brim is worked flat as a short turned strip rather than in the round, then its two short ends are joined — this is what lets the back-loop-only rows stack into a ribbed band that stretches around the head.

The Body is built by working double crochets into the tops of the brim rows rather than into a foundation chain, so the stitch count for the crown is set by how many rows the brim strip contains, not by a separate round of chains.

Time per section

Starting stripabout 15-20 minutes because it is only 9 stitches wide but every row is worked individually with a turn
Body roundsabout 1-1.5 hours because the front post/regular double crochet repeat is worked stitch by stitch around the full crown
Crown decreasing and closingabout 30-40 minutes because each decrease round is shorter than the last but still needs careful single crochet two-together counting

Photographs of this one

Every one was taken by whoever published the pattern, in the order the source listed them.
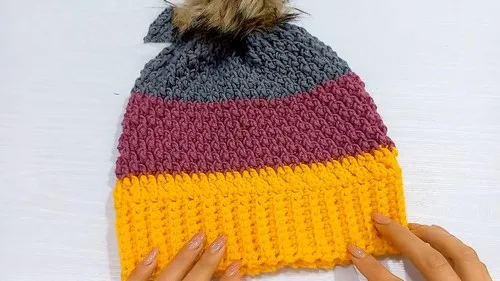
Alpine stitch beanie with a flat brim and post stitch crown — photo 2
Alpine stitch beanie with a flat brim and post stitch crown — photo 3
Alpine stitch beanie with a flat brim and post stitch crown — photo 4
Alpine stitch beanie with a flat brim and post stitch crown — photo 5
Alpine stitch beanie with a flat brim and post stitch crown — photo 6

Common questions

Can this beanie be made in just one color?
Yes, the materials list treats the three yarn colors as optional. The alpine stitch texture holds up in a single color since the pattern comes from the stitch structure, not from color blocking.
Why does the pattern use two different hook sizes?
The 4.5 mm hook keeps the brim rows snug so the band hugs the head, while the 5 mm hook opens up the Body stitches enough for the front post double crochets to stand out as a visible rib.
What if the brim strip comes out a different number of rows?
That is fine as long as the two short ends are joined into a ring that fits the head, since the Body round picks up one double crochet from the top of each brim row. More or fewer rows simply changes the final stitch count carried into the Body.

These answers came from whoever first published the pattern, kept word for word.