
Intermediate
What the pattern's own author called it. Nothing here is graded again.
 Crochet·Rituals
Home Decor 33 Laid out for paper No account, no download
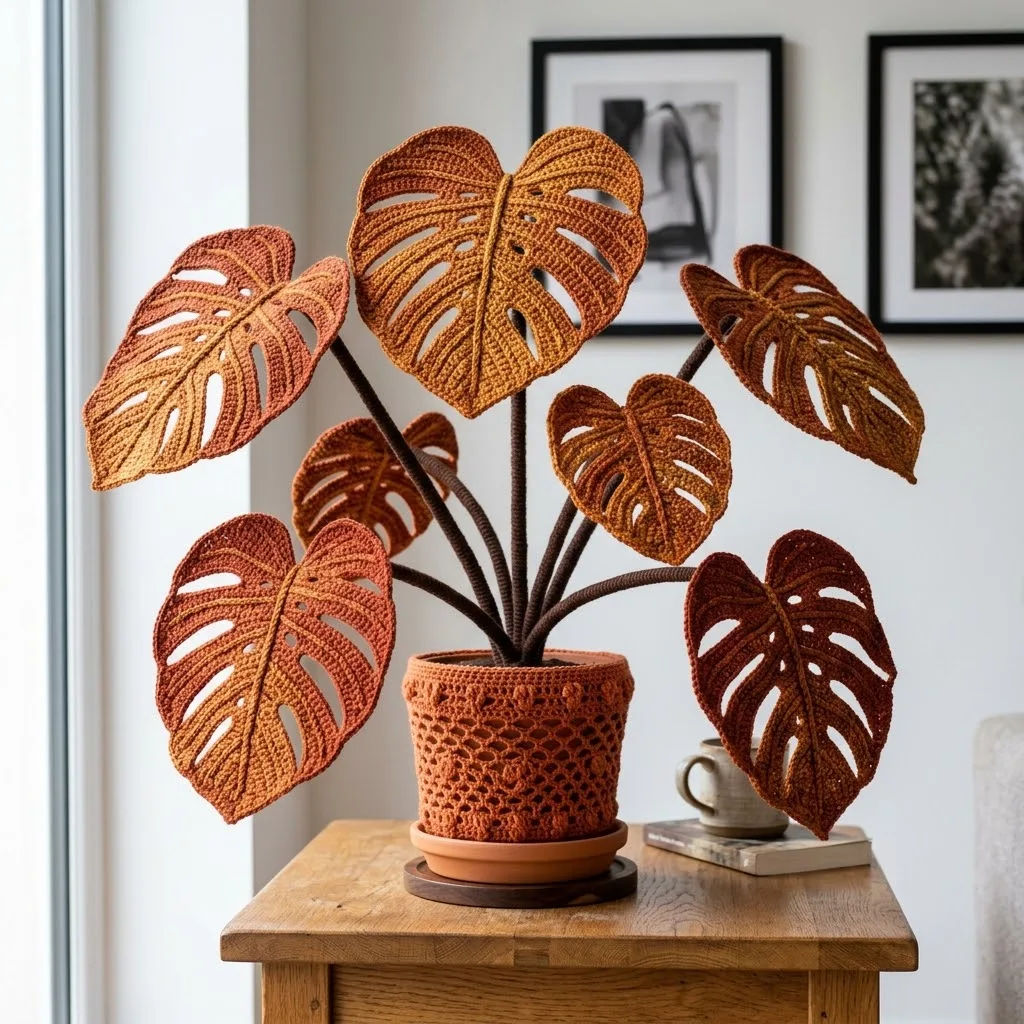
Crochet a burnt orange monstera plant: 21-row leaf, 5.0mm hook, wired stems, terracotta pot cover.
Crochet Rituals · retyped from the source and laid out for print · added 10 Oct 2026
What the pattern's own author called it. Nothing here is graded again.

What the sample was worked in. Any weight works; the size moves with it.

Each one is typed out whole and gets its own line.
This burnt orange monstera plant builds from three main parts: a large leaf worked flat over 21 rows, where ch-3 and ch-4 spaces left open and filled on the following row shape the deep lobes along each edge; a smaller tapering piece worked flat with steady decreases down to a 3-stitch point; and a terracotta pot cover worked in the round from an 8-stitch ring up through 40 stitches. Before starting, have an 18-gauge wire cut into 12 to 16 inch lengths, a 5.0mm hook for leaves and pot cover, and a 4.0mm hook for stems.
Listed by the pattern's own author, in their words.
Key to this pattern, 8 short forms
Sc in 2nd ch from hook, sc in each ch across. (27 sc)
Ch 1, turn. Sc in first 5 sts, ch 3, sk 3, sc in next 4 sts, ch 3, sk 3, sc in next 5 sts, ch 3, sk 3, sc in last 4 sts. (18 sc, 3 ch-3 spaces)
Ch 1, turn. Sc in first 4 sts, 3 sc in ch-3 space, sc in next 5 sts, 3 sc in ch-3 space, sc in next 4 sts, 3 sc in ch-3 space, sc in last 5 sts. (27 sc)
Ch 1, turn. Inc in first st, sc in next 25 sts, inc in last st. (29 sc)
Ch 1, turn. Sc in first 6 sts, ch 4, sk 4, sc in next 9 sts, ch 4, sk 4, sc in last 6 sts. (21 sc, 2 ch-4 spaces)
Ch 1, turn. Sc in first 6 sts, 4 sc in ch-4 space, sc in next 9 sts, 4 sc in ch-4 space, sc in last 6 sts. (29 sc)
Ch 1, turn. Inc in first st, sc in each st across to last st, inc in last st. (31 sc)
Ch 1, turn. Sc in first 7 sts, ch 5, sk 5, sc in next 7 sts, ch 5, sk 5, sc in last 7 sts. (21 sc, 2 ch-5 spaces)
Ch 1, turn. Sc in first 7 sts, 5 sc in ch-5 space, sc in next 7 sts, 5 sc in ch-5 space, sc in last 7 sts. (31 sc)
Ch 1, turn. Sc in each st across. (31 sc)
Ch 1, turn. Dec, sc in each st to last 2 sts, dec. (29 sc)
Ch 1, turn. Sc in first 5 sts, ch 4, sk 4, sc in next 11 sts, ch 4, sk 4, sc in last 5 sts. (21 sc, 2 ch-4 spaces)
Ch 1, turn. Sc in first 5 sts, 4 sc in ch-4 space, sc in next 11 sts, 4 sc in ch-4 space, sc in last 5 sts. (29 sc)
Ch 1, turn. Dec, sc to last 2 sts, dec. (25 sc after Row 17)
Ch 1, turn. Sc in each st across. (25 sc)
Ch 1, turn. Dec, sc to last 2 sts, dec. (17 sc after Row 22)
Ch 1, turn. Dec, sc to last 2 sts, dec. (9 sc after Row 26)
Ch 1, turn. Dec, sc in next 5 sts, dec. (7 sc)
Ch 1, turn. Dec, sc in next 3 sts, dec. (5 sc)
Ch 1, turn. Dec, sc in next st, dec. (3 sc)
Ch 1, turn. Sc3tog. (1 sc) Fasten off, leaving a long tail for seaming.
Sc in 2nd ch from hook, sc across. (15 sc)
Ch 1, turn. Inc in first st, sc to last st, inc. (21 sc after Row 4)
Ch 1, turn. Sc in each st across. (21 sc)
Ch 1, turn. Dec, sc to last 2 sts, dec. (9 sc after Row 14)
Ch 1, turn. Dec, sc to last 2 sts, dec. (3 sc after Row 17)
Ch 1, turn. Sc3tog. (1 sc) Fasten off. Make 1 to 2 small leaves without cutting any holes.
Ch 1, 8 sc in ring. Sl st to first sc. (8 sc)
Ch 1, inc in each st around. Sl st to first sc. (16 sc)
Ch 1, *sc in first st, inc in next st* around. Sl st to first sc. (24 sc)
Ch 1, *sc in first 2 sts, inc in next st* around. Sl st to first sc. (32 sc)
Ch 1, *sc in first 3 sts, inc in next st* around. Sl st to first sc. (40 sc)
Continue increasing pattern until base fits pot bottom. (Approximately 56 to 64 sc)
Wire cutters Tapestry needle Stitch markers Scissors 6-inch terracotta pot with saucer Floral foam or polystyrene to fit inside pot
Hot glue gun (optional but helpful)
Repeat these two rounds until cover reaches pot rim. Fasten off.
Slip cover over pot. It should fit snugly.
| Rounds | 33 |
|---|---|
| Parts | 5 |
| Level | Intermediate |
| Time | 4-6 hours |
| Hook | 5.0 mm |
| Yarn | Worsted |
The large leaf is worked flat and gains its monstera-style lobes from ch-3 and ch-4 spaces left unworked on one row, then filled with 3 sc into each space on the next; this turns straight edges into the leaf's signature cut-in shape without any separate trimming.
The pot cover base starts at an 8 sc ring and increases by 8 stitches every round (16, 24, 32, 40), keeping the stitch count evenly divisible at each stage so the circle lies flat before the sides are worked straight.
| Large leaf (21 rows) | about 60-75 minutes, because the ch-3 and ch-4 spaces require tracking shifting stitch counts across every row |
|---|---|
| Tapering leaf piece (decrease rows to 3 sc) | about 25-35 minutes, because the steady decrease sequence from 21 sc down to 3 sc moves quickly but needs careful stitch placement near the point |
| Pot cover (8 sc to 40 sc spiral) | about 30-40 minutes, because five increase rounds must stay even before the sides can be worked straight |
Every one was taken by whoever published the pattern, in the order the source listed them.

These answers came from whoever first published the pattern, kept word for word.