Skip to the patterns
Crochet·Rituals
Menu

Home Decor 4 Laid out for paper No account, no download

Granny square throw and pillow cover pattern

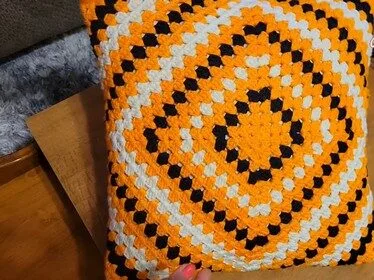
Granny square throw and pillow set, 28 rounds, standing dc from Round 3, any hook to match yarn.

Jump to the rounds Pin it
Granny square throw and pillow cover pattern
Home Decor · Worsted
Skill
Intermediate
Time
4-6 hours
Yarn weight
Worsted
Rounds
4

Intermediate

What the pattern's own author called it. Nothing here is graded again.

Worsted

What the sample was worked in. Any weight works; the size moves with it.

4

Each one is typed out whole and gets its own line.

This piece grows from a single ring into a classic granny square, repeated to 28 rounds so it works equally as a throw motif or a pillow face. Each round adds a fresh shell of double crochet into the corner spaces, with a standing double crochet replacing the usual chain-3 from Round 3 onward. Before starting, have your yarn, a hook sized to it, a darning needle, and — if making the pillow version — a 20-inch zipper and a 16x16-inch insert on hand.

Common mistakes and their fixes

Losing count of ch-2 corner spaces
Place a stitch marker in each ch-2 corner space as you complete a round. Move the markers up round by round so all four corners stay easy to find.
Zipper stitches marked unevenly
Measure and mark exactly 4 stitches in from each corner on both sides of the pillow opening before pinning the zipper. Uneven marks will pull the zipper off-center once sewn.

The materials list

  1. Yarn (any color or colors you prefer)
  2. Crochet hook (size appropriate for your yarn)
  3. Zipper (20 inches long or the same length as your pillow)
  4. Darning needle
  5. Stitch markers (optional)
  6. Pillow insert (16x16 inches or your desired size)

Listed by the pattern's own author, in their words.

Key to this pattern, 4 short forms

Main Pattern

Round 1

Make a slip knot and ch 4; join with a sl st to the first ch to form a ring; ch 3 (counts as 1 dc), 2 dc in the ring; ch 2, 3 dc in the ring; ch 2, 3 dc in the ring; ch 2, sl st in the third ch of the ch 3; sl st in the next st, sl st in the next st, sl st in the next ch 2 sp; pull the tail tightly.

Round 2

ch 3, 2 dc in the same sp, ch 2, 3 dc in the same sp; repeat step 1 in each corner; 3 dc, ch 2, 3 dc; ch 2, sl st in the third ch of the ch 3; sl st in the next st, sl st in the next st, sl st in the next ch 2 sp.

Round 3

ch 1, 1 standing dc in the corner; 2 dc in the same sp, ch 2, 3 dc in the same sp; repeat step 2 in each corner; 3 dc, ch 2, 3 dc; ch 2, sl st in the top of the standing dc; sl st in the next st, sl st in the next st, sl st in the next ch 2 sp.

Rounds 4–28

Repeat Round 3 for a total of 28 rounds.

Assembly, in order

Step 1Attaching the Sides: Fold the square in half, wrong sides together.
Step 2Measure and mark the center of each side.
Step 3Using a darning needle and yarn, sew the sides together, attaching the corners of the square.
Step 4Attaching the Zipper: Mark 4 stitches from the corner on each side of the pillow cover.
Step 5Sew the zipper to the marked stitches on both sides of the pillow cover.
Step 6Finishing: Weave in all ends.
Step 7Insert the pillow insert.

Check these before you start

  • Pull the tail tight after Round 1 — a loose ring center will show as a gap at the middle of the finished square.
  • The standing double crochet used from Round 3 onward replaces the ch-3 turning chain; keep its height consistent with the ch-3 rounds below it so the square doesn't cup.
  • Keep tension even across all 28 rounds, since even minor tightening late in the square will pull the edges out of square for seaming or zipper insertion.
  • the pillow cover, work one square, then fold it in half with wrong sides together before sewing the sides and adding the zipper.

On one line

Rounds4
LevelIntermediate
Time4-6 hours
YarnWorsted

Set-up

  • Confirm total yarn yardage will cover a 28-round square before casting on, since color changes are not part of this pattern.
  • Read Round 3 fully before working it — it introduces the standing double crochet that replaces the chain-3 used in Rounds 1 and 2.
  • Set a stitch marker in the first corner chain-2 space of Round 1 so corners stay easy to locate once rounds multiply.
  • Work a small test swatch of the first three rounds to check that your ring and corner spacing lie flat before committing to all 28.

Finishing

  1. Weave in all yarn ends securely, including the pulled tail at the center ring and the join at the end of Round 28.
  2. the pillow cover, mark 4 stitches from each corner along the opening sides, then sew the 20-inch zipper to those marked stitches on both sides of the opening.
  3. Fold the completed square in half with wrong sides together, mark the center of each side, and sew the remaining sides together at the corners before inserting the 16x16-inch pillow form.

Construction

All shaping happens at the four corner ch-2 spaces, where 3 dc is worked twice into the same space each round; the straight sides simply lengthen with each pass and add no new increases of their own.

The sl st sequence at the end of every round — into the top of the starting chain or standing dc, then across two stitches into the next ch-2 space — repositions the working yarn at a corner so the next round can begin its increase immediately.

Time per section

Rounds 4-28about 3-4 hours, because each of the 25 remaining rounds adds length around all four sides
Assembly and zipperabout 45 minutes to an hour, because marking, seaming, and sewing the zipper in by hand take patience

Photographs of this one

Every one was taken by whoever published the pattern, in the order the source listed them.
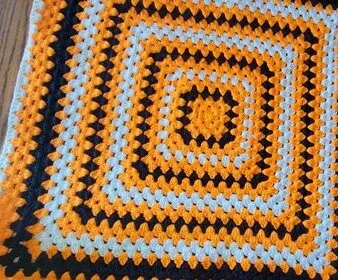
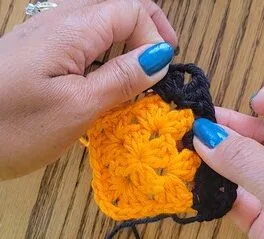
Granny square throw and pillow cover pattern — photo 2
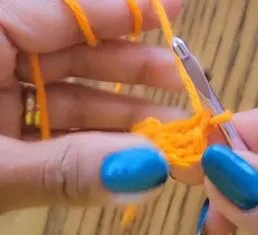
Granny square throw and pillow cover pattern — photo 3
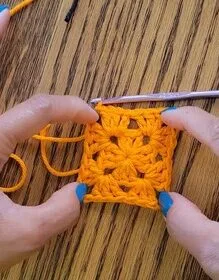
Granny square throw and pillow cover pattern — photo 4
Granny square throw and pillow cover pattern — photo 5

Common questions

Can this square be used for a throw instead of a pillow?
Yes — the 28-round Main Pattern is the same square used for both projects. Skip the zipper and assembly steps and use the finished square as a throw motif or single panel instead.
Why does Round 3 use a standing double crochet instead of a chain-3?
The standing dc replaces the usual ch-3 turning chain and gives a cleaner, less bulky start to the round. It is worked directly into the corner space rather than chained up from the previous stitch.
How do I know the square is the right size for a 16x16-inch insert?
Measure the square after blocking it flat, since 28 rounds should approximate the insert size, but hook and tension affect the final measurement. Adjust hook size before starting over if your gauge runs noticeably loose or tight.

These answers came from whoever first published the pattern, kept word for word.