
Intermediate
What the pattern's own author called it. Nothing here is graded again.
 Crochet·Rituals
Amigurumi 60 Laid out for paper No account, no download
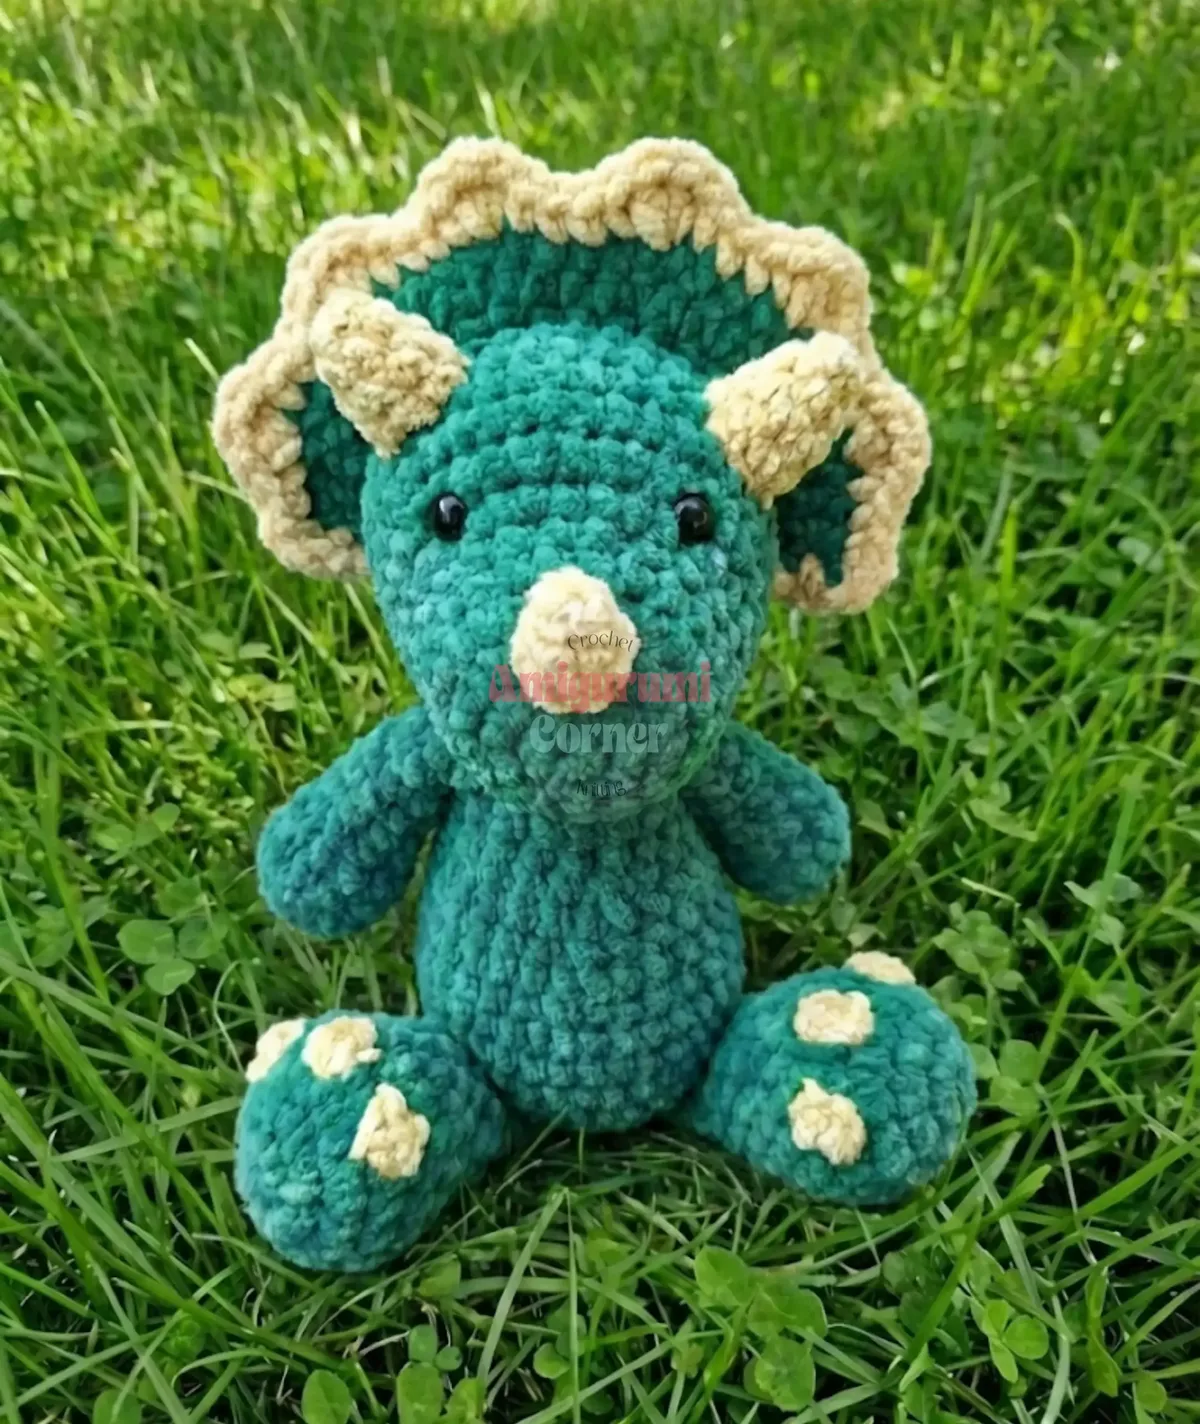
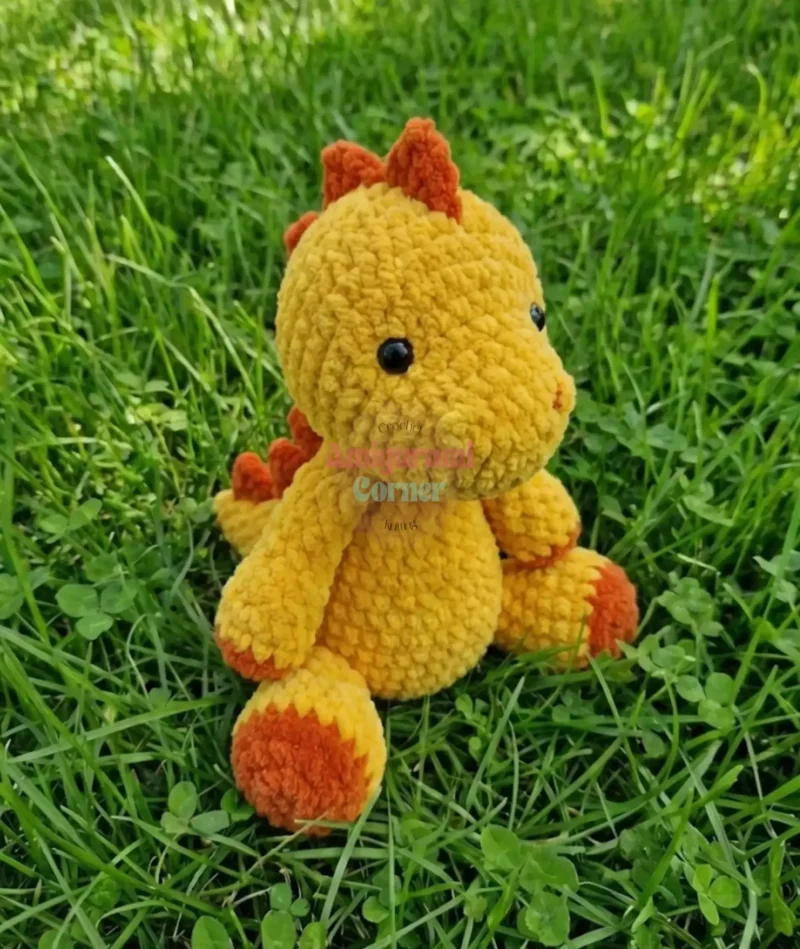
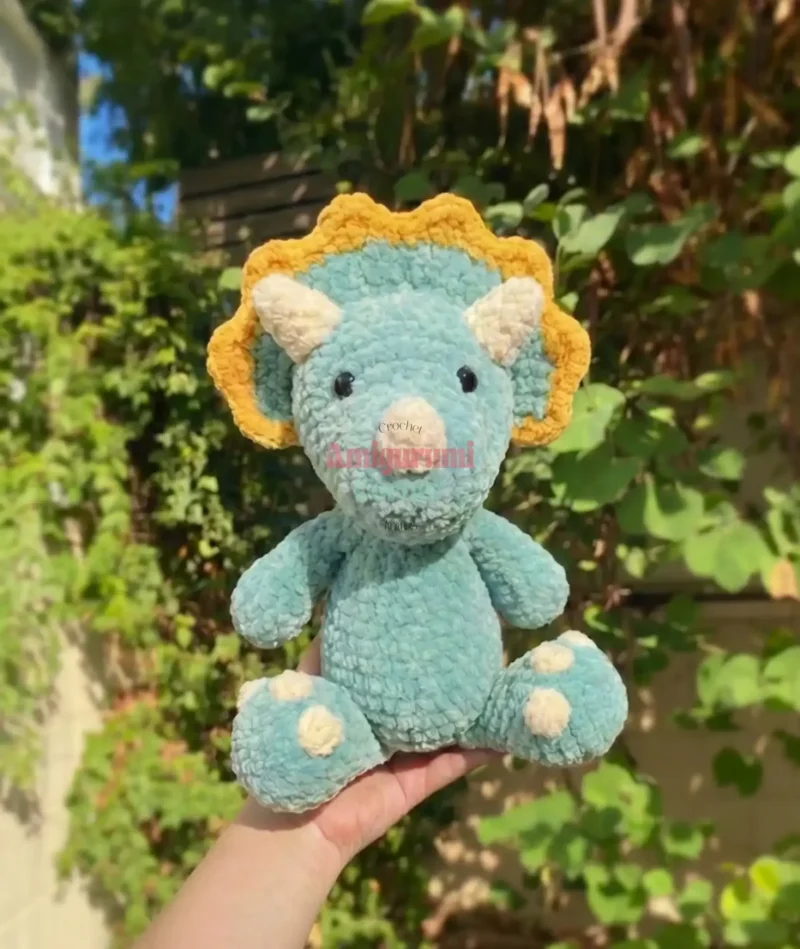
2-in-1 amigurumi dinosaur: Stegosaurus and Triceratops. 4.5mm hook, super bulky yarn, 13-round body and head.
Crochet Rituals · retyped from the source and laid out for print · added 8 Oct 2026
What the pattern's own author called it. Nothing here is graded again.

What the sample was worked in. Any weight works; the size moves with it.

Each one is typed out whole and gets its own line.
This two-in-one amigurumi pattern builds a Stegosaurus and a Triceratops from shared limb and body shapes, worked in continuous spiral rounds with a 4.5mm hook and super bulky yarn. Arms and legs are completed first, from hand to shoulder and foot to hip, before the 13-round body and head take shape; a tail and spine finish the Stegosaurus, while two back horns and a headpiece turn the same base into a Triceratops. Have stuffing, 12mm safety eyes, a stitch marker, and both colorways ready before starting.
Listed by the pattern's own author, in their words.
Key to this pattern, 11 short forms
Starting at the hand and finishing at the shoulder.
Start in shade 1150-53 Lagoon.
Step by step: Starting at the hand and finishing at the shoulder; Use shade 1150-51 Seaside.
Step by step: Starting at the foot and finishing at the hip; Use shade 1150-51 Seaside.
Starting at the base and finishing at the neck. You must have both arms and legs made before starting the body.
Step by step: Use shade 1150-51 Seaside.
Step by step: Starting at the tip and finishing at the base; Use shade 1150-51 Seaside.
Step by step: Starting at the tip and finishing at the base; Use shade 1150-41 Mushroom.
sc 8 into a mr [8]sc around [6] (2 rounds = 12 total stitches) Tie off and leave a long tail for sewing. Stuff the horn.
inc x 8 [16] Change to shade 1150-49 Key Lime.
(sc 3, inc) x 4 [20] The following round will crochet three bobble toes onto the foot of the dinosaur. Perform each Bobble in shade 1150-41 Mushroom. Crochet all other stitches of round 4 in shade 1150-51 Seaside. For no toes, you can substitute round 4 for sc 20 without changing colours.
sc 8, bobble, sc 2, bobble, sc 2, bobble, sc 5 [20] 3 Yarn Over Bobble Guide: YO (yarn over), insert your hook into the stitch. YO and pull up a loop (3 loops on your hook), YO and pull through 2 loops.
YO, insert into the same stitch, YO and pull up a loop (4 loops on your hook), YO and pull through 2 loops.
YO, insert again into the same stitch, YO and pull up a loop (5 loops on your hook), YO and pull through 2 loops.
You will have 4 loops on your hook. YO and pull through all 4 loops. Push the bobble out as you continue the round.
Step by step: Continue to crochet.
Colour change technique: Change colours in the stitch prior to the bobble. YO and pull through then YO and pull through the new colour ready to bobble. Complete the bobble in your contrasting colour until you have 4 loops on your hook. Then finish the bobble by switching back to your main colour to pull through all 4 loops. Continue to crochet and repeat for each toe.
sc around [16]Step by step: (LEGS): (sc 3, inc) x 1 [30] Take your first leg (sc 3, inc) to join (toes facing you); (sc 3, inc) x 1 Take your second leg (sc 3, inc) to join (toes facing you); (sc 3, inc) x 2.
(sc 2, dec) x 4 [12]Step by step: sc around [24] (3 rounds = 72 total stitches); sc 6, (sc 1, inc) x 6, sc 6 [30].
sc around [12]
(sc 1, dec) x 4 [8] Stuff the hand and forearm and continue to crochet.
sc around [8] (4 rounds = 32 total stitches)
sc around [36] (4 rounds = 144 total stitches) Work the middle section of the following round into the back loop only (BLO). This will leave unworked front loop only (FLO) stitches to attach the triceratops headpiece onto later in the pattern. The rest of the round is worked into both loops (BL). Mark the first and last unworked FLO stitch with a stitch marker. This will make it easier to find later when attaching the headpiece to the head.
Crochet the arm closed. Fold the opening flat, chain 1 and sc 4 to close. Go through both loops of both sides. [4]Step by step: Tie off and cut your yarn. Make 2 arms.Tie off and cut your yarn. Make 2 arms.
Starting at the foot and finishing at the hip.
Start in shade 1150-53 Lagoon.
sc 8 into a mr [8]
inc x 8 [16]
(sc 3, inc) x 4 [20] Change to shade 1150-49 Key Lime.
sc around [20] (3 rounds = 60 total stitches)
(sc 3, dec) x 4 [16]
(sc 2, dec) x 4 [12]
sc around [12] Stuff the foot and calf, then continue to crochet.
(sc 1, dec) x 4 [8]
sc around [8]
Crochet the leg closed. Fold the opening flat, chain 1 and sc 4 to close. Go through both loops of both sides. [4]Step by step: Tie off and cut your yarn. Make 2 legs.Tie off and cut your yarn. Make 2 legs.
Starting at the tip and finishing at the base.
Use shade 1150-49 Key Lime.
sc 6 into a mr [6]
(sc 1, inc) x 3 [9]
sc around [9]
(sc 2, inc) x 3 [12]
sc around [12]
(sc 2, inc) x 4 [16]
sc around [16]
(sc 1, inc) x 8 [24]
sc around [24] Tie off and leave a long tail for sewing. Stuff the dinosaur’s tail.
Starting at the base and finishing at the neck. You must have both arms and legs made before starting the body.
Use shade 1150-49 Key Lime.
sc 8 into a mr [8]
inc x 8 [16]
(sc 1, inc) x 8 [24] Attach both legs in the following round as instructed. When connecting a limb, position it in front of your working piece. Crochet through both loops of both pieces to join. The legs will sit close together and angle outwards at the front of the body, allowing the toy to sit flat.
LEGS (sc 3, inc) x 1 [30] Take your first leg (sc 3, inc) to join (sc 3, inc) x 1Take your second leg (sc 3, inc) to join (sc 3, inc) x 2
(sc 4, inc) x 6 [36]
sc around [36] (4 rounds = 144 total stitches)
(sc 4, dec) x 6 [30]
sc around [30]
(sc 3, dec) x 6 [24]
sc around [24]
(sc 2, dec) x 6 [18]
sc around [18] (2 rounds = 36 total stitches) Stuff the body of the dinosaur. Attach both arms in the following round as instructed. The arms will sit on either side of the body. When attaching an arm, place it in front of your working piece and go through both loops of both parts to join.Eyes Option 1: If making the toy for a small child, continue to crochet and finish the entire project including the headpiece. Then use yarn and a tapestry needle to sew on the eyes over rows 7 and 8, placing them 6 stitches apart (counted on row 7). Place the eyes centred to the triceratops headpiece. Repeat stitching over the rows until you reach your desired thickness. Hide your yarn tails.Eyes Option 2: Safety eyes – Insert 12mm safety eyes between rows 7 and 8, placing them 6 stitches apart (counted on row 7). Position the eyes centred to the marked unworked FLO stitches (this is the location of the headpiece). Once happy with placement, turn your work inside out and secure each eye with a washer. Continue to crochet.Stuff the head of the dinosaur: Insert a small amount of stuffing into the nose first. Continue stuffing the head working from the outside in to ensure even distribution.
sc 2. Take your first arm and sc 4 to join. Sc 6. Take your second arm and sc 4 to join. Sc 2. [18]Step by step: Tie off and leave a long tail of yarn for sewing. Stuff the body of the dinosaur.Tie off and leave a long tail of yarn for sewing. Stuff the body of the dinosaur.
Starting at the front and finishing at the back of the head.
Use shade 1150-49 Key Lime.
3 Yarn Over Bobble Guide:
YO (yarn over), insert your hook into the stitch. YO and pull up a loop (3 loops on your hook), YO and pull through 2 loops.
YO, insert into the same stitch, YO and pull up a loop (4 loops on your hook), YO and pull through 2 loops.
YO, insert again into the same stitch, YO and pull up a loop (5 loops on your hook), YO and pull through 2 loops.
You will have 4 loops on your hook. YO and pull through all 4 loops. Push the bobble out as you continue the round.
Continue to crochet.
sc 8 into a mr [8]
inc x 8 [16]
sc 5, bobble, sc 4, bobble, sc 5 [16]
(sc 1, inc) x 8 [24]
sc around [24] (2 rounds = 48 total stitches)
sc 3, (sc 2, inc) x 6, sc 3 [30]
sc 9, (sc 1, inc) x 6, sc 9 [36]
sc around [36] (5 rounds = 180 total stitches)
(sc 4, dec) x 6 [30]
(sc 3, dec) x 6 [24]
(sc 2, dec) x 6 [18] Do not tie off. After inserting the eyes, continue to crochet.Eyes Option 1: If making the toy for a small child, continue to crochet and finish the entire project. Then use yarn and a tapestry needle to sew on the eyes over rows 7 and 8, placing them 6 stitches apart (counted on row 7). Position the eyes behind the nostrils. Repeat stitching over the rows until you reach your desired thickness. Hide your yarn tails.Eyes Option 2: Safety eyes – Insert 12mm safety eyes between rows 7 and 8, placing them 6 stitches apart (counted on row 7). Position the eyes behind the nostrils. Once happy with placement, turn your work inside out and secure each eye with a washer.Continue to crochet.Stuff the head of the dinosaur: Insert a small amount of stuffing into the nose first. Continue stuffing the head working from the outside in to ensure even distribution.
(sc 1, dec) x 6 [12]
dec x 6 [6] Tie off and close. Hide your yarn tails.
Starting at the tip and finishing at the base.
Use shade 1150-41 Mushroom.
sc 6 into a mr [6]
sc around [6]
(sc 2, inc) x 2 [8]
sc around [8] Tie off and leave a long tail for sewing. Make two large horns. Stuff the horns.
Crochet the headpiece onto the 22 unworked FLO stitches from round 13 of the triceratops head. Face the dinosaur’s head towards you and proceed to work from right to left, turning between rows. Tie off then add a contrasting colour to the border of the headpiece.
Use shade 1150-51 Seaside.
Standing Single Crochet Guide:
Make a slip knot, insert your hook around a stitch on the toy, YO (yarn over) and pull through. You will have two loops on your hook. YO and pull through both loops to complete the standing single crochet.
Perform a standing sc in the first unworked FLO stitch from round 13. This counts as your first sc. Then sc into the next 21 stitches [22]
Chain 1, Turn. Then sc 2, (sc 1, inc, sc 1) x 6, sc 2 [28]
Chain 1, Turn. Then Sc 4, (sc 2, inc, sc 2) x 4, sc 4 [32] Tie off and hide your yarn tails. Remove the stitch markers.Now take your contrasting yarn and crochet a border of stitches around both short edges and top of the headpiece. Face the head towards you and work from right to left.
Use shade 1150-40 Cornflower.
Instructions continued:
Start on the short edge. Perform a standing sc around the side post on row 1 on the headpiece. Then sc around the side post of row 2 on the headpiece.
Put 3sc into the corner stitch. Then perform the following repeat unit a total of 6 times, crocheting along the top of the headpiece.
Repeat Unit: Stitch 1: sc Stitch 2: sc Stitch 3: 3dc into the same single stitch Stitch 4: sc Stitch 5: sc Repeat x 6 until you have one corner stitch remaining.
Instructions continued: Put 3sc into the corner stitch.
Sc 2 down the short edge around the side posts of the headpiece to finish.
Hide your yarn tails.
Locate the front of the body (the legs are positioned towards the front and angled outward).
Stitch the tail to the base of the body in the centre over rows 3-8. Use a flat surface to ensure the dinosaur sits upright with the tail attached before sewing. The tail will sit under the curve of the back.
Stitch the body to the head of the dinosaur. Centre the head to face forwards. Stitch the body to rows 8-13 on the underside of the head.
Hide your yarn tails.
Pro Tip: When sewing large parts together, consider using a separate length of yarn in a similar color (acrylic or cotton in 4 or 8 ply works well) instead of the attached yarn tail. This prevents fraying during the sewing process. Ensure a firm pull as you stitch the components together, then neatly conceal all yarn tails for a polished finish.
The stegosaurus spine is made by crocheting a series of stitches down the centre back of the animal. Work each stitch around a row on the existing toy. Start at the top of the head and work down towards the tail.
Use shade 1150-53 Lagoon.
Instructions:
Make a slip knot and perform a standing ss (slip stitch) in the centre of the head around row 10. This counts as your first stitch in the repeat unit.
Perform the repeat unit all the way down the head, back and tail. Each repeat unit makes one spike. A total of 7 dinosaur spikes is pictured.
Tie off and hide your yarn tails.
Repeat Unit:
The repeat unit consists of a 4 stitch sequence. Each stitch in the repeat unit is worked around a row on the dinosaur. Work around a total of 4 rows for each dinosaur spike.
Stitch 1: ss and chain 1 Stitch 2: dc and picot Stitch 3: dc and chain 1 Stitch 4: ss Repeat until you get to the bottom of the tail. Hide your yarn tails.
Picot Guide: Chain 3 Insert your hook onto that first chain (or third chain from the hook)
Make a slip stitch to complete the picot This will give the spike a nice pointy finish. Continue to crochet.
Standing Slip Stitch Guide:
Make a slip knot, insert your hook around a stitch, YO (yarn over) and pull through. You will have two loops on your hook. Pull through one loop to complete the standing slip stitch. Continue to crochet.
Detailed Spine Instructions: Standing ss around row 10 Chain 1 Dc around the next row Picot: chain 3 and ss into the third chain from the hook
Dc around the next row Chain 1 Ss around the next row Repeat for 4 spikes on the head and 3 spikes down the back and tail. Hide your yarn tails.
Stitch the small horn in the centre of the nose over rows 3-4
Stitch the larger two horns over rows 10-11. Place them 6 stitches apart (or directly behind the eyes).
Stitch the tail to the base of the body in the centre over rows 3-8. Use a flat surface to ensure the dinosaur sits upright with the tail attached before sewing. The tail will sit under the curve of the back.
Stitch the body to the head of the dinosaur. Locate the front of the body. The legs are positioned towards the front and angled outward. The toes will also be positioned to face forward. Stitch the body to rows 8-14 on the underside of the head.
Hide your yarn tails.
Pro Tip: When sewing large parts together, consider using a separate length of yarn in a similar color (acrylic or cotton in 4 or 8 ply works well) instead of the attached yarn tail. This prevents fraying during the sewing process. Ensure a firm pull as you stitch the components together, then neatly conceal all yarn tails for a polished finish.
| Rounds | 60 |
|---|---|
| Parts | 10 |
| Level | Intermediate |
| Time | 6-7 hours |
| Hook | 4.5 mm |
| Yarn | Super Bulky |
Legs begin at a magic ring of 8 stitches, increase to 16, then reach 20 with an evenly spaced (sc 3, inc) round - the shaping front-loads into the first three rounds, so the remaining seven hold a constant circumference from foot to hip.
Arms and legs are each worked in a single direction (hand to shoulder, foot to hip) and must both be finished before the body starts, meaning the body round sequence is written to receive four completed limbs rather than pause for limb-making partway through.
| Arms and legs (make 2 each) | about 2 hours, because four limbs run 8 to 10 rounds each with the increase shaping concentrated early |
|---|---|
| Body and head | about 2.5 hours, because two 13-round pieces need safety eye placement and firm, even stuffing |
| Tail, horns, headpiece, and assembly | about 1.5 hours, because the pieces are short (9, 4, and 3 rounds) but stitching everything together takes care |
Every one was taken by whoever published the pattern, in the order the source listed them.
These answers came from whoever first published the pattern, kept word for word.