Skip to the patterns
Crochet·Rituals
Menu

Amigurumi 13 Laid out for paper No account, no download

Crochet starfish bag charm with layered pouch body

Starfish charm, double-sided build, 3.5mm hook, back and front worked across 8 rounds.

Jump to the rounds Pin it
Crochet starfish bag charm with layered pouch body
Amigurumi · Worsted
Skill
Intermediate
Time
4-6 hours
Yarn weight
Worsted
Hook
3.5 mm
Rounds
13

Intermediate

What the pattern's own author called it. Nothing here is graded again.

Worsted

What the sample was worked in. Any weight works; the size moves with it.

13

Each one is typed out whole and gets its own line.

This charm takes the shape of a five-armed starfish, built as two matching sides that are joined at the end rather than stitched in one continuous piece. The back side carries the main shaping: a body worked in three rounds, five separate arms, a round of arm detailing, and a tuft at the base of each foot. The front side mirrors this in single rounds for body, arms, and details, then adds a decorative layer before the strap and seam pull both sides together. Have your 3.5 mm hook, a tapestry needle, and more than one color of 5 ply milk cotton yarn ready before you begin.

Common mistakes and their fixes

Losing count through 5 arm repeats
Work one arm at a time and mark the end of each before starting the next; the ch 11 and 10 sc pattern repeats identically four times before Arm 5 changes.
Sewing through both loops at assembly
Check the assembly steps again — the seam is specified as back loops only, starting from the increase stitch in each arm, so the front detailing stays raised.
Skipping the 2-stitch gap between arms
After finishing each arm's detail round, skip 2 sts and slip stitch to the 3rd stitch as instructed, or the arms will crowd together instead of fanning out.

The materials list

  1. 5 ply milk cotton yarn (multiple colors)
  2. 3.5 mm crochet hook
  3. Scissors
  4. Tapestry needle

Listed by the pattern's own author, in their words.

Key to this pattern, 7 short forms

Body (Back Side)

Round 1

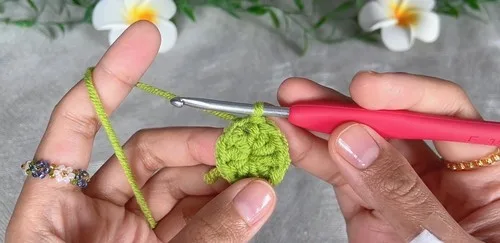
Make a slip knot or use a magic ring. Ch 3 (counts as 1st dc), 9 dc in the ring, sl st to the 3rd ch.

Round 2

Ch 1 (counts as 1st dc), 1 dc in the same st, 1 dc, 1 inc, repeat * for 5 times (15 dc total), sl st to the 1st dc.

Round 3

Ch 1 (counts as 1st dc), 1 dc in the same st, 1 inc, repeat * for 14 times (30 dc total), sl st to the 1st dc.

Arms (Back Side)

Arm 1

Ch 11, 10 sc in the 2nd ch from the hook, 6 sl st, ch 11, 10 sc in the 2nd ch from the hook, 6 sl st. Repeat this pattern for 3 more arms.

Arm 5

Ch 11, 10 sc in the 2nd ch from the hook, 3 sl st, change color (if desired), 3 sl st.

Arm Details (Back Side)

Arm 1

4 dc, 3 hdc, 3 sc, 1 inc, 3 sc, 3 hdc, 4 dc, skip 2 sts, sl st to the 3rd st. Repeat this pattern for all 5 arms.

Join & Strap

Skip 2 sts, sl st to the 1st arm. Ch 55 for the long strap, sl st to the same st. Finish off.

Tuft Feet (Back Side)

Arm 1

Attach yarn in the 1st loop of the arm, ch 2, sl st in the 2nd ch from the hook, skip 1 st, sl st in the next st. Repeat this pattern for 6 more times. Repeat this pattern for all 5 arms.

Body (Front Side)

Rounds 1–3

Follow Rounds 1-3 as for the back side.

Arms (Front Side)

Arms 1-5

Follow Arm 1-5 as for the back side.

Arm Details (Front Side)

Arm 1

Follow Arm 1 as for the back side.

Strap

Ch 6, sl st to the same st. Finish off.

Decorations (Front Side)

Decoration

Attach yarn in any stitch, ch 2, 1 sc in the same st, fasten off, tie the tails together. Repeat as desired.

Assembly, in order

Step 1Place the front and back sides together with wrong sides facing.
Step 2Attach the strap.
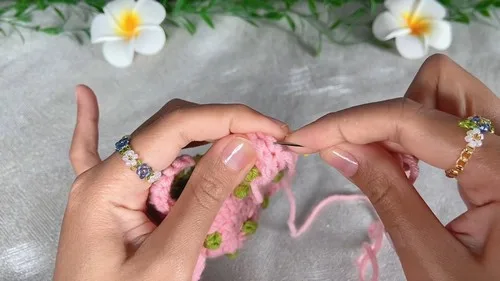
Step 3Sew the front and back sides together using the back loops only, starting from the increase stitches in each arm.

Check these before you start

  • Work the increases in Round 2 and Round 3 of the Body on a consistent stitch count — 5 repeats in Round 2 and 14 in Round 3 — so the back side sits flat before the arms are added.
  • When you reach Arm 5 in the Back Side section, the color change happens after 3 slip stitches rather than at the start of the arm; keep the join loose so it does not pucker.
  • Use back loops only when sewing the front and back sides together, as stated in the assembly steps — working into both loops here will flatten the raised arm detailing.

On one line

Rounds13
Parts8
LevelIntermediate
Time4-6 hours
Hook3.5 mm
YarnWorsted

Set-up

  • Wind off separate small amounts of each color you plan to use for the arms and decorations, since color changes happen mid-round rather than between rounds.
  • Read through the Arms (Back Side) section fully before starting it — five arms are worked in sequence from a single ch 11 base, and the fifth arm ends differently from the first four.
  • Make a quick gauge swatch in dc with your 3.5 mm hook so the Body rounds lie flat rather than cupping or ruffling.
  • Set aside a stitch marker for the 3rd ch at the end of Round 1 of the Body, since the first slip stitch join depends on finding it exactly.

Finishing

  1. Weave in every color-change end from the Arms and Arm Details sections before assembly, since loose ends are harder to reach once the two sides are seamed.
  2. Place the front and back sides together with wrong sides facing, then attach the long strap at the point specified before closing the seam.
  3. Sew the front and back sides together through back loops only, beginning at the increase stitch in each arm, then steam-block lightly to even out the five points.

Construction

The increases in Round 2 and Round 3 of the Body fall at regular intervals (every 3rd stitch, then every 2nd stitch), which is what pushes the circle from 9 to 15 to 30 stitches without distorting the center.

The arms are worked flat off a chain rather than in the round, because each arm needs two straight sc edges and a slip-stitch spine running down its center before the Arm Details round builds the point.

Time per section

Body and Arms, Back Sideabout 90-120 minutes because the Body's 3 rounds build quickly, but 5 separate arms worked off individual chains take longer to keep even.
Arm Details and Tuft Feet, Back Sideabout 60-75 minutes because shaping 5 pointed arm tips in a single round is fiddly, even though the tuft itself is one short round.
Front Side, Decorations, and Assemblyabout 90 minutes because the front's single-round parts go fast, but attaching the strap and sewing back-loop seams around 5 arms takes care.

Photographs of this one

Every one was taken by whoever published the pattern, in the order the source listed them.
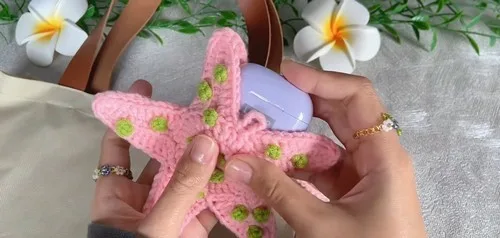
Crochet starfish bag charm with layered pouch body — photo 2
Crochet starfish bag charm with layered pouch body — photo 3
Crochet starfish bag charm with layered pouch body — photo 4
Crochet starfish bag charm with layered pouch body — photo 5

Common questions

Can the front and back sides be worked in different colors?
Yes — the pattern is built as two separate pieces joined at assembly, so the back side and front side can use entirely different colors. Keep the arm detail colors consistent on both sides if you want the charm to look the same from either angle.
Why does Arm 5 end differently from the other arms?
Arm 5 closes the circuit of five arms back to the starting point, so it ends with 3 slip stitches, an optional color change, and 3 more slip stitches instead of running straight into the next arm. This transition is what lets the Arm Details round move cleanly around all five points afterward.
Does this charm need stuffing?
The pattern does not call for stuffing; the front and back sides are sewn together flat with wrong sides facing. The shape comes from the double layer and the arm detailing rather than filled stuffing.

These answers came from whoever first published the pattern, kept word for word.