Skip to the patterns
Crochet·Rituals
Menu

Amigurumi 18 Laid out for paper No account, no download

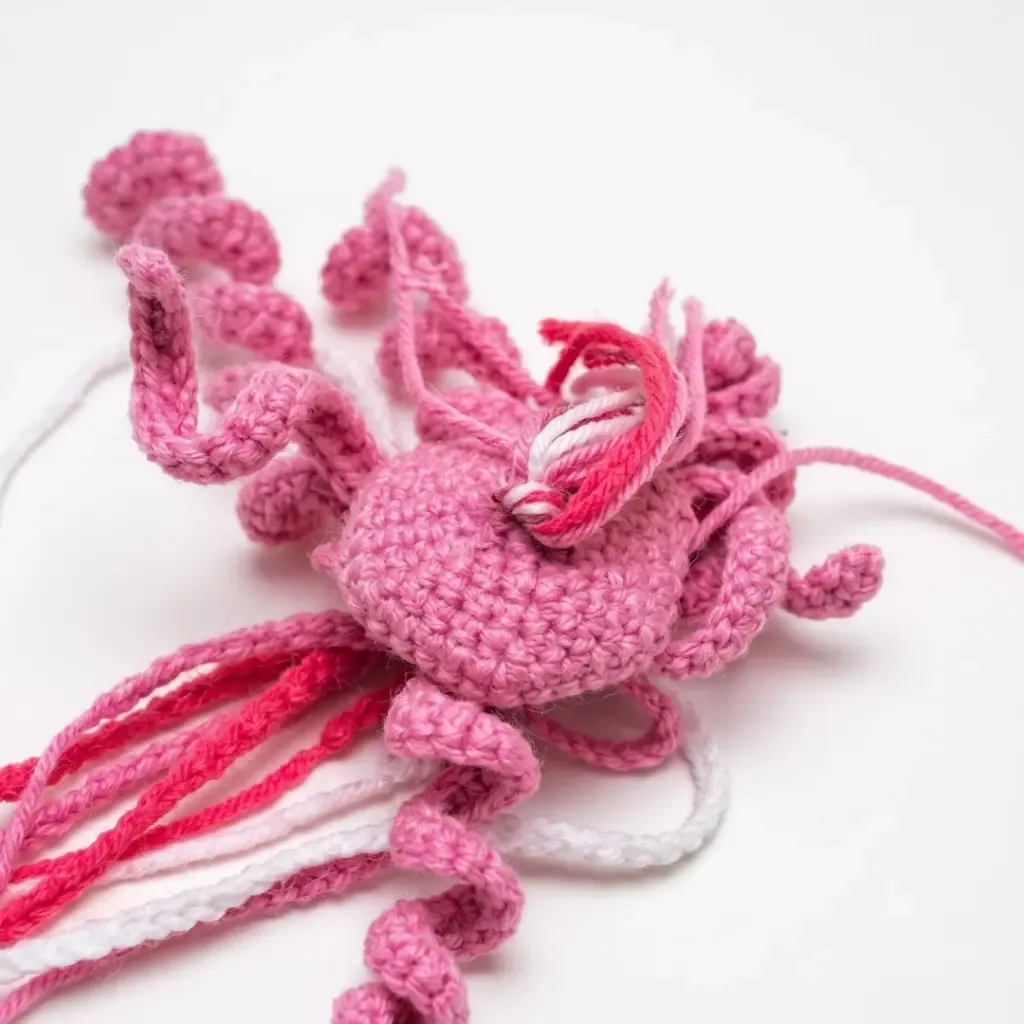
Jellyfish amigurumi with curly tentacles and a domed cap

Spiral-worked jellyfish amigurumi: 6-round disc, curly tentacles, 1.75 mm hook.

Jump to the rounds Pin it
Jellyfish amigurumi with curly tentacles and a domed cap
Amigurumi · Sport / DK
Skill
Intermediate
Time
3-5 hours
Yarn weight
Sport / DK
Hook
1.75 mm
Rounds
18

Intermediate

What the pattern's own author called it. Nothing here is graded again.

Sport / DK

What the sample was worked in. Any weight works; the size moves with it.

18

Each one is typed out whole and gets its own line.

This jellyfish amigurumi builds from a flat spiral disc worked in continuous rounds, then grows tentacles anchored directly into a marked stitch left from Round 2, before joining to a domed upper cap that closes the body with a rippling shell-stitch edging. Finished size is about 19 cm from cap to tentacle tip, and the pattern is rated easy — a great first amigurumi project or a quick, meditative make for experienced crafters. Have YarnArt Jeans in one main color and two accent colors wound and ready, along with a US steel 4 / 1.75 mm hook, polyester fiberfill, two 7 mm cabochon eyes, and a stitch marker to hold your place through the tentacle join. Keep your stitches close enough that no fiberfill shows through the fabric.

Common mistakes and their fixes

Losing count in the spiral rounds
Since neither the Disc nor the Cap is joined at the round's end, move a stitch marker up at the start of every round instead of relying on a seam to count from.
Marking the wrong stitch on the Disc
Place the marker precisely in the last stitch of Round 2, not before or after, since every tentacle anchors from that exact point.
Working the tentacle chains too loosely
Keep the foundation chain and the following single crochet row snug; the repeated increase pattern only curls properly when the fabric holds its shape.
Clustering tentacle lengths
Vary tentacle length deliberately — alternate short, medium, and long tentacles as you work around the base rather than clustering similar lengths together, so the jellyfish looks balanced and full from every angle.
Rushing the joining round
The shell-stitch joining round (Rnd 17) works through two layers at once — go slowly, make sure your hook catches both loops of both pieces on every stitch, and keep your tension slightly looser than usual so the ruffle fans out properly.
Fighting the yarn-chain threading
Threading the yarn-chain tentacles through the MR center is easier with a large-eye blunt needle: fold the chain end in half, thread the fold through the needle eye, pull it through the MR, then pass the tail through the loop and pull tight before knotting.

The materials list

Yarn

  1. YarnArt Jeans (55% cotton, 45% polyacrylic, 50 g / 160 m — Sport/Light DK weight) in 1 main color and 2 accent colors

Hook

  1. US Steel 4 / 1.75 mm

Stuffing

  1. Polyester fiberfill

Eyes

  1. 2 half-dome cabochon eyes, 7 mm diameter

Adhesive

  1. Craft glue suitable for bonding plastic to fabric
  2. Yarn needle / tapestry needle
  3. Scissors
  4. Stitch marker
  5. Hanging loop / keychain ring (optional, for bag charm use)

Listed by the pattern's own author, in their words.

Key to this pattern, 9 short forms

Lower Disc

Round 1

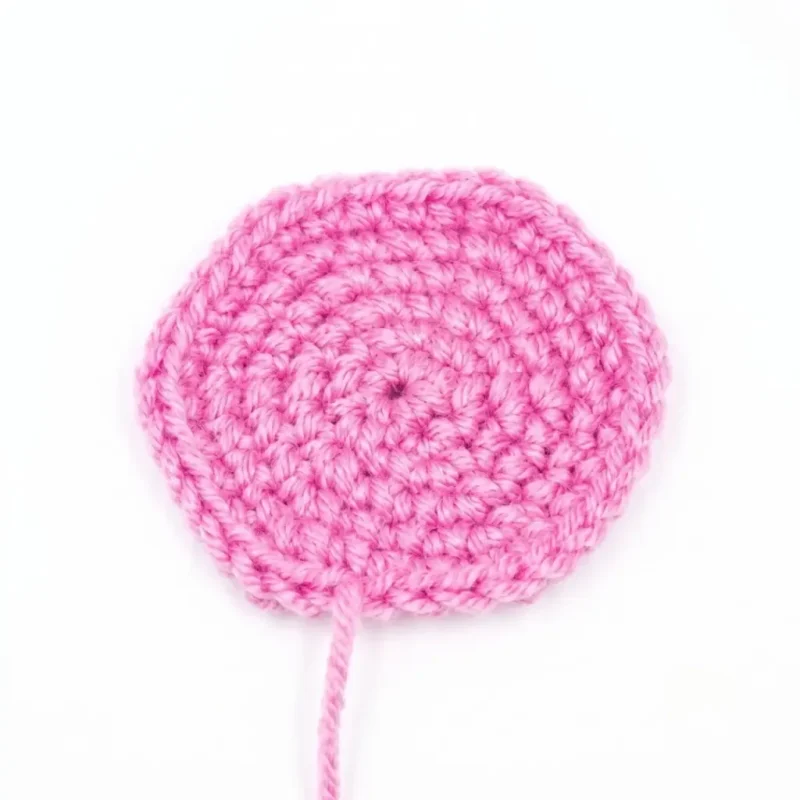
6 sc in MR. (6)

Round 2

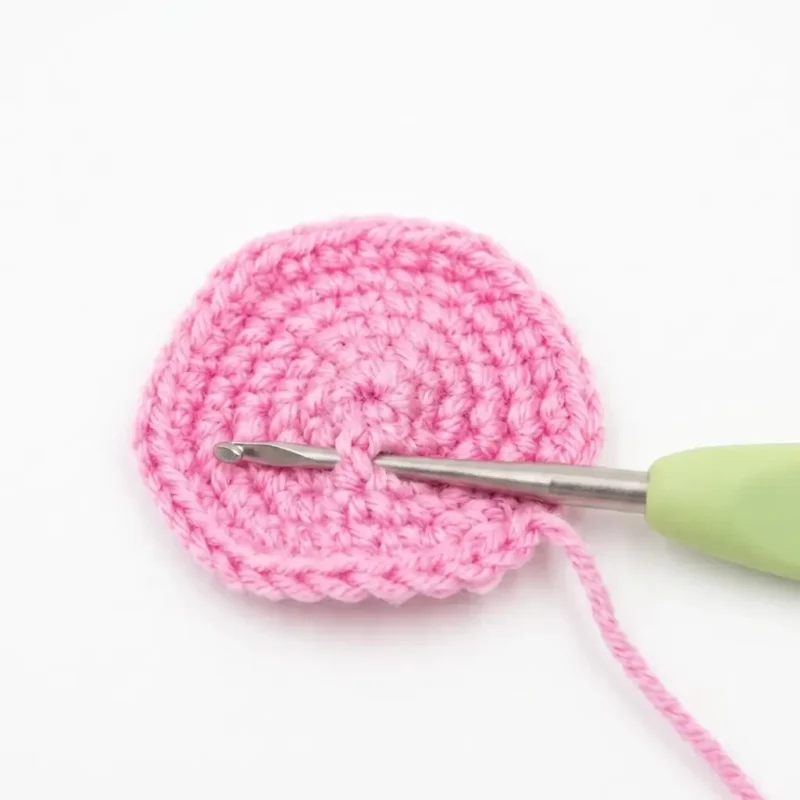
inc in each st around. (12)Place a stitch marker in the last stitch of Rnd 2. Tentacle attachment begins here.

Round 3

1 sc, inc repeat 6 times. (18)

Round 4

2 sc, inc repeat 6 times. (24)

Round 5

3 sc, inc repeat 6 times. (30)

Round 6

4 sc, inc repeat 6 times. (36)

Tentacles

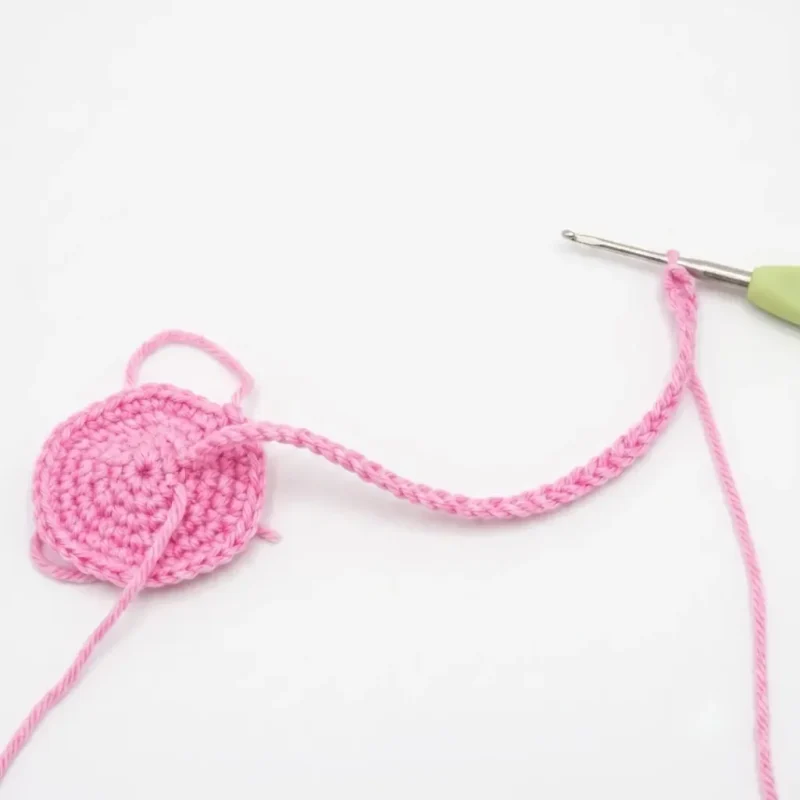
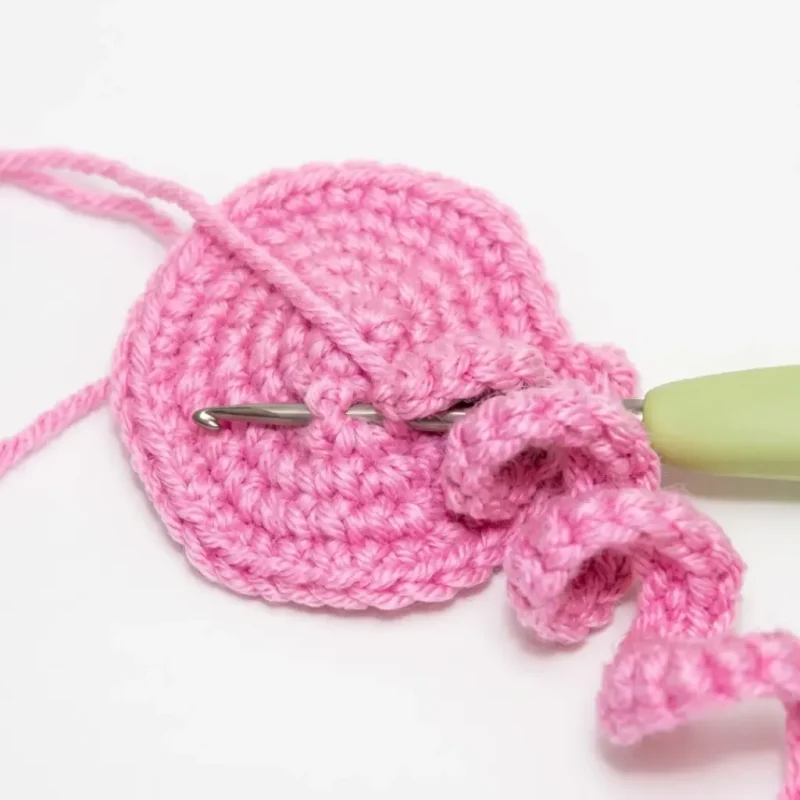
Tentacles are worked directly onto the Lower Disc, starting at the marked last stitch of Rnd 2. Insert your hook into that marked stitch and the adjacent stitch to anchor the working yarn.

Tentacle 1 — Curly Long Tentacle Join yarn. Ch 41 (40 foundation ch + 1 turning ch).

Working back along the chain: 1 sc, inc repeat 20 times. (40 sts worked into 40 ch)

Insert hook into the next 2 sts on the Lower Disc base, work 1 sc to anchor. (Moves along 2 base sts)

Tentacle 2 — Medium Tentacle Ch 28 (27 foundation ch + 1 turning ch).

Work 27 sc along the chain. (27)

Insert hook into the next 2 sts on the Lower Disc base, work 1 sc to anchor.

Tentacle 3 — Extra Long Tentacle Ch 51 (50 foundation ch + 1 turning ch).

Work 2 sc in each ch across. (100)

Insert hook into the next 2 sts on the Lower Disc base, work 1 sc to anchor.

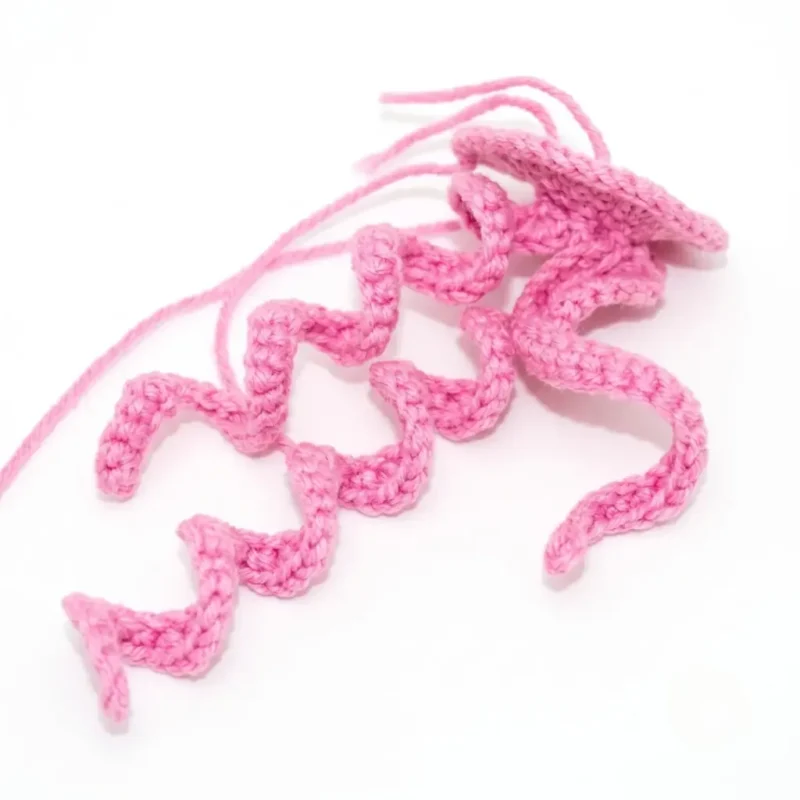
Repeat the tentacle sequence to create 3 more tentacles (6 tentacles total from the crocheted base). Freely adjust the number of foundation chains on each one — adding or subtracting chains — so that each tentacle differs in length. This natural variation gives the jellyfish its playful, flowing look.

Yarn-chain accent tentacles

Using all 3 yarn colors, make 9 simple ch cords (3 per color). Vary the length of each cord freely between 25 ch and 50 ch.

Thread the tail ends of each cord through the center of the Lower Disc’s MR opening.

On the wrong side, tie each cord end with 2–3 knots to secure.

Upper Cap

The design is built in two separate pieces — a domed Upper Cap and a flat Lower Disc — that come together at the final round with a rippling shell-stitch edging that mimics the ruffled bell of a real jellyfish. The Upper Cap is worked in continuous spiral rounds: increases build the dome, a straight section forms the sides, then decreases begin closing it before joining to the Disc.

Round 1

6 sc in MR. (6)

Round 2

inc in each st around. (12)

Round 3

1 sc, inc repeat 6 times. (18)

Round 4

2 sc, inc repeat 6 times. (24)

Round 5

3 sc, inc repeat 6 times. (30)

Round 6

4 sc, inc repeat 6 times. (36)

Round 7

5 sc, inc repeat 6 times. (42)

Round 8

6 sc, inc repeat 6 times. (48)

Rounds 9–14

sc in each st around. (48)

Round 15

6 sc, dec repeat 6 times. (42)

Round 16

5 sc, dec repeat 6 times. (36)Do not fasten off. Stuff the Upper Cap firmly with fiberfill now, before joining. Hold the Lower Disc against the opening, wrong sides together, aligning the 36 sts of each piece.

Round 17

Joining Round Insert your hook through the corresponding stitch of both the Upper Cap and the Lower Disc simultaneously for every stitch of this round. Work the following pattern around: 1 sc, skip 1 base st, 5 dc in the next sc, skip 1 base st — repeat to end of round, sl st to join. (Ruffled shell edging)

Assembly, in order

Step 1After Rnd 17, fasten off and weave in all yarn ends from the Cap and Disc, including the joining tail.
Step 2Thread a yarn needle onto the long starting tail from the Lower Disc’s MR. Insert the needle down through the center of the Upper Cap and pull gently to create a subtle dimple between the two pieces — this gives the jellyfish its characteristic slight waist. Knot to secure internally and weave in the end.
Step 3If adding a hanging loop or keychain ring, form a small loop from a length of yarn at the top center of the Upper Cap and secure it firmly with several passes of the yarn needle before weaving in the tail.
Step 4Apply a small amount of craft glue to the flat back of each 7 mm half-dome eye. Position both eyes on the front of the Upper Cap, centered and symmetrical, approximately at the level of Rnd 12–13. Press firmly and allow to dry completely before handling.
Step 5Trim any uneven ends on the tentacle tips for a clean finish.
Step 6Optional: Lightly blush the cheeks using dry chalk pastel or fabric blush for a rosy, cheerful expression.

Check these before you start

  • Keep to the US steel 4 / 1.75 mm hook and size down if your stitches look loose; the fabric needs to stay tight enough that no fiberfill shows through.
  • The stitch marker placed at the end of Round 2 is structural, not optional; it fixes the exact point where tentacle attachment begins.
  • Both the Lower Disc and Upper Cap are worked in continuous spiral with no join or chain-up, so track rounds with the marker rather than by counting seams.
  • Stuff the Upper Cap firmly enough to hold its dome shape; the Lower Disc is not stuffed.
  • The half-dome eyes are glued onto the Upper Cap rather than inserted as safety eyes. Glue them in place after assembly and allow full drying time before gifting.

On one line

Rounds18
Parts3
LevelIntermediate
Time3-5 hours
Hook1.75 mm
YarnSport / DK

Set-up

  • Wind all three yarn colors before starting, since the Lower Disc, tentacles, and Upper Cap all draw from the same balls without a natural break.
  • Read through Round 2 of the Lower Disc before casting on, since the last stitch of that round is where every tentacle attaches.
  • Work a quick swatch in single crochet to confirm your fabric is dense enough to hide fiberfill before committing to six rounds.
  • Set the stitch marker aside where you can reach it, since it needs to go into the last stitch of Round 2 the moment you finish it.

Finishing

  1. Fasten off after Round 17 and weave in all ends from the Upper Cap and Lower Disc, including the tail left from joining the two pieces.
  2. Stuff the body firmly before closing, checking that the fiberfill stays hidden behind the fabric rather than pressing through it.
  3. Thread the long starting tail from the Lower Disc's magic ring through the center of the Upper Cap, pull gently to form the waist dimple, then knot internally and weave in the end.

Construction

Rounds 1 through 4 of the Lower Disc double the stitch count in even steps (6, 12, 18, 24), the standard spaced-increase shaping that keeps a spiral disc flat rather than cupping.

Tentacles are worked flat from long foundation chains rather than in the round; Tentacle 1's 41-chain start worked back with a repeated increase produces one longer edge than the other, which is what makes the strand curl.

Time per section

Lower Discabout 20-30 minutes, because it is only 6 rounds with fast early increases
Tentaclesabout 1-1.5 hours, because each tentacle starts from its own long foundation chain worked flat with a repeated increase
Upper Cap and Assemblyabout 1-1.5 hours, because the round count climbs to 17 total before the waist dimple and eye attachment

Photographs of this one

Every one was taken by whoever published the pattern, in the order the source listed them.
Jellyfish amigurumi with curly tentacles and a domed cap — photo 2
Jellyfish amigurumi with curly tentacles and a domed cap — photo 3
Jellyfish amigurumi with curly tentacles and a domed cap — photo 4
Jellyfish amigurumi with curly tentacles and a domed cap — photo 5
Jellyfish amigurumi with curly tentacles and a domed cap — photo 6

Common questions

Can I use a different yarn for this jellyfish pattern?
Yes — any Sport or Light DK weight yarn with a smooth texture will give you a similar result. A cotton or cotton-blend yarn is ideal because it holds a firm stitch definition that keeps the dome shape crisp. Avoid fuzzy or bouclé yarns, as they will obscure the stitch detail on the shell-stitch edging and make the tentacle curls harder to see.
How do I make the curly tentacles actually curl?
The curl happens naturally when you crochet more stitches into a chain than there are chain stitches — working increases along the chain forces it to spiral. For Tentacle 1, you're working 40 stitches into a 40-chain base, with an increase in every other stitch, which produces a tight spiral. For Tentacle 3, working 2 sc into every chain doubles the stitch count and creates an even denser curl.
What actually creates the waist between the disc and the cap?
The long tail left from the Lower Disc's magic ring gets threaded through the center of the Upper Cap and pulled gently before being knotted off inside. That single pull is what pinches the two pieces into a jellyfish silhouette rather than leaving a plain rounded shape.

These answers came from whoever first published the pattern, kept word for word.