Skip to the patterns
Crochet·Rituals
Menu

Accessories 11 Laid out for paper No account, no download

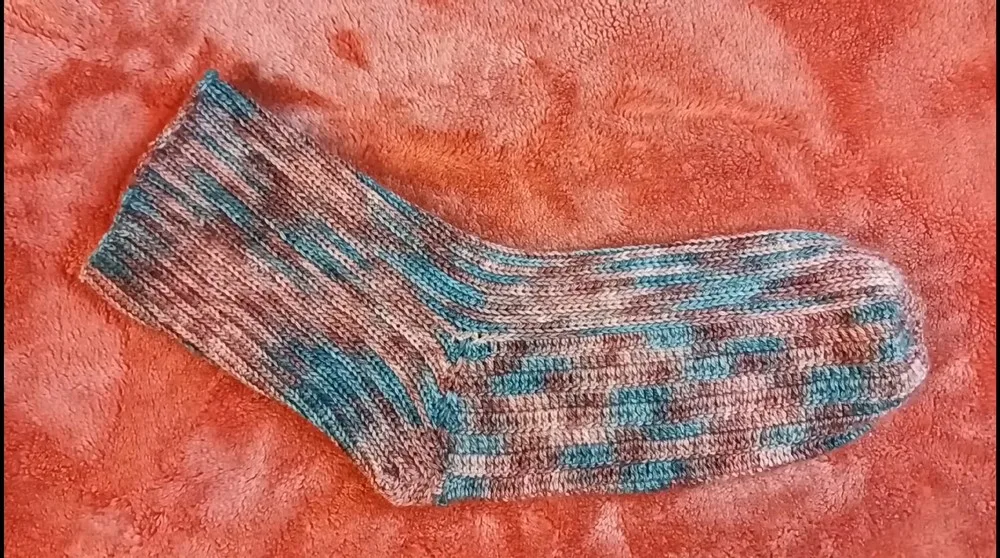
Crochet stretchy socks with a flat panel and gusset

Flat-worked hdc socks with a gusset heel. 2.75mm hook, fingering weight, 11 rounds total.

Jump to the rounds Pin it
Crochet stretchy socks with a flat panel and gusset
Accessories · Fingering
Skill
Intermediate
Time
4-6 hours
Yarn weight
Fingering
Hook
2.75 mm
Rounds
11

Intermediate

What the pattern's own author called it. Nothing here is graded again.

Fingering

What the sample was worked in. Any weight works; the size moves with it.

11

Each one is typed out whole and gets its own line.

This sock is built as a flat rectangle first, then shaped into a foot through a gusset section and a seamed closure. You work the leg back and forth in hdc, hitting the back bar of each stitch to keep the fabric elastic, then move into a gusset panel that swaps to double crochet before increasing back down to hdc for the cuff shape. Have your fingering weight yarn, a 2.75 mm hook, stitch markers, and a yarn needle within reach before you chain your first 103 stitches.

Common mistakes and their fixes

Skipping the back bar on the leg
If Row 2 of the leg is worked into the top loops instead of the back bar, the fabric loses its stretch. Rip back and re-work into the back bar so the sock can flex around the ankle.
Seaming the wrong direction
The side seam is worked right to left; seaming left to right will twist the sock body. Check the direction against the first few stitches before committing to the whole seam.

The materials list

  1. Fingering weight yarn (enough to make socks)
  2. 2.75 mm C hook
  3. Stitch markers
  4. Scissors or clippers
  5. Yarn needle or darning needle (optional, if you don't want to slip stitch with the crochet hook)

Listed by the pattern's own author, in their words.

Key to this pattern, 6 short forms

Leg

Row 1

Chain 103 ch (adjust this number based on your desired sock size); hdc in the 3rd ch from the hook, hdc in each ch to the end of the row. Ch 1, turn.

Row 2

hdc in the back bar of the next st, hdc in each st to the end of the row. Ch 1, turn. Repeat this row until you reach the desired width across the top of your foot (this example used 24 rows).

Gusset

Round 1

Work hdc until you reach the area for the gusset (right around the ankle).

Round 2

Switch to double crochets (dc) for the gusset area; work dc until you reach the desired height for the gusset.

Round 3

Switch back to hdc for the cuff.

Round 4

Work hdc in the first st, inc, hdc in the next 2 sts, inc, repeat this pattern across the row.

Round 5

Work hdc in each st for the next row. Repeat the increase pattern and the plain row until the gusset is wide enough.

Cuff

Round 1

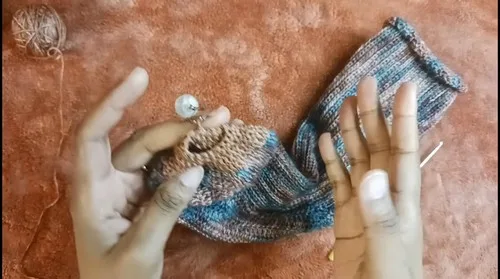
Reattach the yarn at the bottom of the cuff; work hdc around the cuff in a u-shape, decreasing at the joint.

Round 2

Sl st the last st to the first st.Weave in the tail.

Toe

Round 1

Reattach the yarn at the toe; work 1 sc in each st around the toe. Ch 1, turn.

Round 2

Work sc in each st, dec in the 5th st. Repeat this decrease pattern until there are just a few sts left.

Assembly, in order

Step 1Detach yarn, reattach on opposite side: cut the yarn, leaving a tail; reattach the yarn in the first st of the opposite side; mirror the pattern you worked on the first side.
Step 2Seam the sides together: sl st the two sides together, working from right to left.
Step 3Weave in the tail.
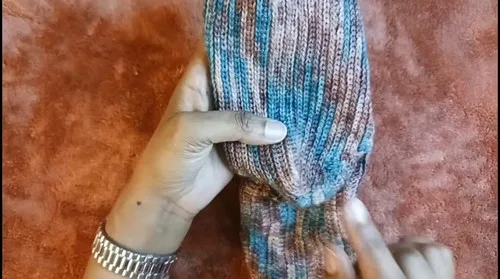
Step 4Turn the sock inside out.
Step 5Seam the remaining sts closed.
Step 6Weave in the tail.

Check these before you start

  • Working into the back bar of each stitch on Row 2 of the leg is what gives the fabric its stretch, so do not substitute a regular top-loop hdc there.
  • Tension matters more here than in a flat swatch project, since a too-tight hdc will fight the sock's stretch when you pull it on.

On one line

Rounds11
Parts4
LevelIntermediate
Time4-6 hours
Hook2.75 mm
YarnFingering

Set-up

  • Confirm you have enough fingering weight yarn on hand for a full pair, not just one sock, before you chain 103.
  • Work a small swatch in hdc through the back bar to check that your fabric has enough stretch for a sock leg.
  • Read through the gusset rounds once before starting them, since the stitch pattern shifts from hdc to dc and back within five rounds.
  • Set a stitch marker at the point where the ankle area begins so you know exactly where to start the gusset.

Finishing

  1. Cut the yarn after the first side, leaving a tail, then reattach on the opposite side and mirror every round you already worked.
  2. Seam the two sides together working right to left, then turn the sock inside out and seam the remaining stitches closed at the toe.
  3. Weave in all three tails and check the gusset seam sits flat before turning the sock right side out again.

Construction

The increases in Gusset Round 4 are spaced as inc, hdc 2, inc, repeated across the row, which pushes the extra width evenly across the gusset panel rather than at a single point.

The leg is worked flat in rows rather than in the round, which is why the pattern later calls for a full side seam and a separate toe seam to close the tube.

Time per section

Legabout 30-40 minutes, because it is only 2 rows plus the repeated back-bar rows to reach the desired foot width
Gussetabout 1-1.5 hours, because it carries 5 rounds with two stitch-height changes and a repeated increase pattern
Cuff, seaming, and toe closureabout 1-1.5 hours, because it involves reattaching yarn twice, mirroring the first side, and three separate seams

Photographs of this one

Every one was taken by whoever published the pattern, in the order the source listed them.
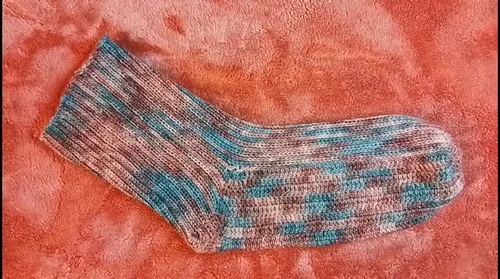
Crochet stretchy socks with a flat panel and gusset — photo 2
Crochet stretchy socks with a flat panel and gusset — photo 3
Crochet stretchy socks with a flat panel and gusset — photo 4
Crochet stretchy socks with a flat panel and gusset — photo 5

Common questions

Why does the leg use the back bar of the stitch instead of the regular top loops?
Working into the back bar leaves a horizontal bar of yarn free on the front of each stitch, and that bar is what gives the finished fabric its stretch. Without it, the sock leg would sit stiff instead of flexing around the ankle.
Can the chain-103 be adjusted for a different foot size?
Yes, the pattern itself notes the chain count should be adjusted for your desired sock size. Work a swatch first so you know how many stitches per inch to plan around before changing the number.

These answers came from whoever first published the pattern, kept word for word.