Skip to the patterns
Crochet·Rituals
Menu

Blankets 6 Laid out for paper No account, no download

Daisy granny square blanket crochet pattern

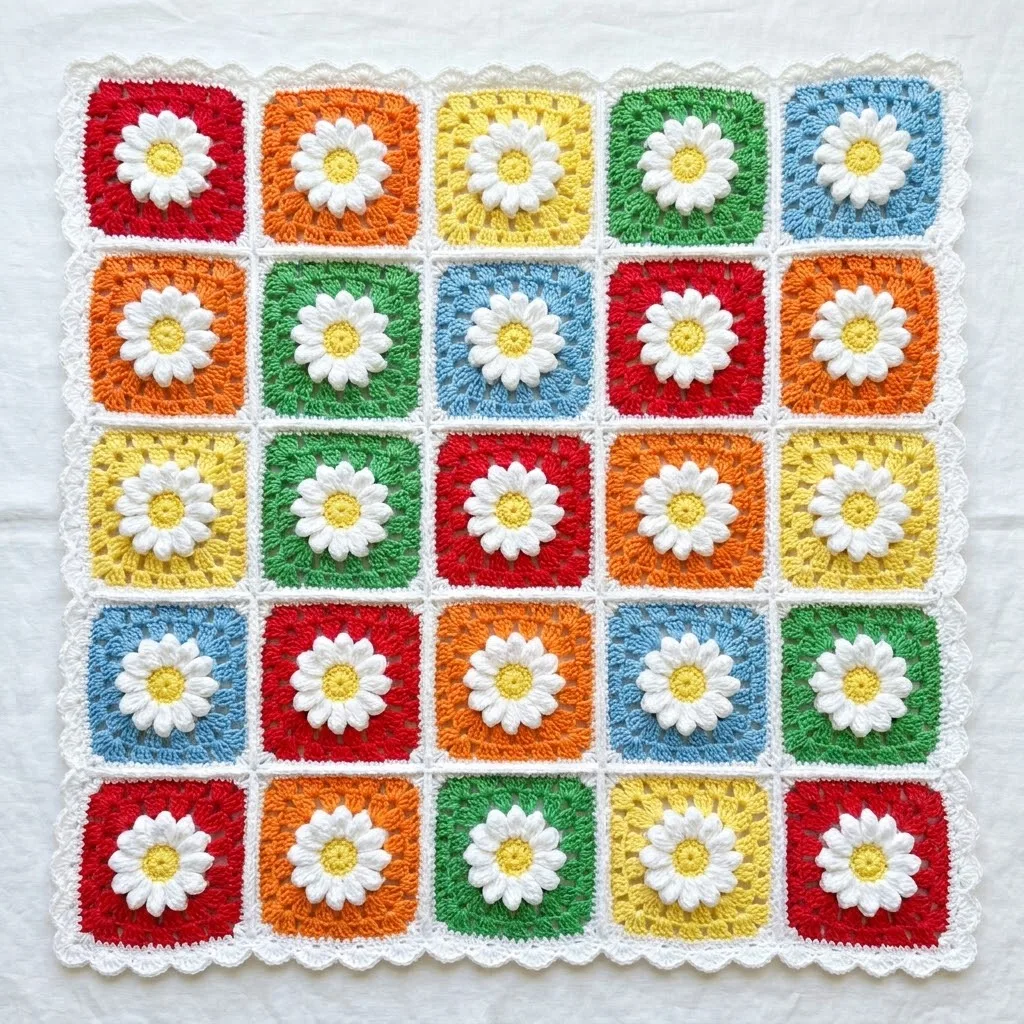
25 daisy granny squares, 6 rounds each, 4.0mm hook. Join with whip stitch, finish with a single crochet border.

Jump to the rounds Pin it
Daisy granny square blanket crochet pattern
Blankets · Worsted
Skill
Intermediate
Time
4-6 hours
Yarn weight
Worsted
Hook
4.0 mm
Rounds
6

Intermediate

What the pattern's own author called it. Nothing here is graded again.

Worsted

What the sample was worked in. Any weight works; the size moves with it.

6

Each one is typed out whole and gets its own line.

This blanket is built from 25 identical daisy granny squares, each worked in six rounds from a magic ring outward: a yellow center, six petal loops layered into full petals, then rounds of half double and double crochet that square off the motif in your choice of red, orange, yellow, green, or blue. Squares finish at roughly 4 inches and join in a 5 by 5 grid with white whip stitching before a white single crochet border ties the whole piece to about 22 inches square. Have your 4.0mm hook, seven colors of worsted weight yarn, and a yarn needle ready before you begin.

Common mistakes and their fixes

Miscounting dc in Round 1
Count to 12 dc total, including the starting ch-3, before joining with a slip stitch. Recount before you fasten off yellow, since fixing this after Round 2 is much harder.
Working into the wrong loop in Round 3
Each petal goes into a chain-5 loop, not into a stitch. Slip stitch into the loop first, then work all seven stitches of the petal into that same space.
Pulling Round 4 stitches too tight over the petals
Since Round 4 works behind the petals into Round 2's sc stitches, keep those dc stitches relaxed so the petals stay raised rather than pulled flat against the square.

The materials list

Yarn

  1. Worsted weight yarn, Category 4, in the following colors:
  2. Yellow (for daisy centers): approximately 50 grams
  3. White (for daisy petals and border): approximately 200 grams
  4. The blanket shown appears to use a smooth acrylic or cotton blend yarn with good stitch definition. I recommend 100% cotton or a cotton acrylic blend for best results. The petals need to hold their shape, and cotton provides that lovely crispness.

Red

  1. approximately 75 grams

Orange

  1. approximately 75 grams

Yellow background

  1. approximately 75 grams

Green

  1. approximately 75 grams

Blue

  1. approximately 75 grams

Hook

  1. 4.0mm (G/6) crochet hook, or size needed to achieve gauge

Notions

  1. Yarn needle for weaving ends
  2. Scissors
  3. Stitch markers (optional but helpful)
  4. Blocking mats and pins

Listed by the pattern's own author, in their words.

Key to this pattern, 7 short forms

Daisy Granny Square

With yellow yarn and your 4.0mm hook, create a magic ring (also called a magic circle or adjustable ring).

Round 1

Ch 3 (counts as first dc), work 11 dc into the magic ring. Sl st to top of ch-3 to join. Pull magic ring closed. (12 dc total)Fasten off yellow. Weave in the short tail now while the center is easy to access.Join white yarn with a sl st to any dc from Round 1.

Round 2

Ch 1, sc in same st. *Ch 5, skip next st, sc in next st.* Repeat from * to * around. You will create 6 chain-5 loops total. End with ch 5, sl st to first sc to join. (6 ch-5 loops)These loops form the base for your petals. Do not fasten off; continue directly into Round 3.

Round 3

Sl st into the first ch-5 loop. Into the same loop, work: (sc, hdc, dc, tr, dc, hdc, sc). This creates one petal. *Into the next ch-5 loop, work: (sc, hdc, dc, tr, dc, hdc, sc).* Repeat from * to * in each remaining ch-5 loop. Sl st to first sc to join. (6 petals total)

Your daisy is now complete! The petals should fan out beautifully around the yellow center. If they look cramped, try using a slightly larger hook for the petal round only.

Fasten off white after Round 3. Leave a tail for weaving.

Here is where the magic happens: we need to work behind the petals to connect the background color, which is easier than it sounds. Join your background color (red, orange, yellow, green, or blue) with a sl st to any sc from Round 2. You will need to gently fold the petals forward to access those stitches underneath.

Round 4

Ch 3 (counts as first dc). Working behind the petals, dc in the same sc from Round 2. *Ch 2, work 2 dc in next sc from Round 2.* Repeat from * to * around. Ch 2, sl st to top of ch-3 to join. (12 dc in 6 groups of 2, with 6 ch-2 spaces)

The daisy petals will naturally pop forward while the background stitches sit behind them. This creates that lovely three-dimensional effect.

Round 5

Sl st across to the first ch-2 space. Ch 3 (counts as first dc), 2 dc in same space, ch 1, 3 dc in same space. This creates your first corner. *Ch 1, (3 dc, ch 2, 3 dc) in next ch-2 space for the next corner.* Repeat from * to * twice more. You now have 4 corners. Ch 1, sl st to top of ch-3 to join. (4 corner groups plus 4 ch-1 spaces)

Do you see how the square shape is forming? The ch-2 spaces at the corners allow the work to turn 90 degrees.

Round 6

Sl st to corner ch-2 space. Ch 3, 2 dc in same space, ch 2, 3 dc in same space. *Ch 1, 3 dc in next ch-1 space. Ch 1, (3 dc, ch 2, 3 dc) in corner ch-2 space.* Repeat from * to * around, ending with ch 1, 3 dc in last ch-1 space, ch 1, sl st to top of ch-3 to join. (4 corners plus 8 side clusters)Fasten off after Round 6. Weave in ends. Your daisy granny square is complete — make 24 more in your chosen color rotation.

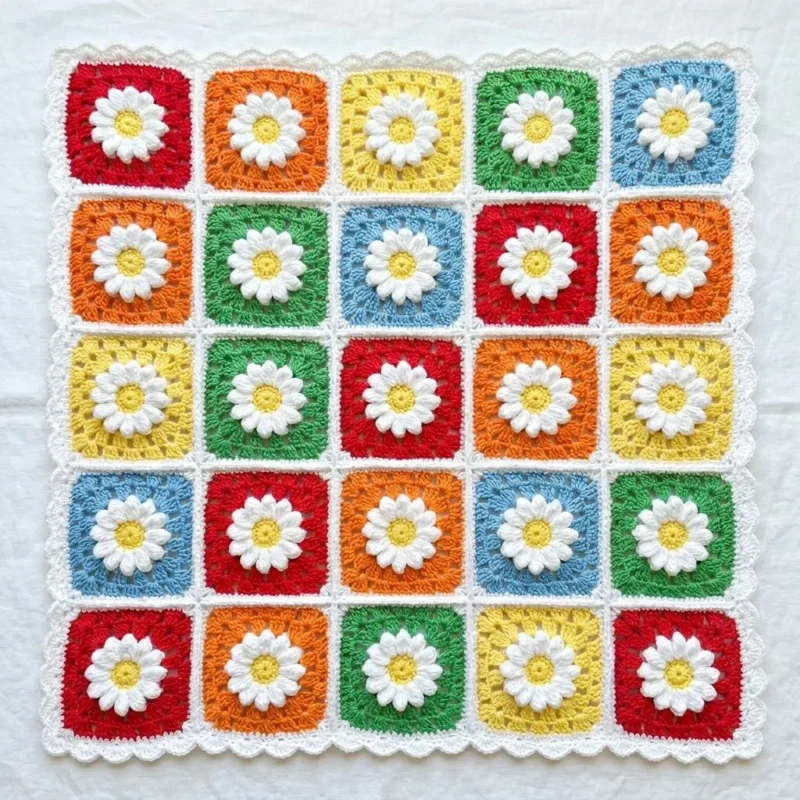
Suggested color distribution for 25 squares: 5 squares with red background, 5 squares with orange background, 5 squares with yellow background, 5 squares with green background, 5 squares with blue background. Arrange them so no two squares of the same color touch.

Assembly, in order

Step 1Lay out all your squares before joining to find an arrangement you love.
Step 2Whip Stitch Method: Hold two squares with wrong sides together (right sides facing out).
Step 3Thread white yarn on your yarn needle.
Step 4Working through back loops only, whip stitch along one edge.
Step 5Continue joining squares into rows first, then join the rows together.
Step 6Border Round 1: Join white yarn at any corner. Ch 1, work sc evenly around entire blanket, placing 3 sc in each corner. Sl st to first sc to join.
Step 7Border Round 2: Ch 1, sc in first st. *Skip 2 sts, work 5 dc in next st (this creates the scallop), skip 2 sts, sc in next st.* Repeat from * to * around, adjusting slightly at corners to keep edges flat. Sl st to first sc to join.
Step 8Fasten off. Weave in all remaining ends.
Step 9Blocking: Wet your blanket thoroughly, gently squeeze out excess water (do not wring!), and lay flat on blocking mats. Pin the edges to keep them straight and the corners square. Allow to dry completely.

Check these before you start

  • Pull the magic ring closed firmly at the end of Round 1 before joining, or the yellow center will show a visible gap once the petals are added in Round 3.
  • Keep tension even across the ch-5 loops in Round 2, since Round 3 builds each petal directly into these loops and uneven loops make lopsided petals.
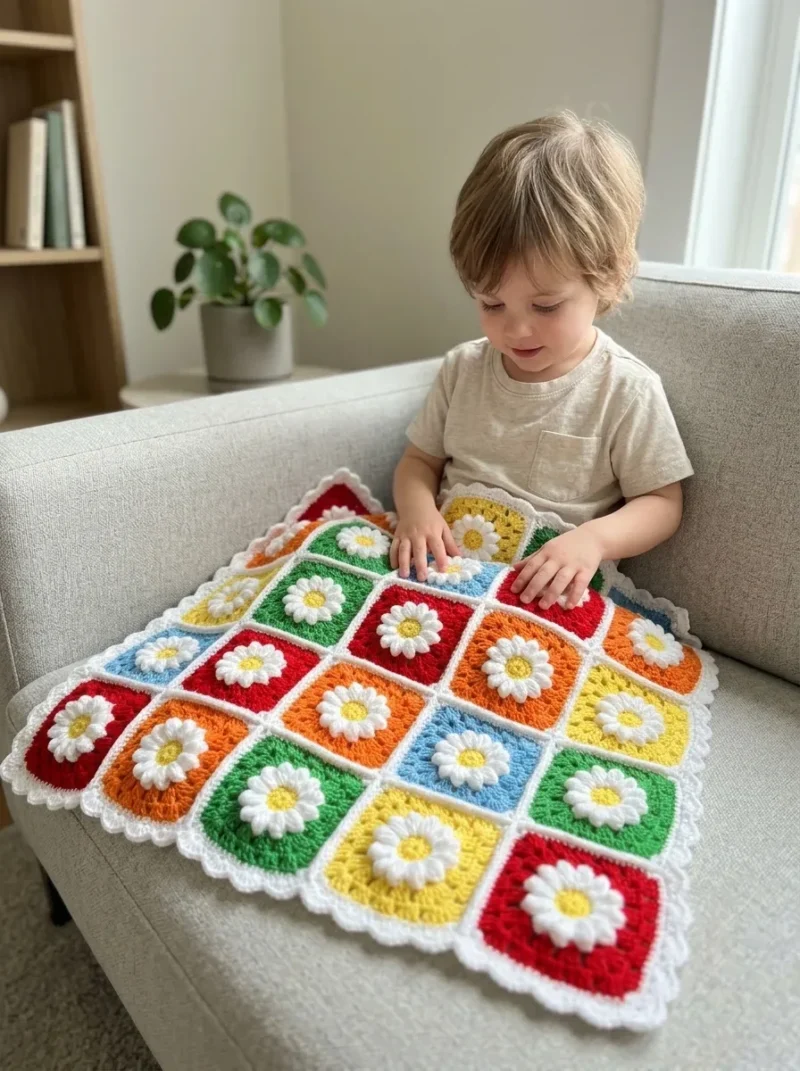
  • The pictured version uses 25 squares arranged in a 5 by 5 grid, but you could easily make 16 squares for a baby blanket or 49 squares for a generous throw.
  • Gauge: Each finished square measures approximately 4 inches by 4 inches (10cm by 10cm) after blocking.
  • Finished Blanket Size: Approximately 22 inches by 22 inches (56cm by 56cm) including border.
  • Gauge matters for this project because you want all your squares to match. If your squares come out different sizes, your blanket will look wonky when joined. Make one square first and measure it. Adjust your hook size up or down as needed.
  • Skill Level: Intermediate beginner. You should be comfortable with basic crochet stitches and working in the round. The daisy petals use a technique that might be new to you, but it is explained step by step.
  • Count your stitches after each round.

On one line

Rounds6
LevelIntermediate
Time4-6 hours
Hook4.0 mm
YarnWorsted

Set-up

  • Confirm you have all seven yarn colors on hand — yellow, white, red, orange, yellow background, green, and blue — since each square draws from multiple skeins.
  • Work one square first and block it to check that it measures close to 4 inches by 4 inches before committing to all 25.
  • Read Round 3 before you start it: each petal is built entirely inside one chain-5 loop, so you need to see how the stitch counts stack there.
  • Set aside stitch markers for Round 1, since counting 12 dc into a magic ring without one is where most miscounts happen.

Finishing

  1. Weave in the yellow tail after Round 1 while the center is still open and easy to reach, then weave in remaining ends on each square as you finish it rather than saving all 25 for the end.
  2. Block each square individually to the 4-inch target before joining, so every square in the grid matches before assembly begins.
  3. Whip stitch squares into rows through back loops with white yarn, then join the completed rows together before working the white single crochet border around the full blanket.

Construction

The petals in Round 3 are worked directly into the six chain-5 loops from Round 2, so each petal's height comes from the sc-hdc-dc-tr-dc-hdc-sc sequence rather than from any increase round.

Round 4 works behind the petals rather than into them, anchoring back into the Round 2 sc stitches so the petals stand forward in relief instead of getting flattened into the square's later rounds.

Time per section

One daisy granny squareabout 20-25 minutes because it runs six rounds with a color change and a petal round that needs careful loop placement
All 25 squaresabout 8-10 hours because each square repeats the same six rounds and benefits from blocking before assembly
Joining and borderabout 2-3 hours because whip stitching 25 squares into rows, then rows together, precedes a full single crochet border with corner increases

Photographs of this one

Every one was taken by whoever published the pattern, in the order the source listed them.
Daisy granny square blanket crochet pattern — photo 2
Daisy granny square blanket crochet pattern — photo 3

Common questions

Can you make a smaller or larger version of this blanket?
Yes. Use 16 squares in a 4 by 4 grid for a baby blanket, or 49 squares for a generous throw. The finished size scales directly with how many 4-inch squares you join.
Why does Round 4 say to work behind the petals?
Round 4 anchors into the sc stitches left over from Round 2, which sit behind the petals added in Round 3. Working there keeps the petals raised instead of trapping them flat under the next round.
What if your square does not measure 4 inches after Round 6?
Adjust your hook size up or down and re-check after blocking, since blocking itself changes the measurement. Make this adjustment before starting all 25 squares, not after.

These answers came from whoever first published the pattern, kept word for word.