
Intermediate
What the pattern's own author called it. Nothing here is graded again.
 Crochet·Rituals
Blankets 19 Laid out for paper No account, no download
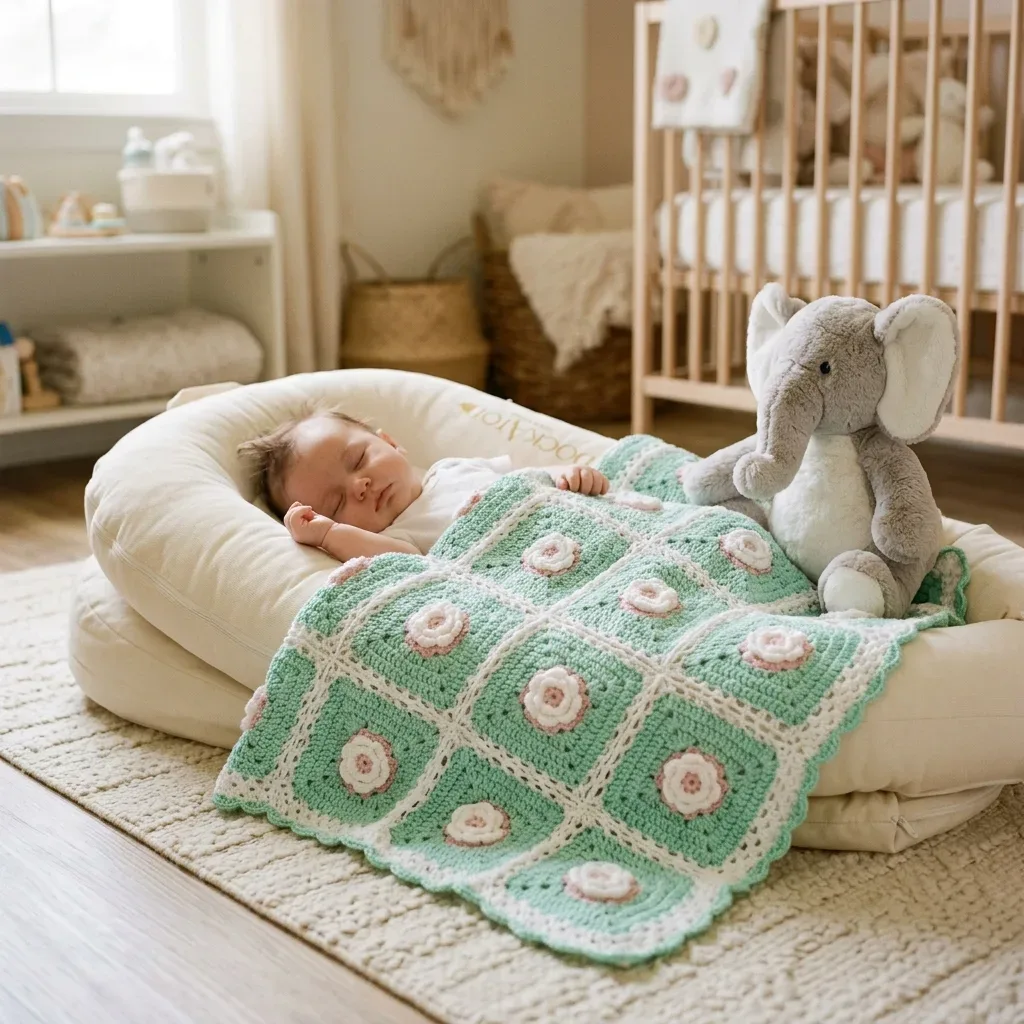
Nine 7.5-inch granny squares, 3D roses, G-6 hook. A mint and cream baby blanket with scalloped edge.
Crochet Rituals · retyped from the source and laid out for print · added 17 Oct 2026
What the pattern's own author called it. Nothing here is graded again.

What the sample was worked in. Any weight works; the size moves with it.

Each one is typed out whole and gets its own line.
This blanket builds from nine mint granny squares with cream border rounds, each topped with a raised rose worked separately and sewn to the center. Construction runs in three phases: squares first, roses second, joining and scalloped edging last. Before picking up a hook, have MC, CA, CB, and CC wound and ready, a G-6 hook on hand, and a tapestry needle for both weaving ends and sewing roses in place. Finished panels measure about 7.5 inches square before assembly, growing to a 24-inch blanket after joining.
Listed by the pattern's own author, in their words.
Key to this pattern, 20 short forms
(RS): Ch 6, sc in second ch from hook, hdc in next ch, dc in next 2 ch, hdc in last ch. Turn.Step by step: With MC, make a magic ring.Ch 3 (counts as first dc), 2 dc into ring, ch 2, [3 dc into ring, ch 2] 3 times. Join with sl st to top of beg ch-3. Pull ring tail to close.Step by step: (4 groups of 3-dc, 4 ch-2 corner spaces).
(WS): Ch 1, working in FLO: sc in first st, hdc in next st, dc in next 2 sts, hdc in next st, sc in last st. Do not turn. Slip stitch back to the base of the petal along the foundation chain.Step by step: Sl st into each of next 2 dc and into corner ch-2 sp.Ch 3 (counts as first dc), 2 dc in same sp, ch 2, 3 dc in same sp (corner made), ch 1, [3 dc in next ch-2 corner sp, ch 2, 3 dc in same sp, ch 1] 3 times. Join with sl st to top of beg ch-3.Step by step: (8 groups of 3-dc).The petals naturally cup and curve because of working in the front loop only. Each rose uses inner petals (starting with ch 5) and outer petals (starting with ch 7).
With CC (white), make a magic ring.
Ch 1, 10 sc into ring. Join with sl st to first sc. (10 sc) Do not fasten off. Continue to Round 2.
Working in FLO of each sc around, [ch 5, sc in second ch from hook, hdc in next ch, dc in next ch, hdc in last ch, sl st into FLO of next sc of center ring] 5 times.Change to CB (blush pink) on final sl st of last inner petal.(5 inner petals worked in CC)
Working now in BLO of each of the original 10 sc from Round 1, join CB if not already attached. Work 2 petals into each BLO sc: [ch 7, sc in second ch from hook, hdc in next ch, dc in next 3 ch, hdc in last ch, sl st into BLO of sc, ch 7, make petal, sl st into same BLO of sc] 5 times.Step by step: Sl st into next 2 dc and into corner ch-2 sp.Ch 3, 2 dc in same sp, ch 2, 3 dc in same sp (corner), ch 1, 3 dc in ch-1 side sp, ch 1, [3 dc in next corner ch-2 sp, ch 2, 3 dc in same sp, ch 1, 3 dc in ch-1 side sp, ch 1] 3 times. Join with sl st to top of beg ch-3.Step by step: (12 groups of 3-dc).(10 outer petals worked in CB)Fasten off CB, leaving a 12-inch tail for sewing.
Work 3 dc, ch 2, 3 dc all into the same stitch or space. One shell made.
Step by step: Sl st into next 2 dc and into corner ch-2 sp.
Ch 3, 2 dc in same sp, ch 2, 3 dc in same sp (corner), [ch 1, 3 dc in next ch-1 sp] 2 times, ch 1, [3 dc in next corner ch-2 sp, ch 2, 3 dc in same sp, (ch 1, 3 dc in next ch-1 sp) 2 times, ch 1] 3 times. Join with sl st to top of beg ch-3.
Step by step: (16 groups of 3-dc).
Step by step: Sl st into next 2 dc and into corner ch-2 sp.
Ch 3, 2 dc in same sp, ch 2, 3 dc in same sp (corner), [ch 1, 3 dc in next ch-1 sp] 3 times, ch 1, [3 dc in next corner ch-2 sp, ch 2, 3 dc in same sp, (ch 1, 3 dc in next ch-1 sp) 3 times, ch 1] 3 times. Join with sl st to top of beg ch-3.
Step by step: (20 groups of 3-dc).
Step by step: Sl st into next 2 dc and into corner ch-2 sp.
Ch 3, 2 dc in same sp, ch 2, 3 dc in same sp (corner), [ch 1, 3 dc in next ch-1 sp] 4 times, ch 1, [3 dc in next corner ch-2 sp, ch 2, 3 dc in same sp, (ch 1, 3 dc in next ch-1 sp) 4 times, ch 1] 3 times. Join with sl st to top of beg ch-3.
Step by step: (24 groups of 3-dc).
Step by step: Change to CA (cream). Sl st into next 2 dc and into corner ch-2 sp.
Ch 3, 2 dc in same sp, ch 2, 3 dc in same sp (corner), [ch 1, 3 dc in next ch-1 sp] 5 times, ch 1, [3 dc in next corner ch-2 sp, ch 2, 3 dc in same sp, (ch 1, 3 dc in next ch-1 sp) 5 times, ch 1] 3 times. Join with sl st to top of beg ch-3. Fasten off CA.
Step by step: (28 groups of 3-dc).
Checkpoint: After Round 7, each square should measure approximately 7 inches by 7 inches before any blocking. If your squares are smaller than 6.5 inches, increase your hook size by half a size. If larger than 7.5 inches, decrease your hook size.
| Rounds | 19 |
|---|---|
| Parts | 5 |
| Level | Intermediate |
| Time | 12-18 hours |
| Hook | 4.0 mm |
| Yarn | DK |
Each granny square's rounds build from a center ring outward with corner ch-2 spaces, which is what lets the piece grow evenly to its 7.5-inch finished size before joining.
The rose center and both petal rings are worked in continuous rounds rather than back and forth, while the petals themselves turn and work flat in rows, so the flower can curve upward off the flat square.
| Nine granny squares | about 7 to 9 hours because each square takes 45 to 60 minutes across its full round count |
|---|---|
| Nine roses | about 3 to 4.5 hours because each rose takes 20 to 30 minutes with its layered petal rounds and front-loop shaping |
| Joining and border | about 2 to 3 hours because nine squares must align before the scalloped edge is worked |
These answers came from whoever first published the pattern, kept word for word.