
Intermediate
What the pattern's own author called it. Nothing here is graded again.
 Crochet·Rituals
Amigurumi 80 Laid out for paper No account, no download
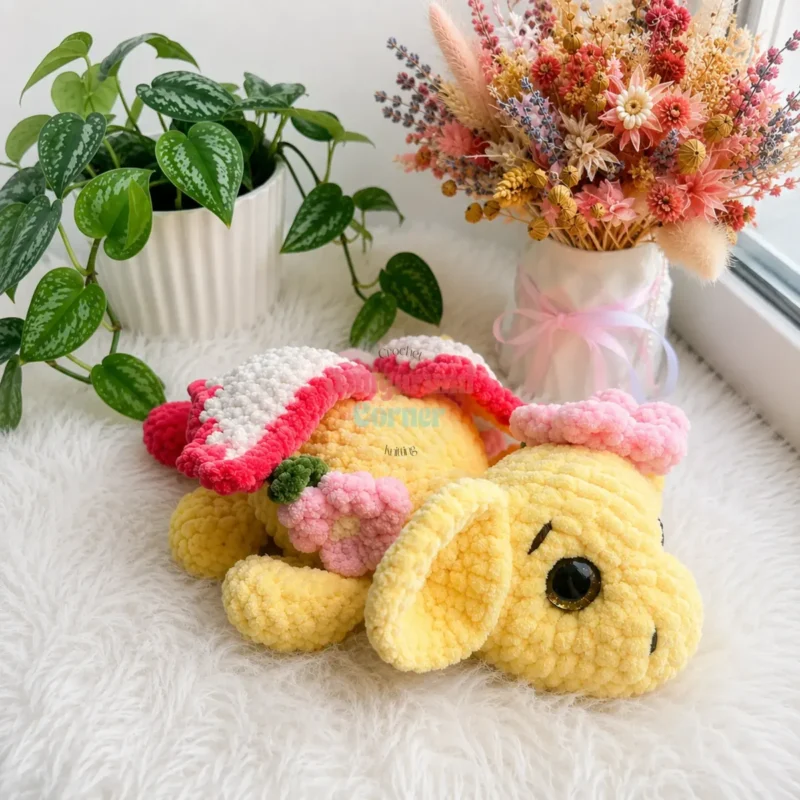
A flower monster amigurumi plush worked in 54 rounds with an E-4 (3.5mm) hook, snout through tail.
Crochet Rituals · retyped from the source and laid out for print · added 1 Oct 2026

What the pattern's own author called it. Nothing here is graded again.

What the sample was worked in. Any weight works; the size moves with it.

Each one is typed out whole and gets its own line.
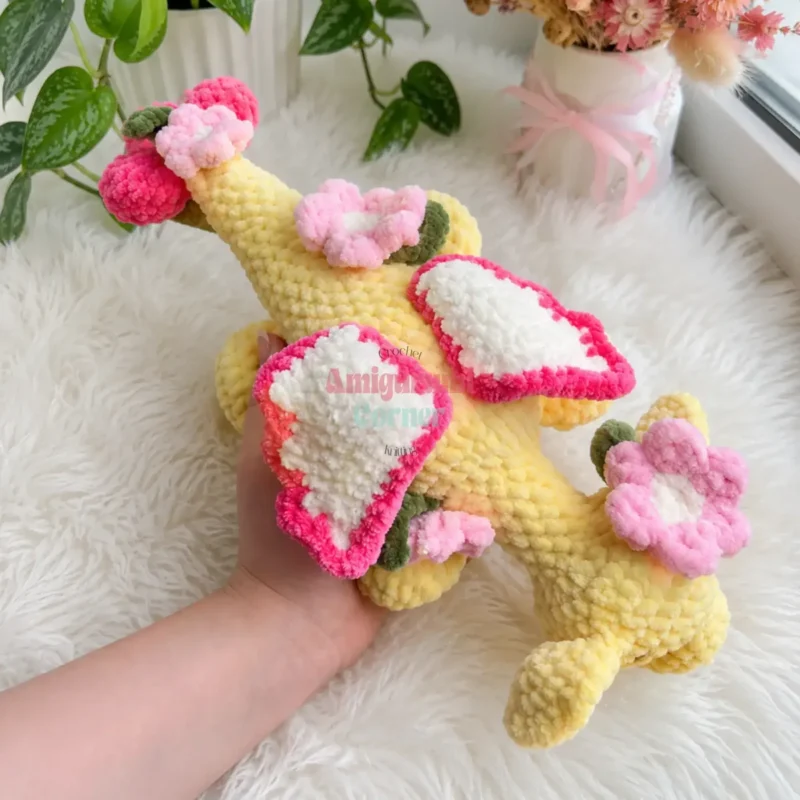
This flower monster amigurumi builds from a single yellow body worked in one continuous spiral, 54 rounds from snout to tail tip, with no joins or turns along the way. Separate pieces — two ears, four flippers, two flat-worked wings, three to four tail petals, large and small flowers, and leaves — are made individually in bright pink, white, green, and light pink, then sewn on at marked round ranges. Have bulky chenille yarn in all five colors, an E-4 (3.5mm) hook, 14mm eyes, polyfill, and a stitch marker ready before starting the snout.
Listed by the pattern's own author, in their words.
Key to this pattern, 10 short forms
Work in Yellow, in continuous spiral rounds.
6 sc in MR. (6)
inc in each st around. (12)
(sc, inc) × 6. (18)
(2 sc, inc) × 6. (24)
Fold piece in half. Working through both layers simultaneously, sc across all sts. (12 joining sts)Fasten off. Weave in ends.
Work in Yellow, in continuous spiral rounds. Do not stuff the flippers.
6 sc in MR. (6)
inc in each st around. (12)
(sc, inc) × 6. (18)
sc in each st around. (18)
(sc, dec) × 6. (12)Do not stuff.
Fold piece in half. Working through both layers simultaneously, 6 sc across. (6 joining sts)Fasten off, leaving a long yarn tail for sewing.
Work in Yellow, in one continuous spiral. Begin at the snout.
6 sc in MR. (6)
inc in each st around. (12)
(sc, inc) × 6. (18)
sc in each st around. (18)
sc in each st around. (18)The increases in Rnd 6 shape the snout. Position them at the sides and top of the muzzle — use a SM to track symmetry.
4 sc, inc, sc, inc, inc, 2 sc, inc, inc, sc, inc, 4 sc. (24)
(3 sc, inc) × 6. (30)
(4 sc, inc) × 6. (36)
sc in each st around. (36)Before working Rnd 10, pin both ears in position symmetrically. The sc-joins in Rnd 10 attach them permanently — shift your starting point if needed to align them.
13 sc, sc-join through ear, 9 sc, sc-join through ear, 12 sc. (36)
(4 sc, dec) × 6. (30)
(3 sc, dec) × 6. (24)Install 14 mm safety eyes between Rnds 6 and 7, with 6 sts between them along Rnd 7.Decreases in Rnd 13 fall at the top of the head. Keep them symmetrical.
7 sc, dec × 6, 5 sc. (18)Stuff the head firmly now.
(sc, dec) × 6. (12)
sc in each st around. (12)
sc in each st around. (12)
sc in each st around. (12)
sc in each st around. (12)
sc in each st around. (12)
sc in each st around. (12)
(sc, inc) × 6. (18)
(2 sc, inc) × 6. (24)Stuff the neck.Increases in Rnd 23 fall at the sides and top of the body — monitor symmetry carefully.
14 sc, inc, sc, inc, inc, 2 sc, inc, inc, sc, inc. (30)
(4 sc, inc) × 6. (36)
sc in each st around. (36)
sc in each st around. (36)
sc in each st around. (36)
sc in each st around. (36)
sc in each st around. (36)
sc in each st around. (36)
(4 sc, dec) × 6. (30)
sc in each st around. (30)
(3 sc, dec) × 6. (24)
sc in each st around. (24)
sc in each st around. (24)
(2 sc, dec) × 6. (18)
sc in each st around. (18)
sc in each st around. (18)
sc in each st around. (18)
sc in each st around. (18)Stuff the body firmly.
(4 sc, dec) × 3. (15)
sc in each st around. (15)
(3 sc, dec) × 3. (12)
sc in each st around. (12)
sc in each st around. (12)
sc in each st around. (12)Stuff the tail.
(2 sc, dec) × 3. (9)
sc in each st around. (9)
sc in each st around. (9)
sc in each st around. (9)
(sc, dec) × 3. (6)
sc in each st around. (6)
sc in each st around. (6)
sc in each st around. (6)Add a final bit of stuffing to the tail tip. Fasten off. Weave in ends.
Work in Bright Pink, in continuous spiral rounds.
6 sc in MR. (6)
inc in each st around. (12)
sc in each st around. (12)Stuff the piece.
dec × 6. (6)
Fold in half. Working through both layers, 3 sc across. (3 joining sts)Fasten off, leaving a long yarn tail for sewing.
Work in White, in flat rows.
Ch 13. Starting in 2nd ch from hook: 12 sc, ch 1, turn. (12)
Starting in 2nd st: 10 sc, ch 1, turn; 10 sc back, ch 1, turn. (10)
Starting in 2nd st: 8 sc, ch 1, turn; 8 sc back, ch 1, turn. (8)
Starting in 2nd st: 6 sc, ch 1, turn; 6 sc. (6)Switch to Bright Pink (or your chosen border color). Cut white yarn. Work one round of sc edging around the entire wing. At each corner, work 3 sc into the same stitch to keep the edge smooth. Fasten off, leaving a long yarn tail for sewing.
Work in Light Pink.
6 sc in MR. (6)
inc in each st around. (12)
(sl st into next st, then into the same st: hdc, dc, ch 1, dc, hdc) × 6.Fasten off, leaving a long yarn tail for sewing.
Work in Light Pink.
6 sc in MR. (6)
Into each st: (sl st, hdc, ch 1, hdc, sl st) × 6.Fasten off, leaving a long yarn tail for sewing.
Work in Green.
Ch 7. Starting in 3rd ch from hook: sc, hdc, dc, hdc, sl st.Fasten off, leaving a long yarn tail for sewing.
| Rounds | 80 |
|---|---|
| Parts | 8 |
| Level | Intermediate |
| Time | 4-6 hours |
| Hook | 3.5 mm |
| Yarn | Bulky |
The body increases steadily at the snout (6 to 12 to 18 stitches by round 3) before leveling off, giving the rounded snout its shape before the straight sides of the spiral begin.
Wings are worked flat in short rows (starting at Ch 13 and tapering down to 6 stitches over 4 rows) rather than in the round, producing a flat piece that lies against the back of the body instead of a dimensional one.
| Body — snout through tail | about 2-3 hours, because the piece runs 54 rounds in one continuous spiral with steady stitch counts to track. |
|---|---|
| Small pieces — ears, flippers, wings, tail petals | about 1 to 1.5 hours, because each piece is short on its own but there are many of them to make and finish. |
| Assembly — flippers, wings, tail petals, leaves | about 45 minutes to 1 hour, because each piece attaches at a specific round range and needs careful placement for symmetry. |
Every one was taken by whoever published the pattern, in the order the source listed them.
These answers came from whoever first published the pattern, kept word for word.