
Intermediate
What the pattern's own author called it. Nothing here is graded again.
 Crochet·Rituals
Amigurumi 39 Laid out for paper No account, no download
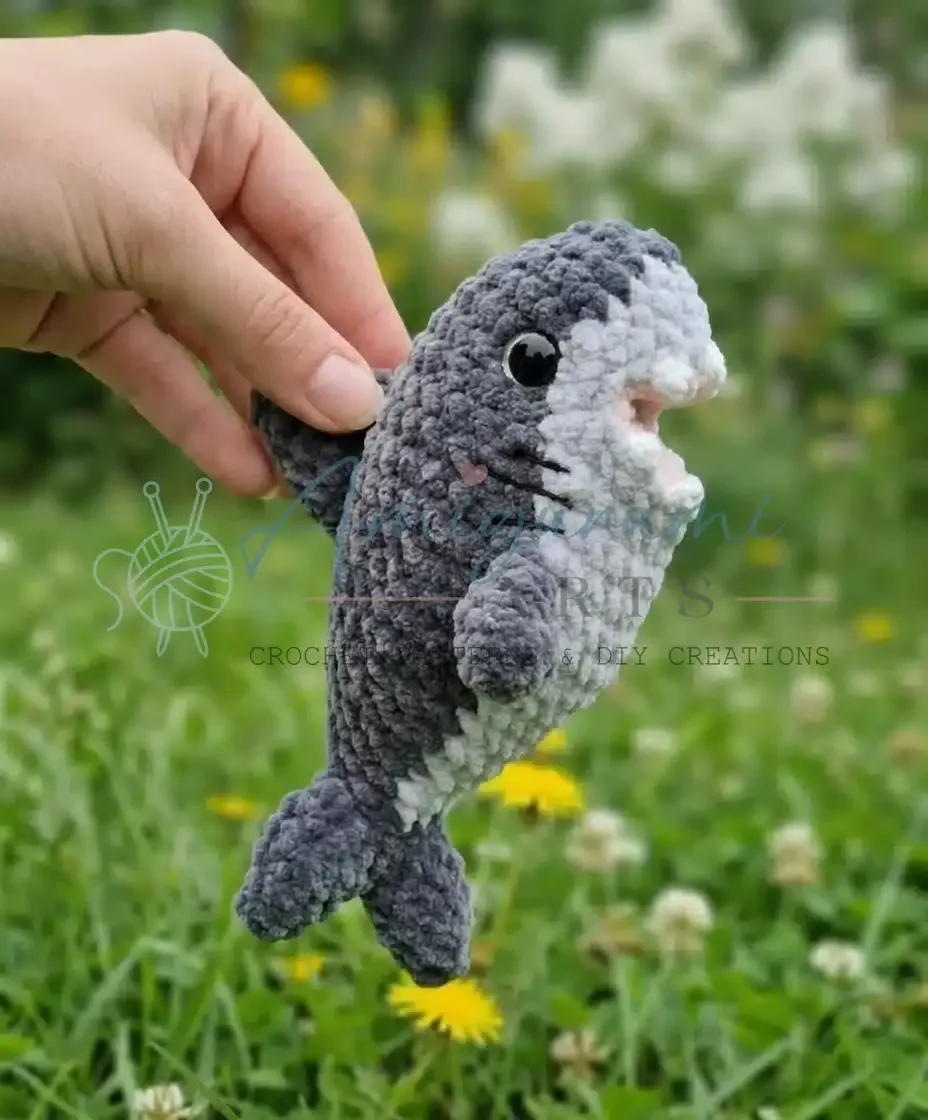
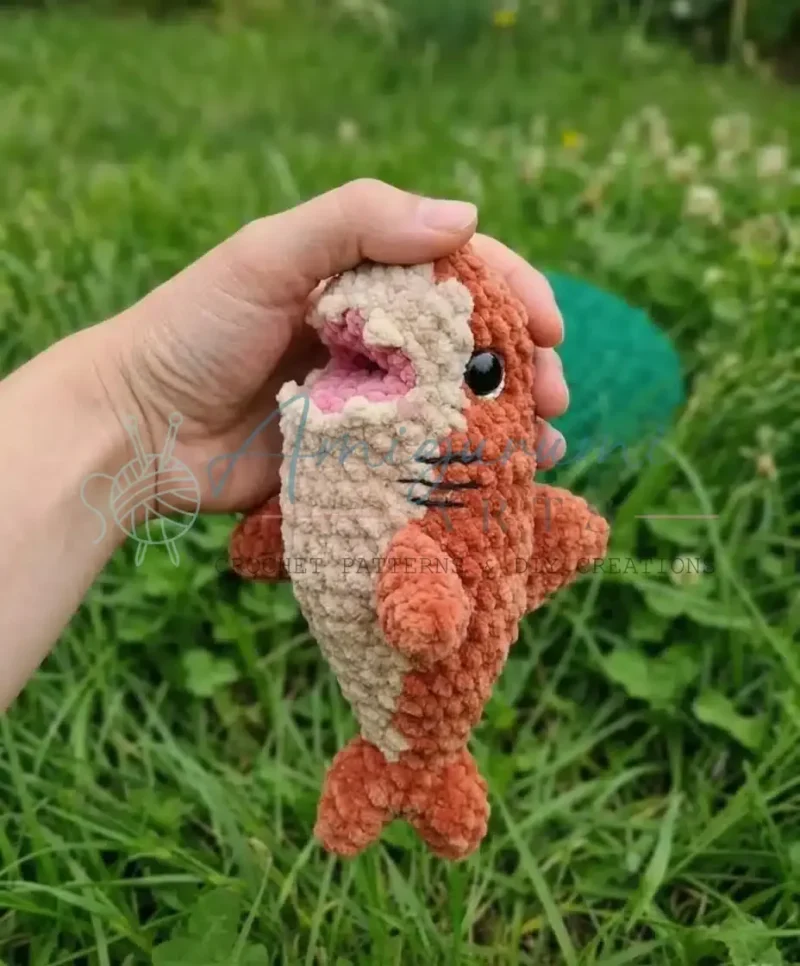
Amigurumi shark with teeth: head, mouth, body and tail in rounds, 4.0 mm hook.
Crochet Rituals · retyped from the source and laid out for print · added 30 Sep 2026
What the pattern's own author called it. Nothing here is graded again.

What the sample was worked in. Any weight works; the size moves with it.

Each one is typed out whole and gets its own line.
This amigurumi shark builds in seven pieces — head, mouth, teeth, body, tail, a single dorsal fin, and two pectoral (belly) fins — worked in continuous spiral rounds from a magic ring (or, since plush yarn frays easily under a traditional magic ring, a chain-2 foundation). The head takes 8 rounds and changes color partway through; the mouth opening is finished separately in 4 rounds, working first into back loops only so the front loops remain free for the teeth. The body runs 12 rounds and flows directly into the tail without fastening off. Have three colors of plush yarn, a contrasting smooth yarn for the teeth, a 4.0 mm hook, 12 mm safety eyes, and fiberfill ready before starting.
Listed by the pattern's own author, in their words.
Key to this pattern, 12 short forms
Begin with Magic Ring (or ch 2 and work into 2nd ch from hook for plush yarn).
MR, 5 sc into ring. Pull ring closed. (5)Step by step: 5 sc. (5).
Inc in each st around. (10)From this round onward, work with two colors, changing color (CC) at the marked points each round.
1` sc, CC — (inc, 1 sc) × 2, inc, CC — (1 sc, inc) × 2. (15)
1 sc, CC — 1 sc, (inc, 2 sc) × 2, inc, CC — (2 sc, inc) × 2. (20)
1 sc, CC — 2 sc, (inc, 3 sc) × 2, inc, CC — 8 sc. (23)The next round begins shaping the mouth opening.
1 sc, CC — 2 sc, ch 14, skip 10 sts, starting from the 14th st of this round work 2 sc, CC — 8 sc. (23)
1 sc, CC — 2 sc, 14 sc across the ch-14 chain, 2 sc, CC — 8 sc. (27)
2 sc, CC — 16 sc, CC — 9 sc. (27)
Set the main body aside and work the Mouth piece next.
The mouth is crocheted into the loops left by the mouth opening. Work Round 1 into the back loops only of those stitches — the front loops will be used later for the teeth. You may begin at any point around the opening.
(BLO): 26 sc into back loops only around the mouth opening. (26)From Round 2 onward, work through both loops as normal.
(3 sc, dec) × 5, 1 sc. (21)
(2 sc, dec) × 5, 1 sc. (16)
(1 sc, dec) × 5, 1 sc. (11)Fasten off, leaving a 6-inch (15 cm) yarn tail for sewing the mouth closed.
Teeth are worked into the front loops only of the mouth opening stitches — the loops left unused from Mouth Round 1. Insert your hook from the mouth side.
Work slip stitches around the opening between teeth. There are 3 sl sts between each tooth. Do not place teeth at the corners of the mouth.
Each tooth is worked as follows:
Sl st into front loop, ch 3, sc into 2nd ch from hook, hdc into next ch, then sc into the same front loop where the sl st was made. Work 3 sl sts to travel to the position of the next tooth, then repeat.
Continue working from where you left off on the Head (after Rnd 8).
3 sc, CC — 5 sc, inc, 3 sc, inc, 4 sc, CC — 6 sc, inc, 3 sc. (30)
Insert safety eyes between Rounds 5 and 6 of the Head now, if you haven’t already. Begin adding fiberfill gradually, positioning stuffing around the mouth. Hold the mouth inward with your fingers as you work so it stays recessed and doesn’t bulge outward.
4 sc, CC — 15 sc, CC — 11 sc. (30)
5 sc, CC — 13 sc, CC — 12 sc. (30)
6 sc, CC — 12 sc, CC — 12 sc. (30)
6 sc, CC — 2 sc, dec, 3 sc, dec, 3 sc, CC — 12 sc. (28)
6 sc, CC — 4 sc, dec, 4 sc, CC — 8 sc, dec, 2 sc. (26)
6 sc, CC — 3 sc, dec × 2, 3 sc, CC — 7 sc, dec, 1 sc. (23)
6 sc, CC — 8 sc, CC — 9 sc. (23)
2 sc, dec, 2 sc, CC — (dec, 2 sc) × 2, CC — (2 sc, dec) × 2, 1 sc. (18)
1 sc, dec, 2 sc, CC — dec × 3, CC — (1 sc, dec) × 2, 1 sc. (12)
4 sc, CC — 4 sc, CC — 4 sc. (12)
2 sc, dec, CC — 2 sc, dec, CC — 2 sc, dec. (9)Finish stuffing the body now. Do not stuff the tail.
Do not fasten off after Rnd 20. Continue directly from the body.
(1 sc, inc) × 4, 1 sc. (13)
(inc, 2 sc) × 4, inc. (18)Divide the tail into two halves of 9 sts each. Work to the midpoint of the tail, then cross to the opposite side, working 1 sc to join into a round, creating the first tail fin loop. (9)
First Tail Fin:
7 sc, dec. (8)
Dec, 4 sc, dec. (6)
Dec, 4 sc. (5)Fasten off and pull the remaining sts closed.
Second Tail Fin: Rejoin yarn near the connecting bridge and work the second fin following the same Rnds 1–3 above.
MR, 5 sc. Pull ring closed. (5)
(1 sc, inc) × 2, 1 sc. (7)
(1 sc, inc) × 3, 1 sc. (10)
(1 sc, inc) × 5. (15)
4 sc, dec, 6 sc, inc, 2 sc. (15)Sl st to close. Fasten off, leaving approximately 8 – 12 inches of yarn tail for sewing.
MR, 5 sc. Pull ring closed. (5)
5 sc. (5)
(1 sc, inc) × 2, 1 sc. (7)
(1 sc, inc) × 3, 1 sc. (10)
10 sc, sl st to close. (10)Fasten off, leaving approximately 12 inches of yarn tail for sewing.
| Rounds | 39 |
|---|---|
| Parts | 7 |
| Level | Intermediate |
| Time | 4-6 hours |
| Hook | 3.25 mm |
| Yarn | Worsted |
The head doubles its stitch count from Round 1 (5 sc) to Round 2 (10), and from Round 2 onward two colors are worked together with color changes at marked points — shaping and color pattern happen in the same rounds.
The tail is never fastened off from the body; Rounds 21–22 continue straight on, then the stitches are divided into two halves of 9 and worked to a midpoint before crossing and rejoining, which builds the first tail fin loop from one continuous piece rather than a seam.
| Mouth and teeth | about 30 minutes because the back-loop foundation round and tapestry-needle teeth work slow the pace |
|---|---|
| Body and tail | about 60–75 minutes because 12 body rounds flow straight into 5 tail rounds with fin shaping at the end |
Every one was taken by whoever published the pattern, in the order the source listed them.

These answers came from whoever first published the pattern, kept word for word.