Skip to the patterns
Crochet·Rituals
Menu

Amigurumi 37 Laid out for paper No account, no download

One-piece chameleon amigurumi with curling tail

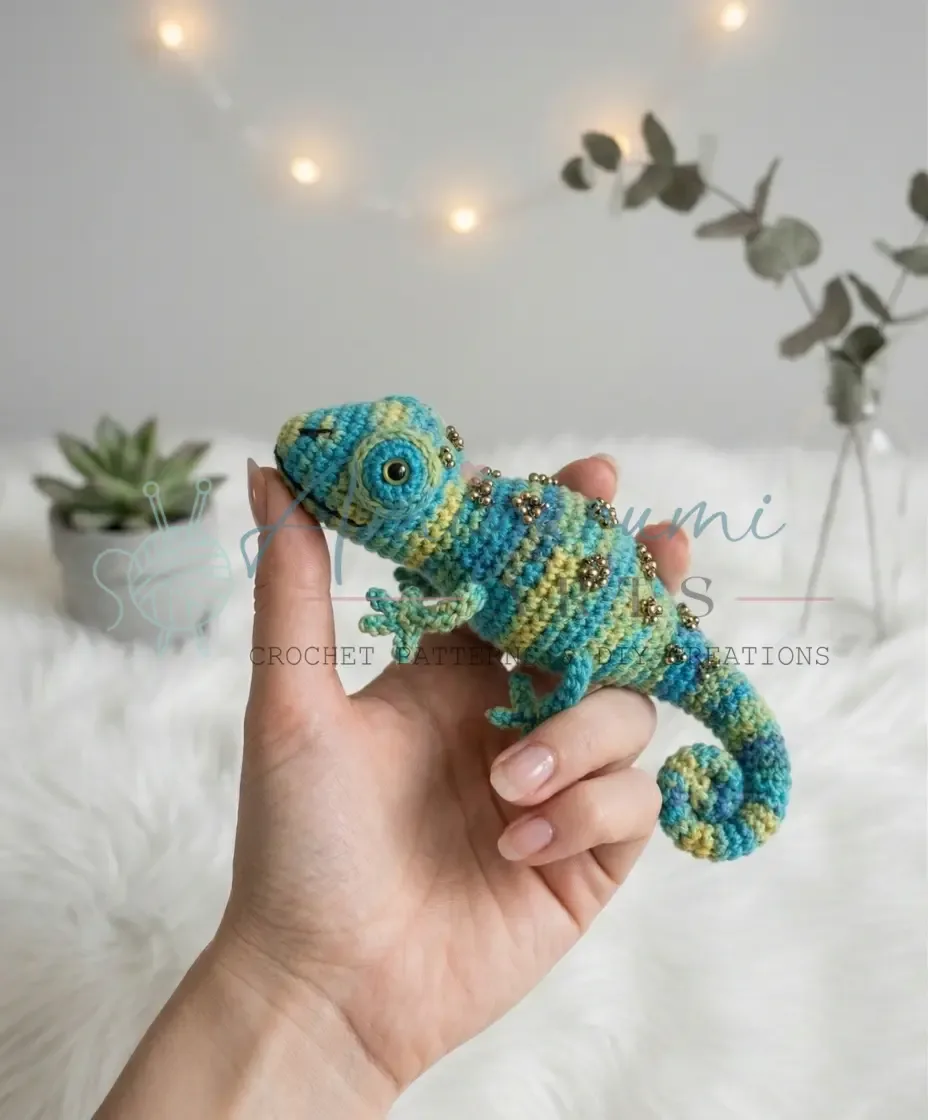
36-round spiral chameleon body on an E-4 (3.5mm) hook, with sl st legs and sewn eye rings.

Jump to the rounds Pin it
One-piece chameleon amigurumi with curling tail
Amigurumi · Fingering / Light DK
Skill
Intermediate
Time
4-6 hours
Yarn weight
Fingering / Light DK
Hook
3.5 mm
Rounds
37

Intermediate

What the pattern's own author called it. Nothing here is graded again.

Fingering / Light DK

What the sample was worked in. Any weight works; the size moves with it.

37

Each one is typed out whole and gets its own line.

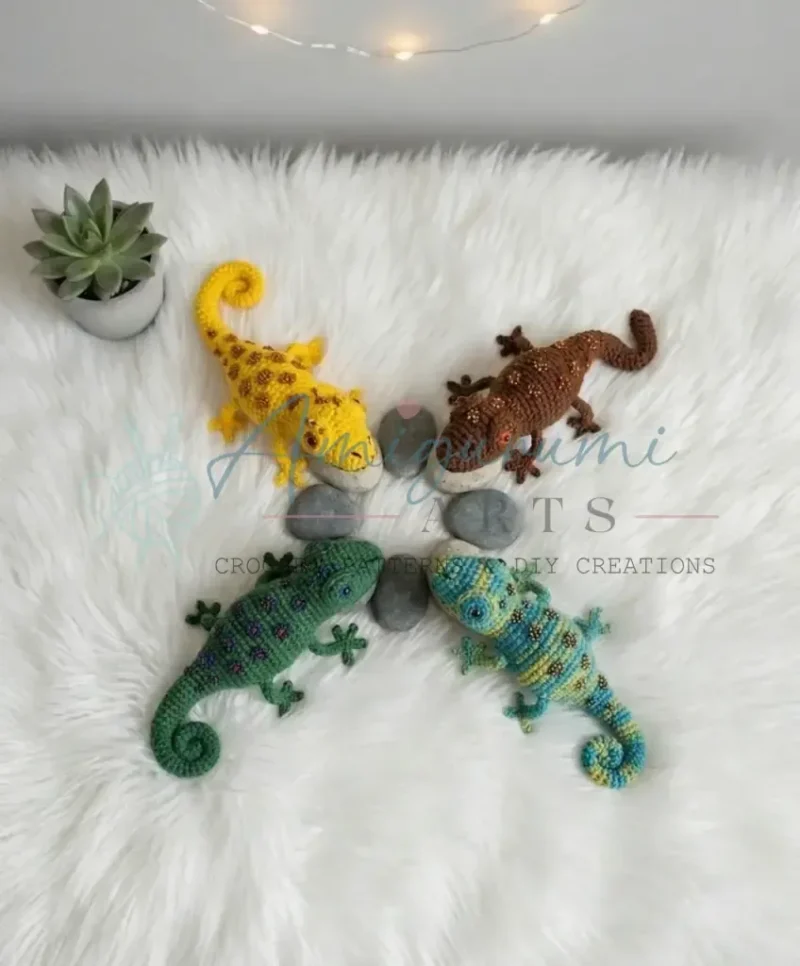
This chameleon builds from a single spiraling body of 36 rounds, shaped through paired increases rather than seams, so the head, torso, and tapering tail all come off one hook without a join. Four legs are worked flat as small slip-stitched tubes with toes branching off a foundation chain, then whipstitched to the underside once the body is stuffed. Two separate eye rings, sized to fit 6 mm cabochons, are sewn on after. Have fingering or light DK yarn, an E-4 (3.5 mm) hook, two stitch markers, and fiberfill ready before starting.

Common mistakes and their fixes

Losing track of the round start
Because the body spiral has no joining stitch, a dropped marker means a lost round count fast. Move the marker up into the first stitch of every new round before making that stitch, not after.
Visible bumps on the tail
Because the tail narrows so gradually over many rounds, sloppy decreases will create visible bumps. Always insert your hook into the front loops of the next two stitches before completing the decrease — it keeps the surface smooth.
Overstuffing past Round 34
The tail section wraps around the wire and doesn't need fiberfill. Overstuffing past Round 34 will make the tail stiff and prevent it from curling naturally around the wire armature. Stuff firmly, but stop at Round 34.
Sharp wire tip exposed
A sharp wire tip that isn't properly bent and wrapped can eventually poke through the yarn over time. Fold the tip back on itself at least twice and wrap several layers of yarn around it before closing the tail.

The materials list

Yarn

  1. Fingering or light DK weight yarn in your chosen chameleon color(s); small amounts for accent details

Hook

  1. Hook size: E-4 (3.5 mm) — adjust to achieve a tight, stuffing-hiding fabric

Eye rings

  1. worked separately in matching or contrast yarn (see Eye Ring section)

Stuffing

  1. Polyfill / fiberfill

Wire

  1. A length of flexible craft or floral wire approximately equal to the body length, for the poseable tail

Stitch markers

  1. 2 (to track round starts and eye placement)
  2. Yarn needle / tapestry needle
  3. Scissors

Optional

  1. Diluted PVA craft glue (for stiffening the feet); seed beads for decorative back embroidery; craft glue or needle and thread for attaching eye rings

Tools

  1. Safety eyes / cabochons: 6 mm, quantity 2

Listed by the pattern's own author, in their words.

Key to this pattern, 7 short forms

Body(make 1)

Round 1

MR, 6 sc into ring. Pull ring closed. (6)

Round 2

2 sc, 2 inc, 2 sc. (8)

Round 3

3 sc, 2 inc, 3 sc. (10)

Round 4

4 sc, 2 inc, 4 sc. (12)

Round 5

5 sc, 2 inc, 5 sc. (14)

Round 6

6 sc, 2 inc, 6 sc. (16)

Round 7

7 sc, 2 inc, 7 sc. (18)

Rounds 8–13

Sc in each st around. (18) (6 rounds)

Round 14

2 sc, inc, 2 sc, inc, 2 dec, 2 sc, inc, inc, 6 sc. (18)

Round 15

Dec, 8 sc, dec, 6 sc. (16)

Round 16

2 dec, 4 sc, 2 dec, 4 sc. (12)

Round 17

Sc in each st around. (12)

Round 18

(Inc, 3 sc) × 3. (15)

Round 19

(Inc, 4 sc) × 3. (18)

Round 20

3 sc, inc, 10 sc, inc, 5 sc. (20)

Rounds 21–23

Sc in each st around. (20) (3 rounds)

Round 24

2 sc, 2 dec, 12 sc, inc, 4 sc. (22)

Note: stitch count increases by 1 from previous rounds — work carefully.

Rounds 25–26

Sc in each st around. (22) (2 rounds)

Rounds 27–29

4 sc, 8 sc, dec, 6 sc. (20) (3 rounds)

Note: Each of Rounds 27–29 follows the same sequence: 4 sc, 8 sc, dec, 6 sc.

Round 30

Sc in each st around. (20)

Round 31

Dec, 7 sc, dec, 9 sc. (18)

Round 32

Dec, 6 sc, dec, 6 sc. (16)

Round 33

2 dec, 2 sc, 2 dec, 6 sc. (12)

Round 34

Sc in each st around. (12)Stuff the body firmly with fiberfill now, before the opening becomes too small.

Round 35

2 sc, dec, 8 sc. (11)

Round 36

Sc in each st around. (11)

Round 37

2 sc, dec, 7 sc. (10)

Rounds 38–40

Sc in each st around. (10) (3 rounds)

Round 41

2 sc, dec, 6 sc. (9)

Rounds 42–45

Sc in each st around. (9) (4 rounds)

Round 46

2 sc, dec, 4 sc. (8)

Rounds 47–50

Sc in each st around. (8) (4 rounds)

Round 51

4 sc, dec, 2 sc. (7)

Rounds 52–55

Sc in each st around. (7) (4 rounds)

Round 56

2 sc, dec, 3 sc. (6)

Rounds 57–60

Sc in each st around. (6) (4 rounds)

Leave a long yarn tail for closing. Tail finishing: Cut a length of wire equal to the body length. Insert the wire into the tail opening, positioning it so it runs through the tail section. Bend the very tip of the wire over (so it can’t poke through), wrap the bent end snugly with yarn, then use your tapestry needle and the remaining yarn tail to gather and close the tail tip opening completely. Fasten off securely and weave in the end.

Eye Rings(make 2)

Round 1

MR, 18 sc into ring. Pull the ring closed to fit snugly around your 6 mm cabochon. Fasten off, leaving a long tail for sewing.

Fit each eye ring around a cabochon before attaching. Sew or glue the eye rings onto the head at your chosen eye position.

Legs / Feet(make 4)

Foundation: Ch 10. Starting in the 2nd ch from hook, sl st 3.

Toe shaping: (Ch 3, starting in the 2nd ch from hook sl st 2, sl st into the base ch stitch from which you chained) × 3. This creates 3 small toes branching off the foot.

Leg: Working back along the foundation chain, sl st 6. Ch 1, turn. Sl st 5. Sl st to join into a ring at the toe end, closing the leg into a tube shape. Fasten off, leaving a tail.

Pull the ring closed and secure the yarn end. For extra stiffness, brush the finished foot with a 50/50 mixture of PVA craft glue and water. Allow to dry fully before attaching.

Assembly, in order

Step 1Attach the eye rings. Position both eye rings on the head — refer to Rounds 2–7 as the head zone. Sew or glue each ring in place with the 6 mm cabochon seated inside it.
Step 2Attach the legs. Using the yarn tail on each leg, sew all four feet to the underside of the body. Position the front two legs at approximately Rounds 18–20 and the back two legs at approximately Rounds 24–26. Use a whipstitch and pull firmly so each leg sits flat against the body.
Step 3Pose the tail. Gently curl the wire-reinforced tail into your desired shape — a classic chameleon coil works beautifully.
Step 4Add bead embroidery. Using a beading needle and thread, embroider a decorative pattern of seed beads along the chameleon's back as desired.
Step 5Weave in all remaining yarn ends using your tapestry needle.

Check these before you start

  • The body is worked in a continuous spiral with no joining slip stitch and no turning chain — move a stitch marker to the first stitch of each new round as you go.
  • Work at a tension tight enough to hide fiberfill; if stitches gap, drop to a smaller hook rather than adding extra stuffing.
  • Stuff as you go rather than waiting until Round 36, since the tapering tail rounds narrow quickly and are hard to pack after the fact.
  • This pattern is written in US crochet terminology.

On one line

Rounds37
Parts3
LevelIntermediate
Time4-6 hours
Hook3.5 mm
YarnFingering / Light DK

Set-up

  • Confirm your E-4 (3.5 mm) hook produces a tight enough fabric that stuffing will not peek through the single crochet.
  • Set two stitch markers aside — one for tracking the start of each round on the body, one for the round you are working when placing eyes.
  • Read through Rounds 2–7 before beginning, since this zone is where the eye rings will later attach.
  • Check your yarn amount covers 36 rounds of body plus four legs and two eye rings before you cast on.

Finishing

  1. Weave in the fastened-off tail at the tip of the tail end of the body, and secure the leg tails after sewing rather than trimming them early.
  2. Close the final round of the body by cinching the last few stitches with the yarn needle so no gap remains at the tail tip.
  3. Attach the eye rings and all four legs last, sewing or gluing eye rings around the cabochons and whipstitching legs firmly against the body so they sit flat.

Construction

The first five rounds increase by 2 stitches per round (6, 8, 10, 12, 14), spacing the increases evenly on either side of the round to dome the head smoothly before the body begins to taper into a tube.

Each leg is worked flat off a 10-chain foundation with slip stitches rather than single crochet, then joined into a ring at the toe end — this keeps the leg fabric thin and pliable enough to curl into a footed shape without bulk.

Time per section

Body (36 rounds)about 2-3 hours, because the continuous spiral runs long and the taper toward the tail slows stitch placement
Legs / feet (make 4)about 45-60 minutes total, because each foot has fiddly toe-chain shaping worked in slip stitch
Eye rings and assemblyabout 45 minutes, because fitting cabochons and whipstitching four legs flat takes patience

Photographs of this one

Every one was taken by whoever published the pattern, in the order the source listed them.
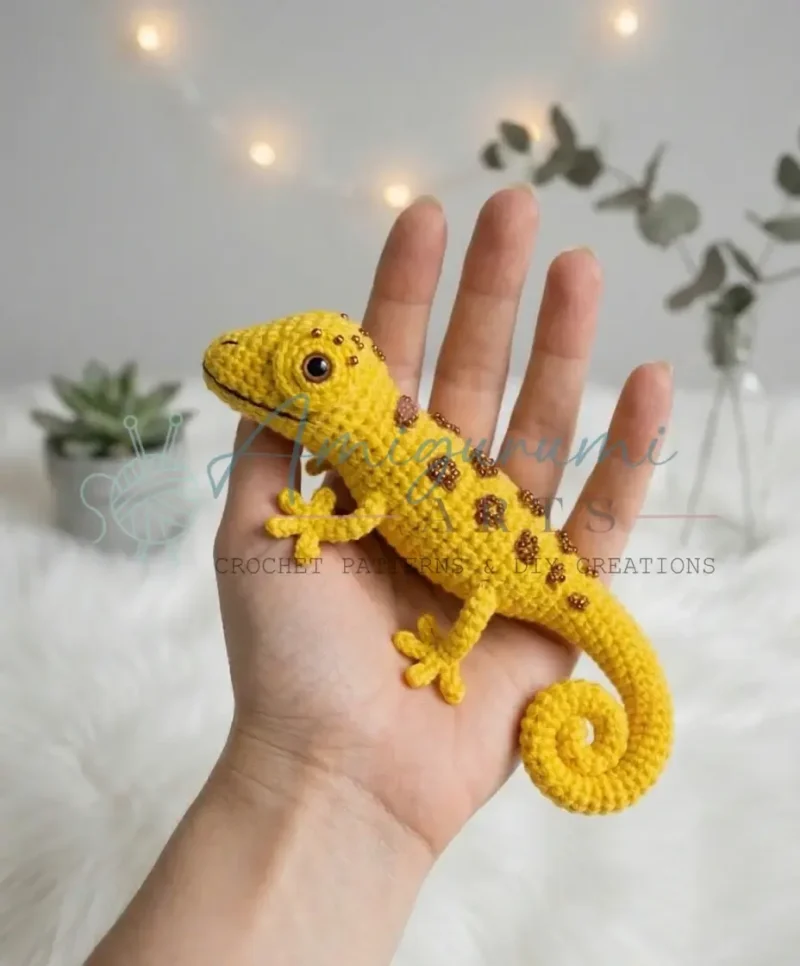
One-piece chameleon amigurumi with curling tail — photo 2
One-piece chameleon amigurumi with curling tail — photo 3

Common questions

Do I need to join or turn at the end of each round on the body?
No. The body is worked in a continuous spiral with no joining slip stitch and no chain at the round start. A stitch marker is the only way to track where each round begins.
Where exactly do the legs attach?
Sew the front two legs at approximately Rounds 18–20 and the back two legs at approximately Rounds 24–26, using the yarn tail left on each foot. Whipstitch firmly so each leg sits flat against the underside of the body.
Why brush the feet with diluted glue?
The legs are worked flat and joined into a soft tube, so on their own they have little structure to hold a standing pose. A 50/50 PVA-and-water mixture, brushed on and fully dried, stiffens the feet enough to keep the chameleon posed.
What skill level is this chameleon amigurumi pattern?
This pattern is best suited to intermediate crochet makers. You should be comfortable working in a continuous spiral, making invisible decreases, and reading stitch counts carefully. Beginners who have completed a basic amigurumi animal will find it a great next challenge.

These answers came from whoever first published the pattern, kept word for word.