Skip to the patterns
Crochet·Rituals
Menu

Kitchen Crochet 6 Laid out for paper No account, no download

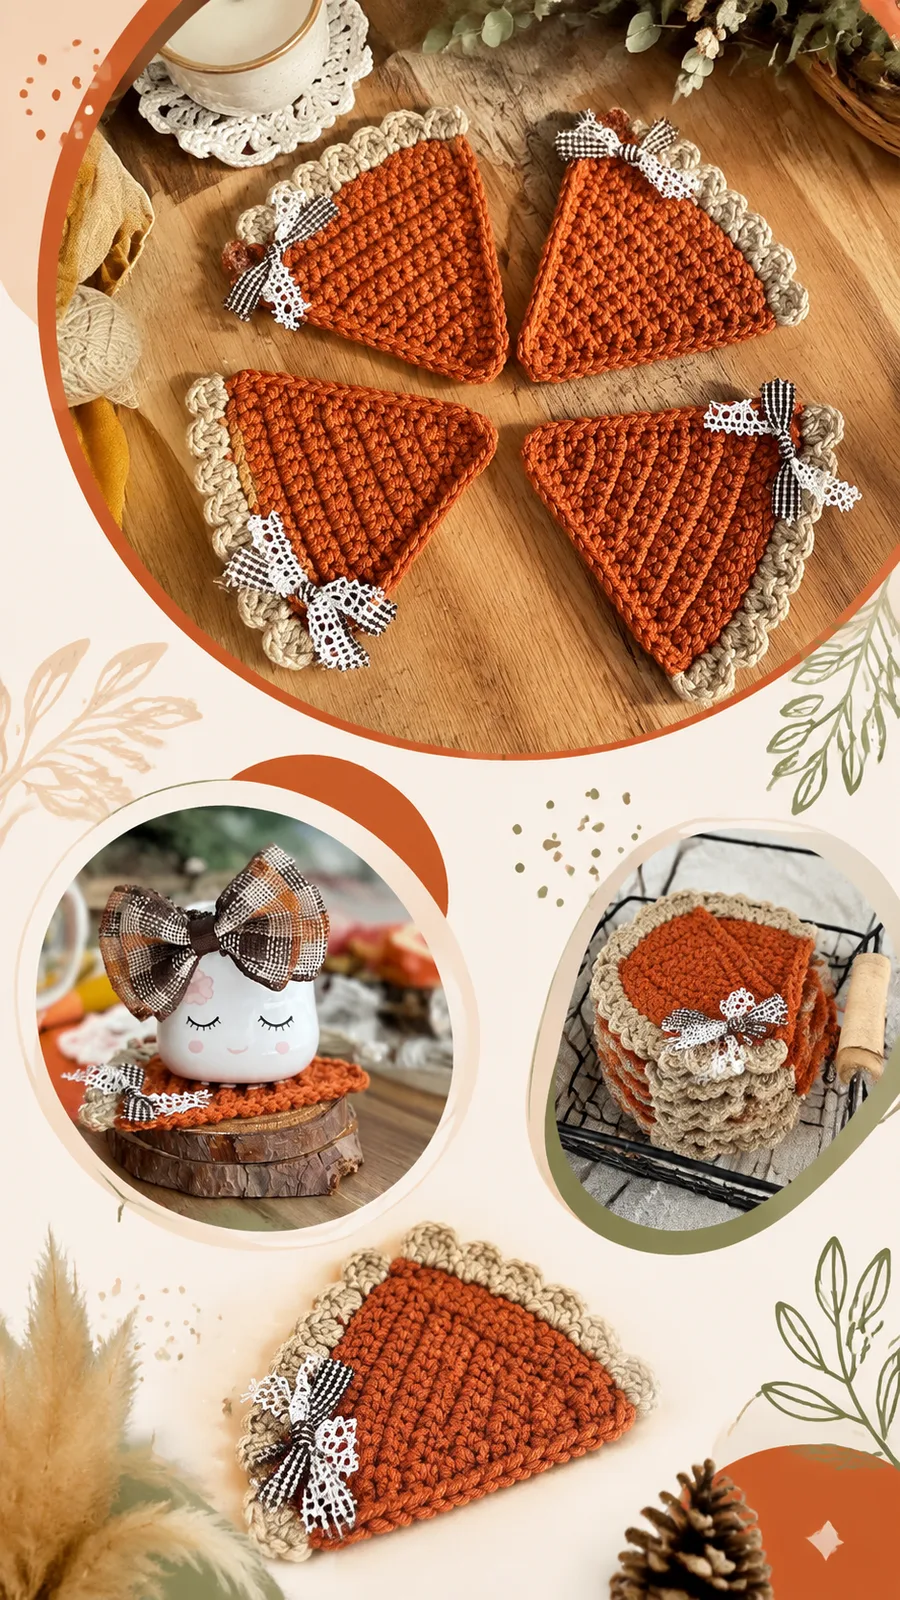
Triangular cotton pot holder with ribbed texture and scallop edge

Triangular cotton pot holder, 18 rows to 36 sts, scallop border, 4mm hook.

Jump to the rounds Pin it
Triangular cotton pot holder with ribbed texture and scallop edge
Kitchen Crochet · Worsted
Skill
Intermediate
Time
2-3 hours
Yarn weight
Worsted
Hook
4 mm
Rounds
6

Intermediate

What the pattern's own author called it. Nothing here is graded again.

Worsted

What the sample was worked in. Any weight works; the size moves with it.

6

Each one is typed out whole and gets its own line.

This pot holder is a single triangular panel, built from the point upward in turned rows that increase at both edges until the widest row reaches about thirty-six stitches. Half double crochet worked in the back loop only creates the ribbed texture visible across the front, while a contrasting single crochet and scallop border finishes the raw edges. Have medium-weight cotton yarn, a small amount of contrast cotton for the edging, a 4 mm hook, a yarn needle, and scissors ready before starting; stitch markers are optional but help with counting increases.

Common mistakes and their fixes

Increasing into both loops after Row 3
Row 4 on, work every stitch into the back loop only, including the increase stitches, or the ribbed texture disappears.
Losing count across 18 increase rows
Check the stitch count at the end of each row against the expected total; by Row 18 the widest edge should read about 36 stitches.
Skipping the extra corner stitches on the border
Place 2 sc in each corner point as directed so the finished edging lies flat instead of cupping inward.
Crocheting the fabric too loosely
A loose stitch pattern may create a decorative piece but may not provide enough protection. Use a smaller hook or add a second layer.

The materials list

  1. Medium weight cotton yarn in pumpkin orange or chosen main color, approximately 120 yards (110 meters).
  2. Small amount of contrasting cotton yarn for edging.
  3. Optional ribbon or fabric strip for decorative bow.
  4. 4 mm crochet hook (US G/6).
  5. Yarn needle.
  6. Scissors.
  7. Stitch markers if desired.

Listed by the pattern's own author, in their words.

Key to this pattern, 8 short forms

Main Pattern

Round 1

Ch 2. Work 2 hdc in the second chain from hook. Turn. (2 sts)

Round 2

Ch 1, 2 hdc in first st, hdc across, 2 hdc in last st. Turn. (4 sts)

Round 3

Ch 1, 2 hdc in first st, hdc across, 2 hdc in last st. Turn. (6 sts)

Round 4

Ch 1, work hdc across in BL only, increasing with 2 hdc in the first and last stitches. Turn. (8 sts)Rows 5-18: Repeat Row 4. Each row increases by 2 stitches. After Row 18, the triangle panel will have approximately 36 stitches across the widest edge.Border: Decorative single crochet and scallop edging added around the outside after the triangle panel is complete. Do not fasten off after the final row.

Border Rnd 1

Ch 1 and work single crochet evenly around the triangle edge. Place 2 sc in each corner point to help the border lay flat. Join with a sl st to the first sc.

Border Rnd 2

Ch 1 and work scallops: skip 1 stitch, work 5 dc in next stitch, skip 1 stitch, sl st in next stitch. Repeat around the entire edge. Fasten off and weave in all ends.

Special Stitch

Back Loop Half Double Crochet: Work a half double crochet stitch by inserting the hook only into the back loop of the stitch instead of both loops. This creates a raised ridge texture.

Optional Decorative Bow

Create a small crochet bow or attach a washable fabric ribbon to one corner. Secure the decoration firmly with stitching. For kitchen use, avoid loose attachments that may catch during handling.

Assembly, in order

Step 1Proper finishing helps a handmade crochet pot holder maintain its shape. After completing the border, gently reshape the triangle and allow it to dry flat. Avoid aggressive stretching because cotton can relax naturally after washing.
Step 2Machine wash gently or hand wash with mild detergent.
Step 3Lay flat to dry to preserve the triangle shape.
Step 4Refresh the texture by lightly steaming if needed.
Step 5Do not use decorative trims that could interfere with kitchen safety.

Check these before you start

  • Use only the 4 mm (US G/6) hook with cotton yarn; synthetic fibers are unsuitable for a piece meant to sit near heat.
  • Mark the first and last stitch of each increase row so the two-stitch gain at each edge stays consistent across all 18 rows.
  • Cotton has little stretch, so keep tension even through the increase rows or the triangle will skew rather than lie flat.
  • Gauge is approximately 18 stitches and 12 rows in 4 inches (10 cm) using half double crochet worked in the back loop only. Finished size is approximately 8 x 8 inches (20 x 20 cm), though measurements are approximate and depend on yarn tension.
  • a modern look, use neutral cotton colors such as cream, beige, or gray. For seasonal decor, choose colors inspired by autumn, winter, or spring themes.
  • The turning chain does not count as a stitch; rows are worked back and forth and turned after each row.

On one line

Rounds6
Parts3
LevelIntermediate
Time2-3 hours
Hook4 mm
YarnWorsted

Set-up

  • Confirm there is enough medium-weight cotton yarn for a solid 18-row triangle plus a small contrasting amount for the border.
  • Work a small swatch of back loop half double crochet to check that the ribbed texture sits firm but not stiff.
  • Read Row 4 before casting on, since its back-loop increase pattern repeats unchanged through Row 18.
  • Place a stitch marker in the first and last stitch of a row if counting increases by eye becomes difficult.

Finishing

  1. Weave in all ends, including the tail left from not fastening off after the final main-pattern row, before starting the border.
  2. Work the single crochet and scallop border directly off the live stitches, placing 2 sc at each corner, then join with a slip stitch to the first sc.
  3. Reshape the triangle by hand and lay it flat to dry; avoid stretching, since cotton settles into its final shape after washing.

Construction

Rows 1 through 3 double the stitch count outright (2, 4, 6 stitches), then Row 4 onward adds exactly two stitches per row by increasing only in the first and last stitch, which is what keeps the triangle's sides straight rather than curved.

The panel is worked flat in turned rows because the shaping happens only at the two outer edges; working in the round would add stitches on all sides and distort the point.

To make a larger triangle, continue repeating the increase row until the piece reaches the desired width; stopping after fewer increase rows produces a smaller panel. For extra thickness, crochet two panels and join them with single crochet. A hanging loop can be added by chaining 8 stitches and attaching it securely near one corner.

Time per section

Main triangular panelabout 1 to 1.5 hours because 18 rows of back-loop increases need steady counting
Single crochet and scallop borderabout 30 to 45 minutes because the 5-dc scallops need even spacing around three edges and two corners
Bow and finishingabout 15 to 20 minutes because the bow must be stitched on firmly for safe kitchen handling

Common questions

Can a different yarn fiber be used instead of cotton?
No. The pattern specifically calls for cotton because it withstands heat and holds up to washing, while synthetic yarns can soften or melt near a hot pan.
Why does the pattern say not to fasten off after the last row?
The border is worked directly from the live stitches of Row 18, so leaving the loop open lets the single crochet and scallop edging begin without a seam.
How many stitches should the triangle have at its widest point?
After Row 18 the widest edge should measure approximately 36 stitches; use that count to confirm the increases were worked evenly.

These answers came from whoever first published the pattern, kept word for word.