Skip to the patterns
Crochet·Rituals
Menu

Garments 8 Laid out for paper No account, no download

Turtleneck sweater top worked in half double crochet

A turtleneck top built from HDC panels on a 4.5 mm hook, main body panel worked over 30 rows.

Jump to the rounds Pin it
Turtleneck sweater top worked in half double crochet
Garments · Worsted
Skill
Intermediate
Time
4-6 hours
Yarn weight
Worsted
Hook
4.5 mm
Rounds
8

Intermediate

What the pattern's own author called it. Nothing here is graded again.

Worsted

What the sample was worked in. Any weight works; the size moves with it.

8

Each one is typed out whole and gets its own line.

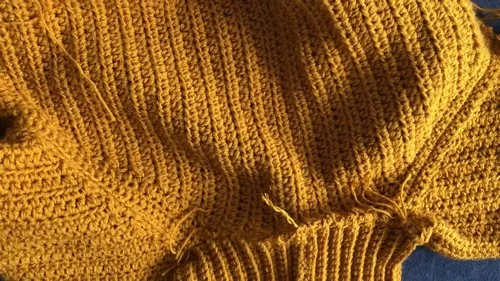
This turtleneck sweater top comes together from three shaped panels: a main body panel worked over 30 rows with paired increases at the start of the piece, a sleeve panel built with an increase-straight-decrease sequence across 37 rows, and ribbed sleeve cuffs worked in single crochet through the back loop for 28 rows. A separate turtleneck and waistband, each worked flat and closed into a loop, finish the neckline and hem. Acrylic yarn held double and a 4.5 mm hook keep the fabric dense enough to hold its shape through assembly. Have both strands wound together before you begin, since every panel depends on that doubled tension from the first row.

Common mistakes and their fixes

Losing the BLO loop on ribbed sections
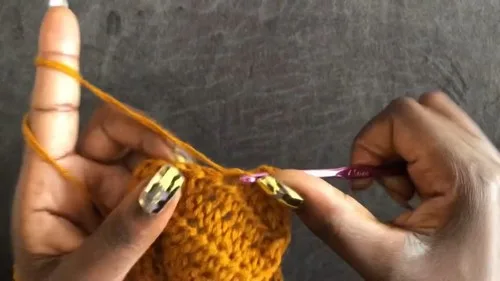
Check the back loop before each stitch on the cuffs, waistband, and neckband rows; working into both loops even once flattens the rib for the rest of that row.
Increasing on the wrong side of the row
Confirm whether the current row calls for a start-of-row or end-of-row increase before working the first stitch, since the Main Body Panel alternates the two across rows 2 through 17.
Splitting the doubled yarn strand
Check that the hook picks up both strands together on every stitch; a single split strand weakens the seam allowance at the shoulders and underarms once the pieces are sewn.

The materials list

  1. Acrylic yarn held double
  2. 4.5 mm hook
  3. Half Double Crochet

Listed by the pattern's own author, in their words.

Key to this pattern, 3 short forms

Main Body Panel

Make 2 Starting chain 25 plus 2

Round 1

Work HDC across

Round 2

Chain 2, turn, work 2 HDC in first stitch, then work HDC to end

Round 3

Chain 2, turn, work HDC to last stitch, then work 2 HDC in last stitch Repeat alternating rows of start increase and end increase until 17 rows are completed

Round 18

to 27: Chain 2, turn, work HDC across for 10 rows with no shaping

Round 28

Chain 2, turn, work HDC2tog at first two stitches, then work HDC across

Round 29

Chain 2, turn, work HDC across until last two stitches, then work HDC2tog Repeat alternating decreases until 17 decrease rows are completedWork 4 rows of Single Crochet along long shaped edges

Sleeve Panel

Make 2 Starting chain 60 plus 2

Round 1

Work HDC across Repeat increase method for 17 rows Work 3 straight rows of HDC Repeat decrease method for 17 rows

Sleeve Cuffs

Make 2 Starting chain 15 plus 2

Round 1

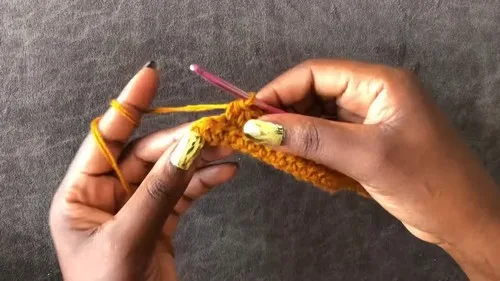
Work SC Work SC BLO each row for 28 rows

Assembly, in order

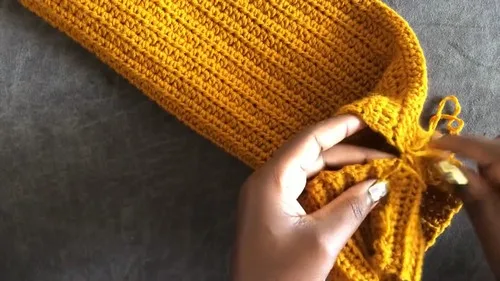
Step 1Close the neckband ends to form a tube
Step 2Attach neckband around the sweater neck opening
Step 3Close cuffs into tubes
Step 4Close waistband into a loop
Step 5Join sleeves to body along the shaped sections
Step 6Sew both main panels together at shoulders and sides
Step 7Sew sleeves along underarm
Step 8Attach cuffs to sleeve ends and attach waistband to lower body
Step 9Your sweater is ready to wear!

Check these before you start

  • Work every SC BLO row on the cuffs, waistband, and neckband through the back loop only; skipping a loop even once breaks the ribbed texture those pieces depend on.
  • Keep the 4.5 mm hook size consistent across all three parts, since the main body panel, sleeve panel, and cuffs are joined directly to one another with no separate gauge swatch built in.
  • Because the yarn is held double throughout, check each stitch to confirm both strands are pulled through together; a dropped strand shows up as a thin patch once the panel is blocked.

On one line

Rounds8
Parts3
LevelIntermediate
Time4-6 hours
Hook4.5 mm
YarnWorsted

Set-up

  • Wind the acrylic yarn double onto one working strand before the first chain, so tension stays even across every panel.
  • Work a small HDC swatch with the 4.5 mm hook and doubled yarn to confirm the fabric is dense enough to hold structure at the shoulders and sides.
  • Read the Main Body Panel rows 1 to 17 before starting, since the alternating start-increase and end-increase pattern needs to be tracked row by row.
  • Set aside stitch markers for the first and last stitch of each row during the sleeve panel's increase and decrease sections, where miscounting is easiest.

Finishing

  1. Weave in all yarn ends on the main body panels, sleeve panels, and cuffs before any seaming begins, since the doubled yarn makes ends bulkier to hide once pieces are joined.
  2. Sew the two main body panels together at the shoulders and sides, then join the sleeve panels along the underarm and attach them to the shaped sections of the body.
  3. Close the neckband, cuffs, and waistband into tubes or a loop, attach the neckband around the neck opening and the waistband to the lower body, then block the finished sweater flat.

Construction

The Main Body Panel places its shaping at the start: rows 2 through 17 alternate a start-of-row increase with an end-of-row increase, then rows 18 through 27 run straight with no shaping, so the widest point of the panel sits below the shoulder line before the fabric levels off.

The Sleeve Panel is worked flat rather than in the round, moving through 17 rows of increase, 3 straight rows, then 17 rows of decrease, which builds the taper needed to fit an underarm seam once the panel is folded and sewn.

Time per section

Main Body Panelabout 90 minutes, because the panel runs 30 rows with shaping to track through row 17 before it settles into straight rows
Sleeve Panelabout 75 minutes, because the increase-straight-decrease sequence spans 37 rows and needs consistent stitch counts at each turn
Sleeve Cuffs, waistband, and turtleneckabout 60 minutes, because the SC BLO ribbing runs 28 rows per cuff plus the separate waistband and neckband strips before assembly

Photographs of this one

Every one was taken by whoever published the pattern, in the order the source listed them.
Turtleneck sweater top worked in half double crochet — photo 2
Turtleneck sweater top worked in half double crochet — photo 3
Turtleneck sweater top worked in half double crochet — photo 4

Common questions

Why does the main body panel only shape at the start?
The increases in rows 2 through 17 build the widest part of the panel before it runs straight for rows 18 through 27. That straight section forms the torso length below the shaping.
Can the sleeve length be adjusted?
Yes, the straight rows worked between the increase and decrease sections of the Sleeve Panel can be extended or shortened. The increase and decrease sections themselves should stay as worked to keep the taper matching the underarm seam.

These answers came from whoever first published the pattern, kept word for word.