Skip to the patterns
Crochet·Rituals
Menu

Amigurumi 7 Laid out for paper No account, no download

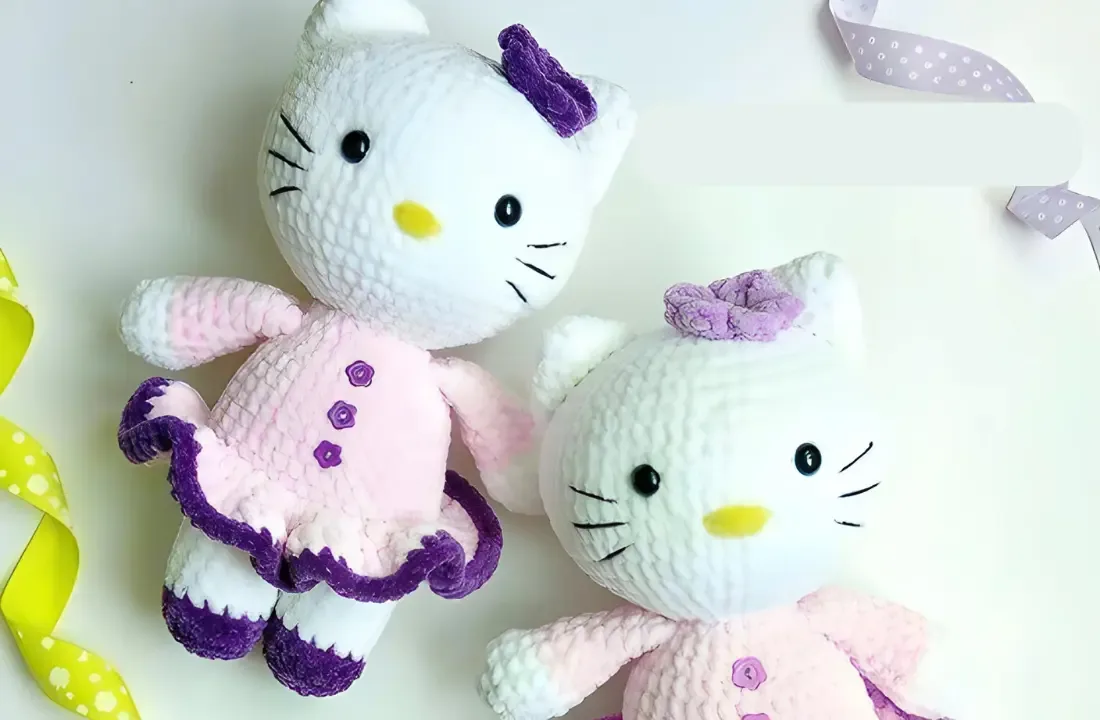
Amigurumi cat doll with one-piece body and legs

Amigurumi cat worked body-to-head in one piece. 4.0 mm hook, 12 mm safety eyes, fiberfill finish.

Jump to the rounds Pin it
Amigurumi cat doll with one-piece body and legs
Amigurumi · Worsted
Skill
Intermediate
Time
4-6 hours
Yarn weight
Worsted
Hook
4.0 mm
Rounds
7

Intermediate

What the pattern's own author called it. Nothing here is graded again.

Worsted

What the sample was worked in. Any weight works; the size moves with it.

7

Each one is typed out whole and gets its own line.

This is a seated cat figure built as legs, body, and head in a single continuous piece, so there is no side seam to sew along the torso. Shaping runs through a short sequence of increase rounds before the top opening is folded flat and closed with a row of single crochet worked through both layers. Before starting, have a 4.0 mm hook, 12 mm safety eyes, fiberfill, fine yarn for sewing details, and buttons for decoration on hand, since the eyes and facial details go in partway through the work, not at the end.

Common mistakes and their fixes

Losing track of the round start
Place a stitch marker at the first stitch of every round and move it up each time; the increase rhythm shifts often enough that it is easy to drift off by a stitch.
Closing the top opening unevenly
Fold the opening flat so the stitches line up directly across from each other before single crocheting through both sides, rather than eyeballing the match as you sew.
Under-stuffing before the close
Add fiberfill firmly into the legs and body before folding and closing the top opening, since there is no second chance to stuff once that seam is sewn shut.

The materials list

  1. 4.0 mm crochet hook
  2. 12 mm safety eyes
  3. Fine yarn to sewing details together
  4. Yarn needles and scissors
  5. Fiberfill
  6. Buttons for decoration

Listed by the pattern's own author, in their words.

Key to this pattern, 2 short forms

R 2

Round 1

(inc) repeat 6 times [12]Step by step: (4 sc, inc) repeat 3 times [18] Fold the top opening flat and 9 sc through both sides; Fasten off; Legs, body and head (one piece).

R 3

Round 1

(3 sc, inc) repeat 3 times [15]

R 2

Round 1

(1 sc, inc) repeat 3 times [9]

R 3

Round 1

(2 sc, inc) repeat 3 times [12]

R 2

Round 1

(inc) repeat 8 times [16]

R 5

Rounds 6–11

16 sc (6 rows) Cut yarn when you’ll finish the first leg. Ready to Learn More? Open the next page for Further Guidance!

Pages: 1 2

R 9

Rounds 10–12

10 sc (3 rows) Stuff only bottom of the arm. Fold the top opening flat and 5 sc through both sides.Fasten off.

Check these before you start

  • Use a 4.0 mm hook and keep your tension snug throughout; a loose gauge lets stuffing show between stitches on a piece this size.
  • Mark the first stitch of every round from the start, since the increase pattern changes rhythm round to round and is easy to lose without a marker.
  • Stuff as you close each section rather than waiting until the very end, so the body holds its shape once the top opening is folded flat and sewn shut.

On one line

Rounds7
Parts7
LevelIntermediate
Time4-6 hours
Hook4.0 mm
YarnWorsted

Set-up

  • Count out your fiberfill in advance so stuffing is even and firm, not added piecemeal as you go.
  • Read through the increase round sequence once before you start, since the stitch counts climb quickly over just a few rounds.
  • Set your 12 mm safety eyes aside with their backs within reach, as placement happens mid-piece rather than after assembly.
  • Keep a stitch marker on hand to track the start of each round through the increase sections.

Finishing

  1. Fold the top opening of the body flat and work single crochet through both sides to close it, matching stitch for stitch across the fold.
  2. Weave in all working ends on the inside of the piece before adding any surface detail.
  3. Attach buttons and any remaining decoration with fine yarn, sewing through to the inside so the knots sit hidden against the stuffing.

Construction

Legs, body, and head are worked as one continuous piece rather than three separate parts joined afterward, which is why there is no final seam up the front or back of the torso.

The top opening is closed by folding it flat and single-crocheting through both layers together, a flat seam rather than a gathered cinch, which gives the closure a straight rather than a rounded edge.

Time per section

Legs and body increase roundsabout 1 to 2 hours, because the stitch count climbs across several increase rounds that need close counting
Top opening fold and closureabout 20 to 30 minutes, because matching stitches across a folded seam takes a slower, deliberate pace
Eyes, stuffing, and button detailsabout 1 hour, because safety eye placement and sewn-on buttons both need steady hands and good light

Common questions

Why is there no seam down the body?
The legs, body, and head are all worked as one continuous piece, so the only seam on the torso is the folded closure at the top opening. This keeps the surface of the body smooth and unbroken.
When should the safety eyes go in?
Place the 12 mm safety eyes before the head is closed and stuffed, since they need to be set from the inside while there is still an opening to reach through. Adding them after closing is not possible with safety-eye backs.
How firm should the stuffing be?
Stuff firmly enough that the fiberfill does not shift or show between stitches, especially around the increase rounds where the fabric is more open. A dense, even fill also helps the folded top closure sit flat.

These answers came from whoever first published the pattern, kept word for word.