
Intermediate
What the pattern's own author called it. Nothing here is graded again.
 Crochet·Rituals
Amigurumi 38 Laid out for paper No account, no download
Amigurumi tiger doll crochet pattern: legs, arms, ears, head, and body worked in continuous spiral rounds from a magic
Crochet Rituals · retyped from the source and laid out for print · added 16 Sep 2026
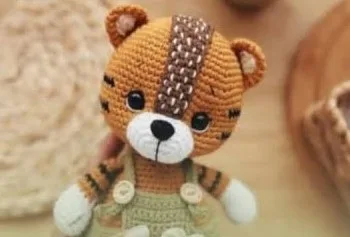
What the pattern's own author called it. Nothing here is graded again.

What the sample was worked in. Any weight works; the size moves with it.

Each one is typed out whole and gets its own line.
This tiger doll is built the way most amigurumi are: worked in continuous spiral rounds from a magic ring, one piece at a time, then joined at the end. The legs run nine rounds, the arms three rounds, the head six, the body fifteen, and the ears four — each part shaped through single crochet and evenly spaced increases. Have your main color, a contrast color for stripes and face detail, stuffing, and a stitch marker ready before you begin, since the spiral has no natural stopping point to mark your place.
Listed by the pattern's own author, in their words.
Key to this pattern, 4 short forms
Create a magic ring with 6 sc.
6 increases = 12 sts.
(1 sc, inc) x6 = 18 sts.
18 sc.
8 sc, 8 dec, 8 sc = 24 sts.
6 sc, 6 dec, 6 sc = 18 sts.
7 sc, 2 dec, 7 sc = 16 sts.
16 sc with black yarn.
16 sc with black yarn.
16 sc with black yarn.
Create a magic ring with 6 sc.
6 increases = 12 sts.
(1 sc, inc) x6 = 18 sts.
Chain 7, start from the 2nd chain.
Increase, 4 sc, 3 sc in one stitch, 5 sc = 14 sts.
2 inc, 4 sc, 3 inc, 4 sc, inc = 20 sts.
(1 sc, inc) x2, 4 sc, (1 sc, inc) x3, 5 sc, inc = 26 sts.
Make 18 single crochets (sc).
Decrease pattern to shape the head, leading to 15 sts and then 12 sts.
Make 12 sc with black yarn.
Make 12 sc with black yarn.
Make 16 sc with black yarn.
Make 16 sc with black yarn.
2 increases, 4 sc, 3 increases, 4 sc, 2 increases = 20 sts.
(1 sc, inc) x2, 4 sc, (1 sc, inc) x3, 5 sc, inc = 26 sts.
Make 32 sc.
Make 16 sc with black yarn.
Make 16 sc with black yarn.
Make 16 sc with black yarn.
Make 48 sc.
6 sc, (dec) x6, 6 sc = 42 sts.
Make 42 sc.
12 sc, (dec) x3, 12 sc = 39 sts.
11 sc, (dec) x3, 11 sc = 36 sts.
4 sc, (dec) x6, 4 sc = 30 sts.
Make 30 sc.
3 sc, (dec) x6, 3 sc = 24 sts.
6 sc, (dec) x3, 6 sc = 21 sts.
| Rounds | 38 |
|---|---|
| Parts | 5 |
| Level | Intermediate |
| Time | 4-6 hours |
| Yarn | Worsted |
The legs increase from 6 to 12 to 18 stitches over the first three rounds, then hold steady at 18 single crochets for rounds 4 through 6 — a classic base-then-cylinder build that gives the leg its rounded foot before it goes straight.
The ears start from a chain of 7 rather than a magic ring, which means they are worked flat in rows rather than in the round; this is typical for a piece meant to lie against the head rather than stand in the round like the body.
The arms use the exact same first three rounds as the legs — magic ring to 6 sc, 6 increases to 12 sts, then (1 sc, inc) x6 to 18 sts — but stop there instead of continuing, since they only need a short rounded shape to attach at the shoulder.
| Legs | about 45 minutes because the piece runs nine rounds with three shaping rounds up front before settling into plain single crochet |
|---|---|
| Arms | about 15 minutes because the piece only runs three rounds, matching the leg's rounded base construction before stopping |
| Head | about 40 minutes because six rounds include both decrease shaping and a color change to black yarn that needs careful counting |
| Body and ears | about 1.5 hours because the body's fifteen rounds are the longest single piece, and the ears' flat rows need close attention to shifting increase placement |
Every one was taken by whoever published the pattern, in the order the source listed them.
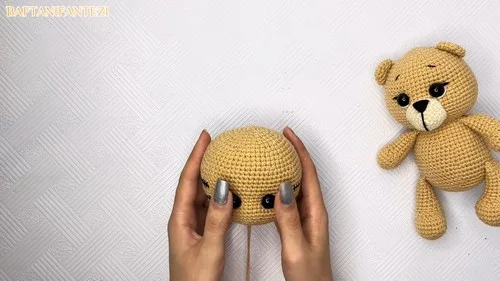
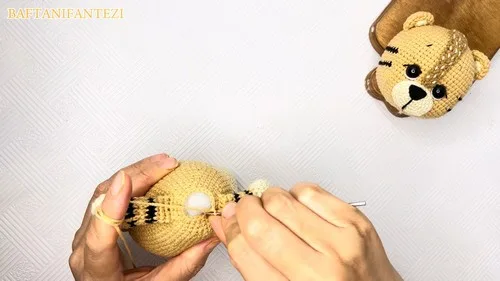
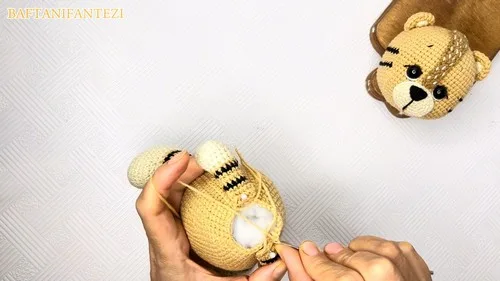
These answers came from whoever first published the pattern, kept word for word.