Skip to the patterns
Crochet·Rituals
Menu

Amigurumi 8 Laid out for paper No account, no download

Small crochet frog keychain pattern for one sitting

Amigurumi frog keychain, worked in rounds with 3.5 mm hook. Eyes, head shaping, closing all in one short sitting.

Jump to the rounds Pin it
Small crochet frog keychain pattern for one sitting
Amigurumi · Worsted
Skill
Intermediate
Time
4-6 hours
Yarn weight
Worsted
Hook
3.5 mm
Rounds
8

Intermediate

What the pattern's own author called it. Nothing here is graded again.

Worsted

What the sample was worked in. Any weight works; the size moves with it.

8

Each one is typed out whole and gets its own line.

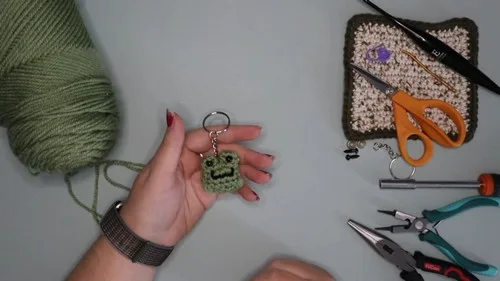
This is a small stuffed frog built to finish as a keychain, worked in worsted weight yarn on a 3.5 mm hook from a magic loop start. The eyes are made first as separate 2-round pieces, then joined together and set into the head where safety eye posts are inserted and secured with washers. The head is shaped through paired increase rounds before the body and bobble-stitch legs are worked and the piece closes with a run of decreases. A stitched black-yarn smile and keychain hardware finish the piece. Have both eye pieces, stuffing, a tapestry needle, and the keychain hardware within reach before starting the head.

Common mistakes and their fixes

Eyes placed off-center in the row
Count stitches to either side of the eye before inserting the post; the second row down should sit centered on the front marked by the stitch marker.
Bobble stitch legs pulled too tight
Keep the same tension used in the sc 4 sections; a bobble worked much tighter than its surrounding stitches will pucker the leg.
Closing round sewn through both loops
Sew the final hole shut using the outer loops only, which keeps the seam flat instead of ridged.

The materials list

  1. Worsted weight acrylic yarn
  2. 3.5 mm crochet hook
  3. Tapestry needle
  4. Stitch marker
  5. Scissors
  6. Two 6mm safety eyes
  7. Keychain hardware (loop, chain, jump ring)
  8. Pliers (needle-nose + one extra pair)
  9. Small amount of stuffing
  10. Lighter (optional, for securing eyes)
  11. Black yarn for the smile

Listed by the pattern's own author, in their words.

Key to this pattern, 4 short forms

Making the Eyes (Make 2)

Create a magic loop, leaving a long tail.

Secure the loop with a slip stitch.

Round 1

6 single crochet (sc) into the magic ring.

Round 2

6 sc around. For the first eye, fasten off. For the second eye, do not fasten off. Instead, secure both yarn tails with a knot.

Joining the Eyes

With the second eye's working yarn, work around both eye pieces to join them side by side before setting them into the head.

Round 3

With the second eye's working yarn: Sc 3 stitches around the first eye. Sc 6 stitches around the second eye. Sc 3 more stitches around the first eye.

Shaping the Head

Round 4

(Inc, sc 5, inc, inc, sc 3, inc) = 16 sts

Round 5

Sc 16 around.

Inserting the Safety Eyes

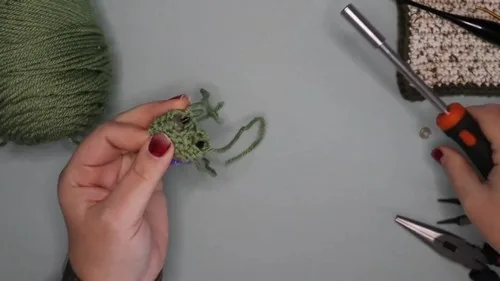
Step by step Identify the front side (stitch marker on left). Insert safety eyes on the second row down, centered on each eye. Turn inside out and attach washers. (Optional) Melt eye posts with a lighter to secure. Turn right side out. Sew eye holes shut with the tail and a tapestry needle.

Creating the Body and Legs

Round 6

Inc, 3-strand bobble stitch (leg), Sc 4, Bobble stitch, Inc, Sc 8.

Adjust bobble placement for symmetry.

Decreasing and Finishing

Round 7

(sc 1, dec) x6Stuff the frog before closing the last opening.

Final Round

6 decreases to close.

Assembly, in order

Step 1Leave a yarn tail.
Step 2Sew the hole closed using the outer loops only.
Step 3Insert the needle through the top and exit at the back to shape.
Step 4Weave in the yarn and trim.
Step 5Thread black yarn onto the tapestry needle.
Step 6Starting below one eye, stitch a simple curved smile by going in and out of stitches to form a gentle curve.
Step 7Knot the yarn underneath and poke it inside the frog to hide the knot.
Step 8Open the jump ring using pliers.
Step 9Thread the jump ring through the keychain chain.
Step 10Attach to a loop in between the frog's eyes.
Step 11Close the jump ring tightly with two pliers.

Check these before you start

  • Insert the safety eyes on the second row down from the top of the eye piece, centered, so both sit level when the head is turned right side out.
  • Keep tension firm and even through the bobble stitch legs; loose bobbles flatten once stuffed and lose their shape.
  • Work the final six decreases in one continuous round without pausing, since gaps here are the hardest to close neatly afterward.

On one line

Rounds8
Parts6
LevelIntermediate
Time4-6 hours
Hook3.5 mm
YarnWorsted

Set-up

  • Make both eye pieces first; the second is left unfastened so its tails can knot the pair together before insertion.
  • Place a stitch marker on what will be the left side of the front so the eye row is easy to find later.
  • Read the head shaping round once before working it: the increases are not evenly spaced, so track stitch count as you go.
  • Check that stuffing and keychain hardware are on hand before the final decrease round, since the piece closes quickly after that point.

Finishing

  1. Turn the head inside out to attach the safety eye washers, then turn right side out again before sewing the eye holes shut with the tapestry needle.
  2. Stuff the frog firmly before working the final round of six decreases to close the opening.
  3. Weave in the remaining yarn tail and trim, then attach the keychain loop, chain, and jump ring with pliers.
  4. Stitch a simple curved smile below one eye with black yarn on the tapestry needle, then knot the yarn underneath and hide the knot inside the frog.

Construction

The eye pieces are made separately and set in before the body is closed, which is why the second eye is left unfastened rather than cut: its tail ties the pair together for insertion.

Round 4's increases land unevenly across the round rather than every other stitch, which shapes the head wider at the sides than at the center.

Time per section

Making the Eyes (Make 2)about 15 minutes because each eye is only 2 rounds, doubled for the pair
Shaping the Headabout 30 minutes because the increase placement in Round 4 needs careful counting
Stuffing, closing, and hardwareabout 45 minutes because eyes, stuffing, the decrease round, and keychain assembly all happen close together at the end

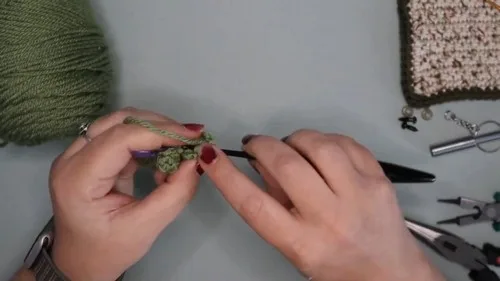
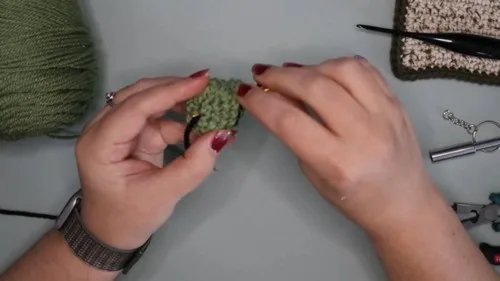
Photographs of this one

Every one was taken by whoever published the pattern, in the order the source listed them.
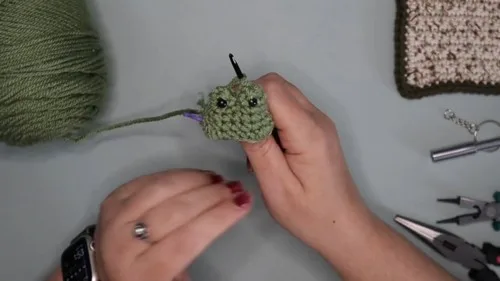
Small crochet frog keychain pattern for one sitting — photo 2
Small crochet frog keychain pattern for one sitting — photo 3
Small crochet frog keychain pattern for one sitting — photo 4
Small crochet frog keychain pattern for one sitting — photo 5

Common questions

How do I know which side is the front before inserting the eyes?
The front is the side marked by the stitch marker placed on the left. Insert both safety eyes on the second row down on that marked side, centered on each eye position.
Do I need to fasten off after the second eye?
No. The first eye is fastened off, but the second eye is left open so its yarn tail can knot together with the first eye's tail before both are set into the head.
What keeps the safety eye posts from working loose?
Turn the head inside out to attach the washers securely, and optionally melt the posts with a lighter before turning right side out again. Sewing the eye holes shut afterward with the tapestry needle adds a second layer of security.

These answers came from whoever first published the pattern, kept word for word.