Skip to the patterns
Crochet·Rituals
Menu

Amigurumi 33 Laid out for paper No account, no download

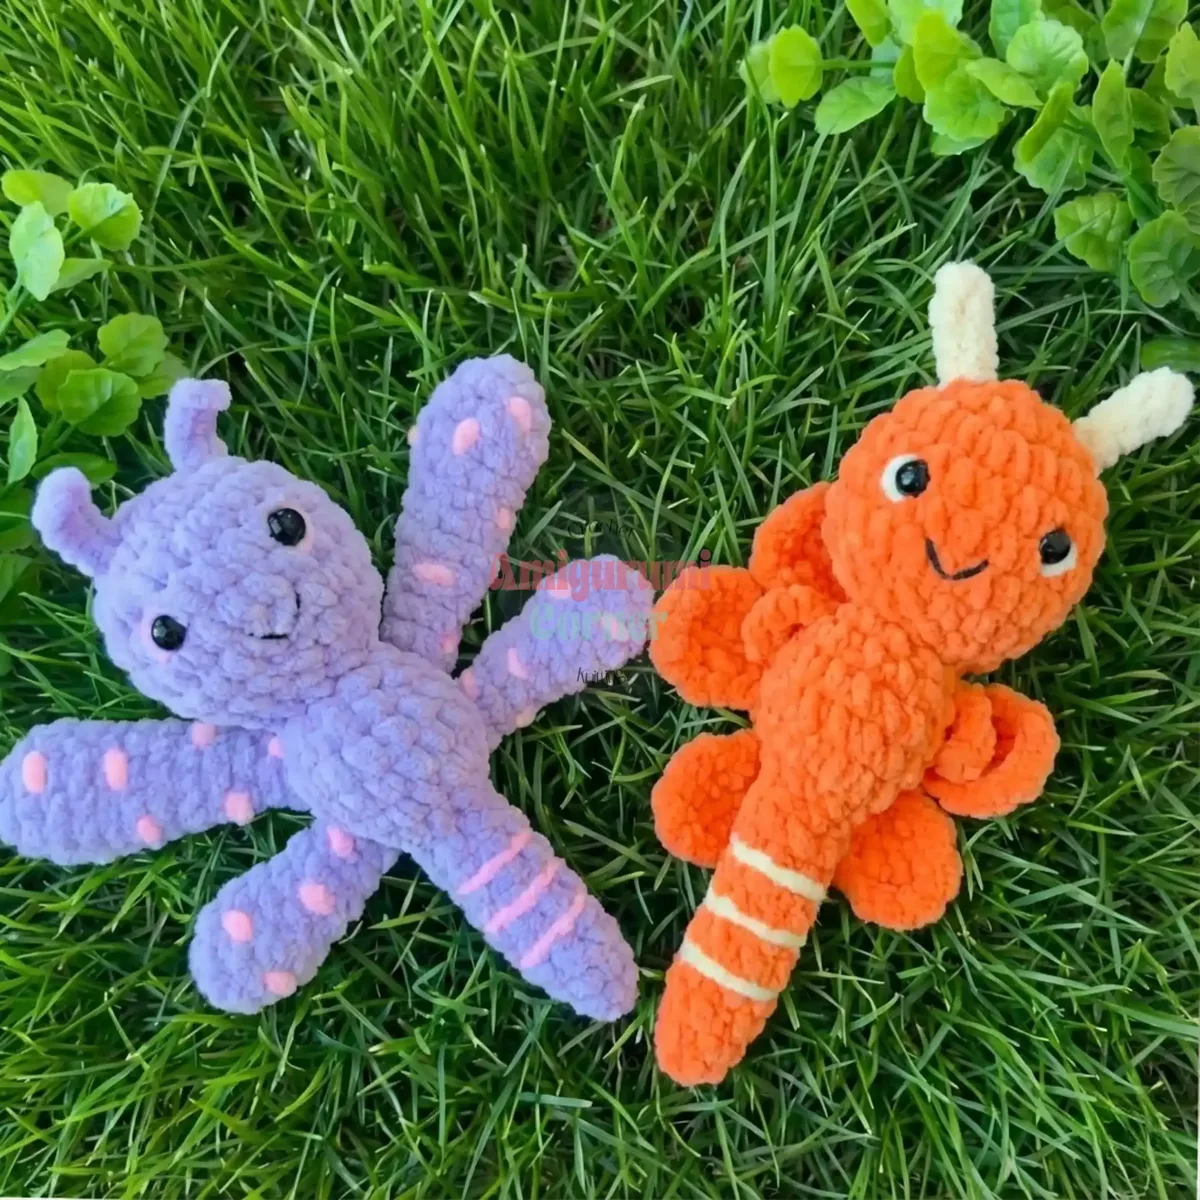
Crochet dragonfly amigurumi pattern with folded wings

Amigurumi dragonfly: 8-round head, 9-round body, folded wings, 3.5mm hook.

Jump to the rounds Pin it
Crochet dragonfly amigurumi pattern with folded wings
Amigurumi · DK
Skill
Beginner
Time
4-5 hours
Yarn weight
DK
Hook
3.5 mm
Rounds
33

Beginner

What the pattern's own author called it. Nothing here is graded again.

DK

What the sample was worked in. Any weight works; the size moves with it.

33

Each one is typed out whole and gets its own line.

This dragonfly takes shape from five small components worked separately and joined at the end: a head and body built in continuous spiral rounds with a color change from blue to yellow, a pair of wings worked flat over ten rows and folded double, a shorter second wing piece, and simple chain-based arms and antennae. Before starting, have 3.5mm hook, the three yarn colors, stitch markers for the spiral rounds, 8mm safety eyes, and bead fiber stuffing within reach, since the head closes around the eyes before any stuffing goes in.

Common mistakes and their fixes

Losing the round on the spiral head
Keep a stitch marker in the last stitch of each round on the head and body; without one, the increase pattern drifts and the color change lands unevenly.
Stuffing the wing pieces
Leave the wings flat and unstuffed; they are meant to be folded and seamed closed, not filled, so they lie flat against the body.
Closing the head before setting the eyes
Place the 8mm safety eyes while the head opening is still wide; once the final rounds are closed and stuffed, there is no way to push the posts through from the right side.

The materials list

  1. 3.5mm crochet hook
  2. Himalaya Dolphin Baby yarn in Blue (80306), Yellow (80302), and White (80301)
  3. Stitch markers
  4. Scissors
  5. Bead fiber for stuffing
  6. 8mm plastic safety eyes
  7. Thin cotton threads for optional body stripes
  8. this …

Listed by the pattern's own author, in their words.

Key to this pattern, 9 short forms

Main Pattern

Round 1

Make 6 sc in MR (6)

Round 2

6 inc (12)Step by step: Cut the yarn and secure it Change to Yellow Yarn:.

Round 3

(1 sc, 1 inc)*6 (18)

Round 4

(2 sc, 1 inc)*6 (24)

Rounds 5–7

24 sc

Round 8

(2 sc, 1 dec)*6 (18)Attach the safety eyes between the 5th and 6th rows, leaving 5 sc between them

Round 9

(1 sc, 1 dec)*6 (12)Step by step: 7 sc.Fill with fiber

Round 10

1 dec, 8 sc, 1 dec (10)Cut the yarn and secure it

Main Pattern

Round 1

Make 4 sc in MR (4)

Round 2

4 sc (4)

Round 3

4 inc (8)

Rounds 4–12

8 scStep by step: 5 sc Fold the piece in half and crochet the edges together Leave a long yarn for sewing; Do not fill with fiber Sew the lower wings under the upper wings.

Round 13

(1 sc, 1 inc)*4 (12)

Round 14

(2 sc, 1 inc)*4 (16)

Rounds 15–16

16 sc

Round 17

(2 sc, 1 dec)*4 (12)

Round 18

3 sc, 1 dec, 4 sc, 1 dec (10)Leave the yarn long for sewing Make body filling every 5 rows Optional: If desired, add 3 strips on the body using thin cotton threads

Main Pattern

Round 1

Make chain 4

Round 2

3 sc Leave the yarn long for sewing Sew the arms to the sides of the neck on the 2nd row

Main Pattern

Round 1

Make chain 5

Round 2

From the second chain, make 4 sl st Leave the yarn long for sewing Sew the antennas to the 2nd row of the head with 3 sc between them

Remember it later!

Main Pattern

Round 1

Make 4 sc in MR (4)

Round 2

4 inc (8)

Round 3

1 sc, 1 inc, (2 sc, 1 inc)*2 (11)

Round 4

11 sc (11)

Round 5

(3 sc, 1 dec)*2, 1 sc (9)

Rounds 6–8

9 sc

Round 9

(2 sc, 1 dec)*2, 1 sc (7)

Round 10

7 sc (7)

Round 11

(1 sc, 1 dec)*2, 1 sc (5)

Rounds 12–14

5 sc Fold the piece in half and crochet the edges together Leave a long thread for sewing

Part 2

Round 1

Into the loops of the white circle, make (8 ch, 7 sc, 2 sl st)*6

Round 2

(sl st, sc, hdc, dc, hdc, sc, sl st)*6 Make 1 sl st in between each loop This creates a beautiful flower that can be attached to your dragonfly for an extra decorative touch.

Assembly, in order

Step 1When assembling your dragonfly, work methodically through each component. Start by securely attaching the head to the body, ensuring proper alignment. Position the arms on either side of the neck at the second row for balanced proportions. The antennas should be evenly spaced on the head’s second row with three single crochet stitches between them.
Step 2For the wings, attach the upper wings first to the back of the body, maintaining two single crochet spaces between them. Then position the lower wings directly beneath the upper ones for a layered, realistic appearance. Take your time with assembly to ensure all pieces are firmly secured and symmetrically placed.

Check these before you start

  • Use the 3.5mm hook consistently throughout; a looser gauge will let bead fiber show through the stitches on the head and body.
  • Keep a stitch marker in the working round for the head and body sections, since both are worked in a continuous spiral where it is easy to lose the round.
  • When you cut and secure the yarn to change from Blue to Yellow, weave in that end immediately rather than leaving it for the final finishing pass.

On one line

Rounds33
Parts6
LevelBeginner
Time4-5 hours
Hook3.5 mm
YarnDK

Set-up

  • Check that you have enough of each yarn color on hand, since the head and body both change from Blue to Yellow mid-round.
  • Set a stitch marker at the start of the first round of the head and body; both are worked in a continuous spiral with no slip stitch to mark the join.
  • Read through the wing rows before starting them; they are worked flat and folded in half, not joined in the round, and are never stuffed.
  • Have the 8mm safety eyes and bead fiber stuffing ready before you reach the final rounds of the head, since the eyes go in before the head closes.

Finishing

  1. Insert the 8mm safety eyes into the head before closing the final rounds; the opening narrows too much afterward to set the posts.
  2. Stuff the head and body firmly with bead fiber as you close the last rounds, but leave both wing pieces unstuffed and flat.
  3. Sew the arms to the second row of the neck, space the antennae on the head's second row with three single crochet stitches between them, then attach the upper wings to the back of the body two single crochet stitches apart before sewing the lower wings underneath.

Construction

The head and body increase from 4 stitches up through 6, 12, and 18, a standard amigurumi curve that lets the color change from Blue to Yellow land cleanly at a round boundary rather than mid-stitch.

The wings are worked flat in rows, not in the round, because each wing is a single folded piece: the fabric is doubled over and the open edges are crocheted together, which is why it is never stuffed.

Time per section

Head and bodyabout 2 hours because the two pieces together run 8 and 9 rounds with a mid-piece color change to track
Upper and lower wingsabout 1.5 hours because the main wing runs 10 rows flat before folding and seaming, and the second, shorter wing piece has to match it
Arms, antennae, and assemblyabout 1 hour because the chain-based pieces are quick, but positioning the antennae, arms, and layered wings evenly takes care

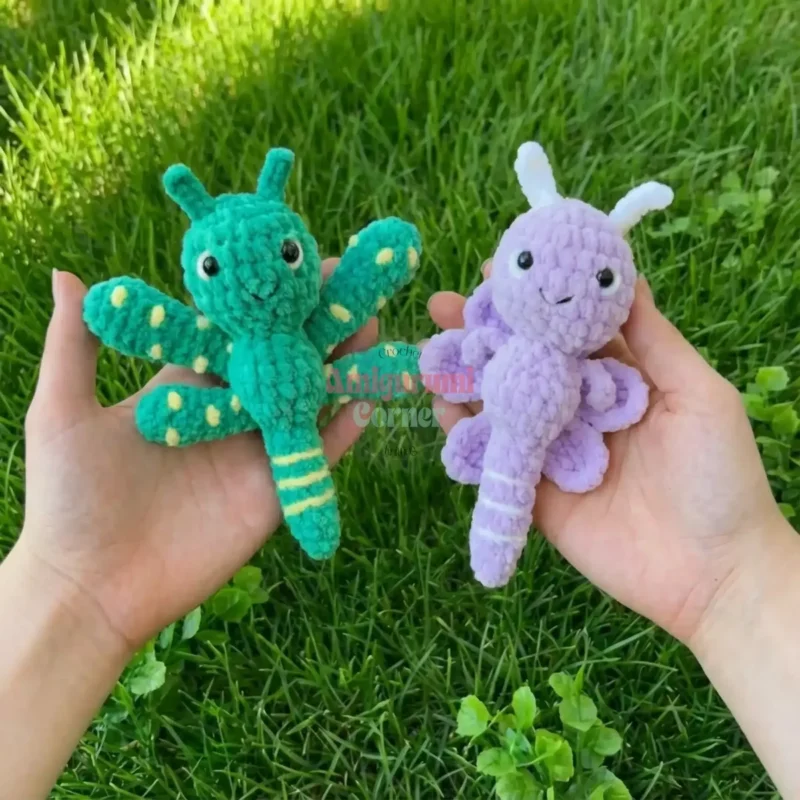
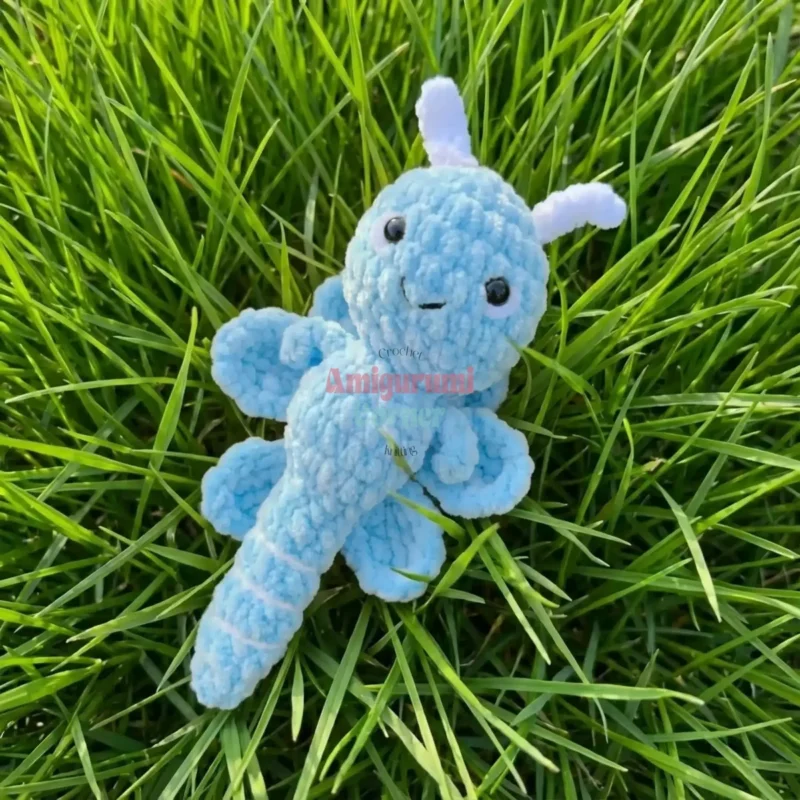
Photographs of this one

Every one was taken by whoever published the pattern, in the order the source listed them.
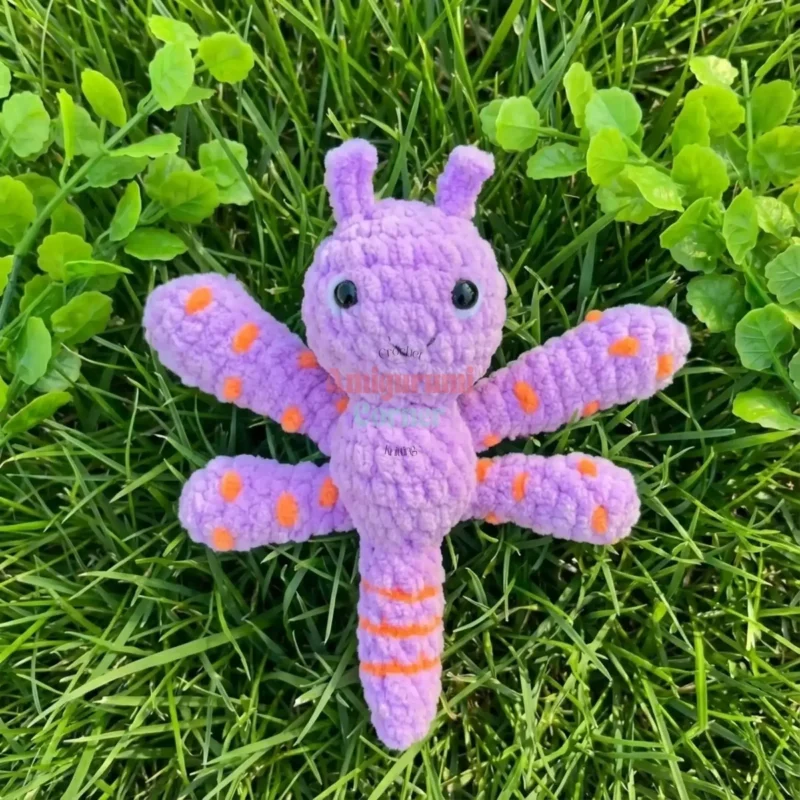
Crochet dragonfly amigurumi pattern with folded wings — photo 2
Crochet dragonfly amigurumi pattern with folded wings — photo 3
Crochet dragonfly amigurumi pattern with folded wings — photo 4
Crochet dragonfly amigurumi pattern with folded wings — photo 5

Common questions

Do I need the cotton threads for the body stripes?
No, the thin cotton threads for body stripes are optional and purely decorative. Leave them out and the dragonfly still holds its shape and color blocking from the Blue-to-Yellow yarn change.
Why are the wings worked flat instead of in the round?
Each wing is a single piece folded in half and crocheted closed along the open edge, which only works as a flat row count. This also means no stuffing is needed, since the folded layers sit flat on their own.
Where exactly do the antennae attach?
They attach to the head's second row, spaced evenly with three single crochet stitches between them. Count the stitches rather than estimating by eye to keep the pair symmetrical.

These answers came from whoever first published the pattern, kept word for word.