
Intermediate
What the pattern's own author called it. Nothing here is graded again.
 Crochet·Rituals
Bags 4 Laid out for paper No account, no download
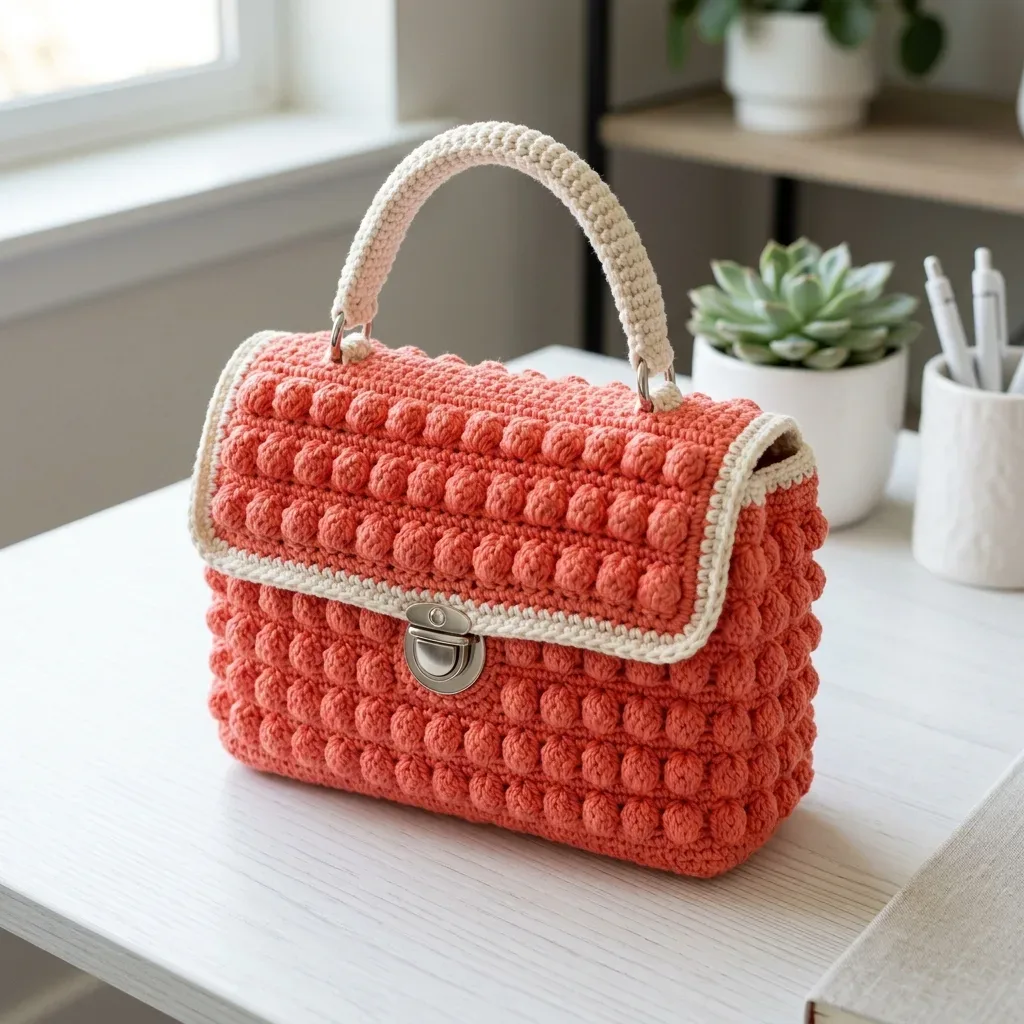
Structured bobble-stitch handbag, 92-st body, cream trim, 3.5 mm hook, worked flat and in rounds.
Crochet Rituals · retyped from the source and laid out for print · added 20 Oct 2026
What the pattern's own author called it. Nothing here is graded again.

What the sample was worked in. Any weight works; the size moves with it.

Each one is typed out whole and gets its own line.
This handbag starts as a flat rectangle, then turns into a box with a bobble-textured body, a matching flap, and a cream contrast border. The base works up in rows, the walls work up in rounds with corner increases, and the flap continues flat off the back panel before closing with a metal clasp and two D-rings. Have coral and cream cotton yarn, a 3.5 mm hook, stitch markers, and a yarn needle ready, along with fabric lining if you plan to finish the interior.
Listed by the pattern's own author, in their words.
Key to this pattern, 7 short forms
The base forms the bottom of your handbag and creates the foundation for everything else.
Foundation: Chain 37.
Single crochet in the 2nd chain from hook and in each chain across. (36 sts)
through 10: Single crochet in each stitch across. (36 sts) At the end of Row 10, you should have a neat rectangle. This is your bag bottom.
Now you’ll work around the entire base rectangle to create the bag walls.
Setting up the round: Work around the rectangle, increasing 3 single crochet stitches in each corner. You’re establishing 92 stitches around the entire perimeter.
To do this, work across the long edge (36 sts), then 3 sc in the corner stitch, work up the short edge, 3 sc in the next corner, across the second long edge (36 sts), 3 sc in the corner, up the remaining short edge, and 3 sc in the final corner. Place a stitch marker to mark the beginning of your round.
through 16: Work in the bobble pattern, alternating with single crochet support rounds.For the bobble rounds, you’ll work: *sc in first stitch, bobble in next stitch* and repeat around. The support rounds are simply single crochet in every stitch.
Checkpoint: After completing the 16 rounds, your bag body should measure approximately 15.5 cm (6.1 inches) in height. If you’re significantly off, check your gauge and tension.
The flap extends from the back panel and folds over to close with the clasp.
Work across 36 stitches on the back panel only. You’ll now be working in rows rather than rounds.
through 14: Continue in bobble texture stitch, maintaining 36 stitches in each row.Border: Join cream yarn and work 1 round of single crochet around the entire flap edge. This creates that beautiful contrast trim you see in the photos.
The handle is worked separately, then attached to the D-rings.
Foundation: Chain 61 with cream yarn.
Work 60 single crochet stitches around the chain, creating a tube shape. Some crocheters like to work over a cord or rope core for extra sturdiness. This is optional but recommended if you plan to carry heavier items.
Attach each end of the handle securely to your D-rings.
| Rounds | 4 |
|---|---|
| Parts | 4 |
| Level | Intermediate |
| Time | 4-6 hours |
| Hook | 3.5 mm |
| Yarn | Worsted |
The flap is worked flat over 36 stitches on the back panel only, breaking out of the round construction used for the body, which lets it extend upward and fold forward to meet the clasp.
| The Base | about 45 minutes because it's 10 straight rows of single crochet across 36 stitches |
|---|---|
| Building the Body | about 2 to 3 hours because of 16 rounds alternating bobble and single crochet across 92 stitches, plus tracking the corner increases |
| Creating the Flap and finishing | about 1 to 1.5 hours because of 14 bobble rows, the cream border round, and attaching the clasp and D-rings |
These answers came from whoever first published the pattern, kept word for word.