Skip to the patterns
Crochet·Rituals
Menu

Amigurumi 20 Laid out for paper No account, no download

Chunky amigurumi capybara crochet pattern

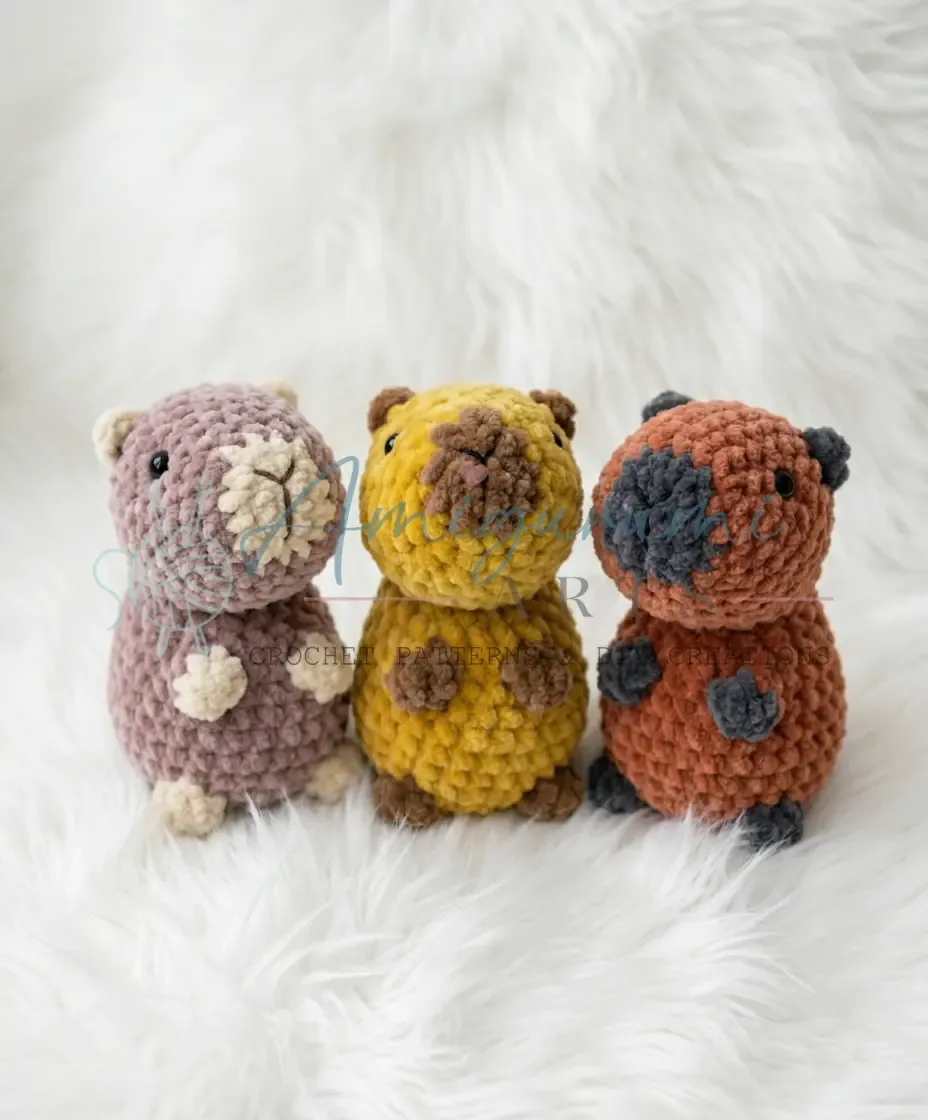
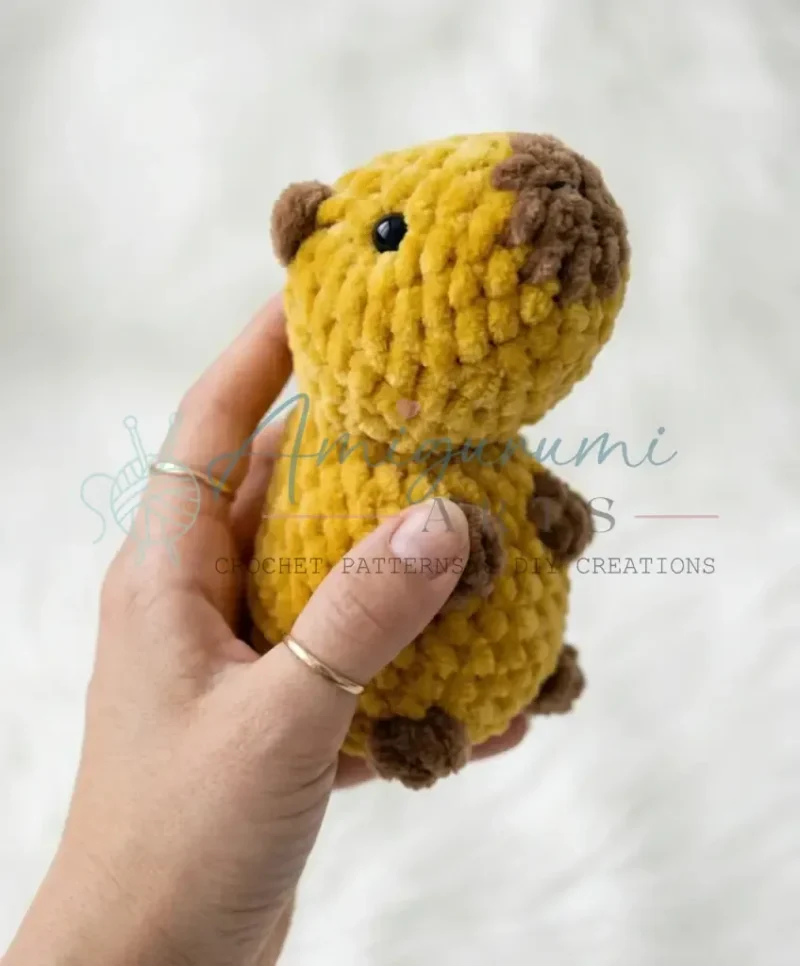
Plush capybara amigurumi worked in one 23-round spiral piece. E-4/3.5mm hook, puff-stitch paws.

Jump to the rounds Pin it
Chunky amigurumi capybara crochet pattern
Amigurumi · Bulky
Skill
Intermediate
Time
4-6 hours
Yarn weight
Bulky
Hook
3.5 mm
Rounds
20

Intermediate

What the pattern's own author called it. Nothing here is graded again.

Bulky

What the sample was worked in. Any weight works; the size moves with it.

20

Each one is typed out whole and gets its own line.

This capybara is built as a single continuous spiral, head and body worked in one unbroken piece across 23 rounds, so there is no seam to join at the neck. Main color plush yarn carries the shape while a contrast color steps in for puff-stitch paws and cheeks. Before the first stitch, have bulky-weight yarn in two colors, an E-4/3.5mm hook, fiberfill, half-bead eyes with clear crystal-formula glue, a stitch marker, and a large tapestry needle for cinching the neck on hand.

Common mistakes and their fixes

Losing the round marker in the spiral
Move the stitch marker up at the end of every single round. Without it, the continuous spiral gives no visual seam to recount from.
Stuffing only at the end
Stuff as you go, a little every few rounds, especially through the neck area. Trying to pack fiberfill in after 20 rounds are closed leaves soft spots that are hard to reach.
Gluing eyes before the neck is cinched
Cinch the neck indentation first with the tapestry needle, then attach the half-bead eyes with clear crystal-formula glue, so eye placement reflects the finished head shape.

The materials list

  1. Yarn (Main Color): Himalaya Dolphin Baby — bulky/chunky weight, plush texture; amount dependent on project size
  2. Yarn (Contrast Color): Any coordinating color for puff stitch paws and cheeks
  3. Yarn (Embroidery): Any black yarn or embroidery thread for the nose

Hook

  1. E-4 / 3.5 mm

Tools

  1. Safety eyes / Half-bead eyes: Size appropriate to project; adhesive applied with clear crystal-formula craft glue
  2. Fiberfill stuffing
  3. Stitch marker
  4. Large tapestry needle (for cinching/tightening the neck indentation)
  5. Scissors

Listed by the pattern's own author, in their words.

Key to this pattern, 10 short forms

Head & Body (worked as one piece)

Begin with main color. Switch to contrast color for puff stitch details as noted. Stuff continuously as you work.

Round 1

6 sc in MR. (6)

Round 2

(inc) × 6. (12)

Round 3

(1 sc, inc) × 6. (18)

Round 4

(2 sc, inc) × 6. (24)

Round 5

4 sc, inc, 4 sc, ps (contrast color — right cheek), 9 sc. (24)The puff stitch sits on the side of the head as a cheek detail. Return to main color after the puff stitch.

Rounds 6–9

sc in each st around. (24) (4 rounds total)

Round 10

10 sc, (dec) × 3, 8 sc. (21)

Round 11

10 sc, ps (contrast color), 2 sc, ps (contrast color), 7 sc. (21)These two puff stitches form the paw/foot details at the base of the head section.

Round 12

(dec, 5 sc) × 3. (18)

Round 13

4 sc, (dec) × 6, 2 sc. (12)

This is the neck. The stitch count drops sharply here — this is correct.

Round 14

(inc) × 4, 6 sc in FLO-prev, (inc) × 2. (18)The FLO-prev stitches here create the transition ridge between neck and body.

Round 15

1 sc, (inc) × 4, 6 sc in FLO-prev, (1 sc, inc) × 2. (24)

Round 16

13 sc, 6 sc in FLO-prev, 5 sc. (24)

Round 17

2 sc, ps (contrast color), 3 sc, ps (contrast color), 6 sc, 6 sl st in FLO-prev, 5 sc. (24)

The two puff stitches here are the front paws on the body. The 6 slip stitches in FLO-prev create a textured tummy detail.

Round 18

15 sc, (dec) × 3, 3 sc. (21)

Round 19

(dec) × 6, 6 sc. (18) (note: this gives 18 sts — keep stuffing firmly)

Round 20

(dec, 4 sc) × 3. (15)

Round 21

(dec, 3 sc) × 3. (12)

Round 22

6 dec, then switch to contrast color, 4 sc. (12)

The color change at the end of this round creates the capybara’s tail area.

Round 23

6 sc. (6)Fasten off, leaving a long tail. Pull the tail through the remaining 6 stitches and pull tight to close. Weave in the end securely.

Assembly, in order

Step 1Stuff Firmly: Before closing, make sure the entire body is stuffed to a satisfying firmness — press gently to check that no soft spots remain at the neck or lower body.
Step 2Close the Opening: Using the contrast-color yarn tail, thread your tapestry needle, pass through all 6 remaining stitches, and pull tight. Knot securely and weave in the end.
Step 3Cinch the Neck: Thread a strong yarn or thread onto your large tapestry needle. Insert the needle at the neck (the narrow point between Rnds 13 and 14), leaving a short tail. Bring the needle out approximately 2 rounds below one of the ear positions. Re-insert the needle 1 stitch across, bring it out on the opposite side of the neck. Re-insert again 1 stitch across, and bring the needle back out at the neck, 1 stitch away from your original entry point. Pull firmly to create the head/body cinch definition. Tie several tight knots and bury the ends inside the body.
Step 4Attach the Half-Bead Eyes: Position the eyes symmetrically on the face — roughly between Rnds 6 and 8, on either side of the cheek puff stitches. Apply a small amount of clear crystal-formula craft glue to the flat back of each half-bead, press firmly, and allow to dry completely before handling.
Step 5Embroider the Nose: Using black yarn or embroidery thread and your tapestry needle, create a small Y-shape or triangle nose centered on the face below the eye line. Weave in the nose ends securely on the inside.
Step 6Weave In All Remaining Ends

Check these before you start

  • Work with the E-4/3.5mm hook tightly enough that no fiberfill shows through the stitches — gauge itself is not critical, but stitch density is.
  • Stuff continuously as you work rather than waiting until the piece is closed; this keeps the shape even through the neck indentation.
  • Keep the stitch marker moving every round without exception, since a missed join point is hard to trace back through 20 rounds of spiral.
  • Master the invisible decrease by inserting the hook through the front loops only of the next two stitches before completing the stitch — this minimizes the gap and keeps the surface smooth, especially important at the neck (Rounds 12–13).
  • Himalaya Dolphin Baby's plush halo can hide your stitches, so count carefully at the end of every round rather than relying on your eye, and use a contrasting stitch marker to recount whenever unsure.
  • Add fiberfill every few rounds rather than waiting until the end so the head stays round and the neck transition holds its shape; overstuffing the neck slightly before working Rounds 14–15 helps the body expand evenly.
  • Rather than carrying the contrast color across multiple rounds for the puff stitches, consider cutting after each puff stitch section and rejoining when needed, since carried floats can distort fluffy yarn.
  • The neck cinch transforms the tube into a recognizable capybara shape — work slowly, test the tension by feel before knotting, and redo it once if the first pass doesn't feel balanced.

On one line

Rounds20
LevelIntermediate
Time4-6 hours
Hook3.5 mm
YarnBulky

Set-up

  • Confirm you have enough main-color bulky yarn for the full 23-round piece, plus a separate contrast color for the puff-stitch paws and cheeks.
  • Place a stitch marker at the start of Round 1 and move it up every round — this piece is worked in a continuous spiral with no joins.
  • Read through the increase pattern in Rounds 1-4 first (6, 12, 18, 24) so the shaping rhythm is familiar before stitches speed up later in the body.
  • Set out the half-bead eyes and clear crystal-formula glue near your workspace now, since eye placement happens after stuffing, not during it.

Finishing

  1. Check the whole body by pressing gently for soft spots, paying particular attention to the neck and lower body, before closing anything.
  2. Thread the contrast-color tail onto the tapestry needle, run it through the final 6 stitches, pull tight, knot securely, and weave in the end.
  3. Thread strong yarn onto the large tapestry needle and cinch the neck at the narrow point to define the indentation, then attach the half-bead eyes with clear crystal-formula glue.

Construction

Rounds 1 through 4 increase by six stitches every round (6, 12, 18, 24), a standard amigurumi crown shape that sets the head's curve before the body begins.

Because the head and body are worked as one continuous piece with no join, the neck shaping has to come from a later cinch rather than from a color or stitch break — hence the separate cinching step with a large tapestry needle after stuffing.

Time per section

Head & Body (Rounds 1-23)about 3-4 hours because the piece is worked continuously with shaping changes across all 23 rounds
Stuffing and closingabout 30-45 minutes because firm, even stuffing must be checked before the final 6 stitches are drawn closed
Neck cinch and eye attachmentabout 30 minutes because the neck cinch takes careful needle placement and the glue for the half-bead eyes needs a moment to set

Photographs of this one

Every one was taken by whoever published the pattern, in the order the source listed them.
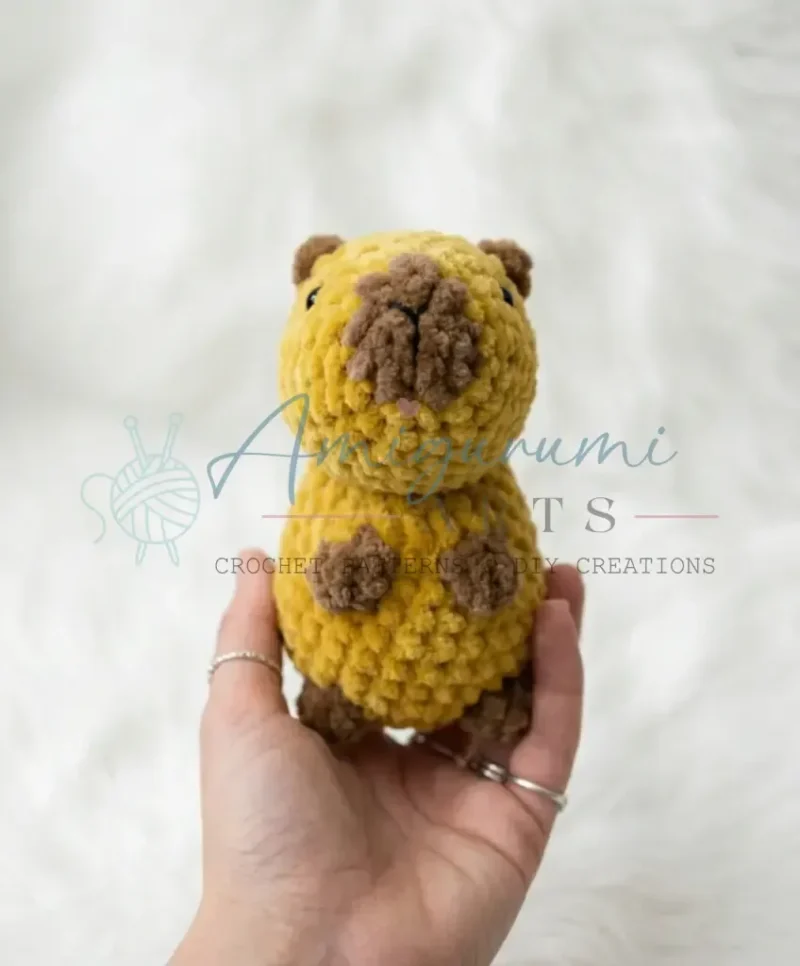
Chunky amigurumi capybara crochet pattern — photo 2
Chunky amigurumi capybara crochet pattern — photo 3

Common questions

What skill level is needed to make this crochet capybara?
This pattern suits confident beginners and intermediate crocheters comfortably. You'll need to be comfortable working in a continuous spiral, making increases and decreases, and working into the front loop of previous rounds. The puff stitches are straightforward once you've practiced them once — don't let them intimidate you.
How long does this capybara take to crochet?
Most crocheters finish this project in two to three evenings of comfortable crafting. Because the head and body are worked as one continuous piece, there's no lengthy assembly stage — the cinching, eye placement, and nose embroidery add only 15 to 20 minutes at the end.

These answers came from whoever first published the pattern, kept word for word.