Skip to the patterns
Crochet·Rituals
Menu

Amigurumi 35 Laid out for paper No account, no download

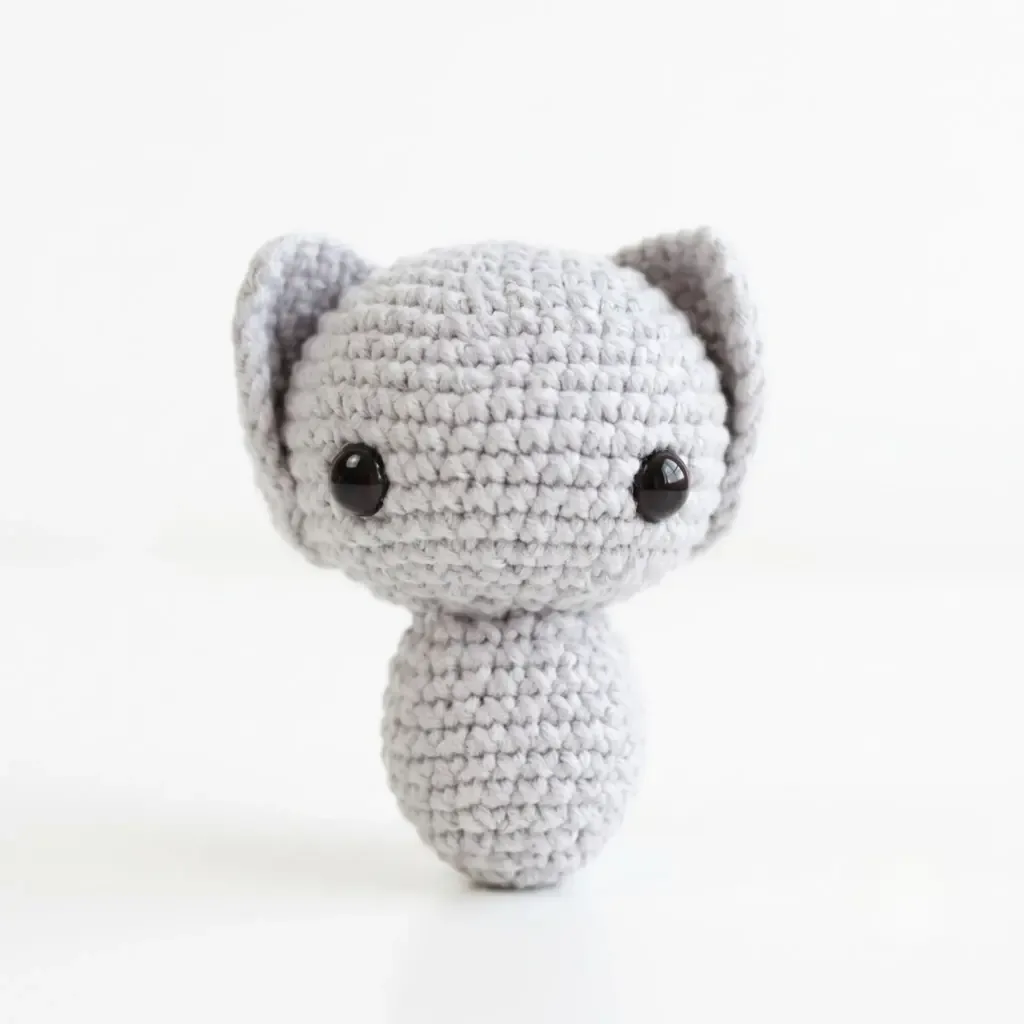
Small crochet bat keychain amigurumi pattern

Bat keychain amigurumi: head, body, ears, wings in sc/dc. 2mm hook, 35 rounds total.

Jump to the rounds Pin it
Small crochet bat keychain amigurumi pattern
Amigurumi · DK
Skill
Intermediate
Time
4-6 hours
Yarn weight
DK
Hook
2 mm
Rounds
35

Intermediate

What the pattern's own author called it. Nothing here is graded again.

DK

What the sample was worked in. Any weight works; the size moves with it.

35

Each one is typed out whole and gets its own line.

This bat keychain is a four-part build worked entirely in DK weight cotton-blend yarn on a US B/1 (2 mm) hook: a 13-round head, an 11-round body, two 6-round ears, and two 5-round wings. Head, body, and ears spiral continuously with no joins, while the wings work in joined rounds using a starting chain 3. Before the first stitch, set out fiberfill, 8 mm safety eyes, a yarn needle, and keyring hardware, since assembly moves straight from the last round into sewing.

Common mistakes and their fixes

Losing the round start on the Head
Place a stitch marker in the first stitch of every round on the Head, Body, and Ears and move it up as you go, since these parts spiral with no join to mark the round for you.
Joining the Wing rounds incorrectly
Remember the Wings work differently from the rest of the pattern: chain 3 counts as the first dc, and each round closes with a slip stitch. Skipping the join will leave a spiral where the pattern expects a seam.
Sewing the Head on before checking eye placement
Set the 8 mm safety eyes during the Head rounds and check they face forward before stuffing the Body, since eyes are difficult to reposition once the Head is closed and attached.
Using a standard decrease on the Head
Using a standard decrease instead of an invisible decrease on the Head's shaping rounds (Rounds 14–17) leaves little bumps along the top and bottom of the oval; use an invisible decrease so the shaping stays smooth.
Leaving a visible seam ridge
Sewing the Head to the Body through full stitches instead of just under the surface loops leaves a visible ridge at the join; work your stitches just under the surface loops and pull gently as you go so the seam disappears into the join.

The materials list

Yarn

  1. DK weight cotton-blend yarn (such as a mercerized cotton/acrylic blend), in black or gray

Hook

  1. US B/1 (2 mm)

Safety eyes

  1. 8 mm, 1 pair
  2. Fiberfill stuffing
  3. Fabric-safe marker (for optional face details)
  4. Yarn needle
  5. Scissors
  6. Keyring hardware (for attaching the finished bat as a keychain)

Listed by the pattern's own author, in their words.

Key to this pattern, 8 short forms

Head

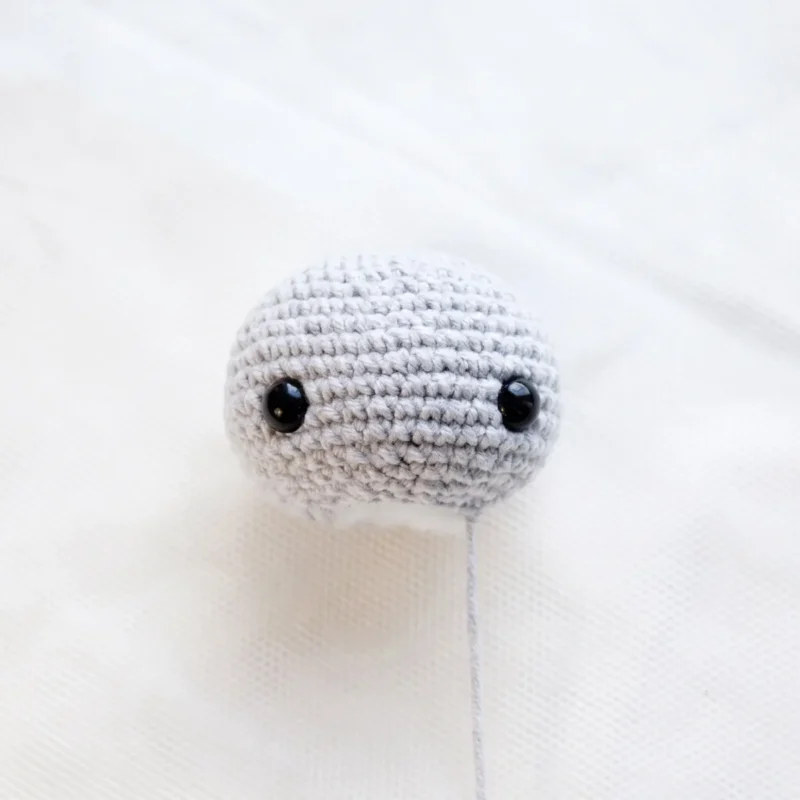
The Head is worked in a continuous spiral with no joining — place a stitch marker in the first stitch of each round and move it up as you go, since there's no slip stitch to mark where the round begins. Safety eyes are inserted partway through, between Rounds 11 and 12, since they can't be added once the opening closes. On the shaping rounds later on, use an invisible decrease rather than a standard one to keep the top and bottom of the oval smooth instead of bumpy.

Round 1

6 sc in MR. (6)

Round 2

inc in each st around. (12)

Round 3

1 sc, inc repeat around. (18)

Round 4

2 sc, inc repeat around. (24)

Round 5

3 sc, inc repeat around. (30)

Round 6

4 sc, inc repeat around. (36)

Rounds 7–8

sc in each st around, 2 rounds. (36)

Round 9

5 sc, inc repeat around. (42)

Rounds 10–13

sc in each st around, 4 rounds. (42)Insert safety eyes now, between Rounds 11 and 12, spacing them 10 stitches apart.

Round 14

4 sc, dec repeat around. (35)

Round 15

3 sc, dec repeat around. (28)

Round 16

2 sc, dec repeat around. (21)

Round 17

1 sc, dec repeat around. (14)Fasten off, leaving a long tail for sewing. Stuff the head firmly, shaping it into an oval rather than a perfect sphere.

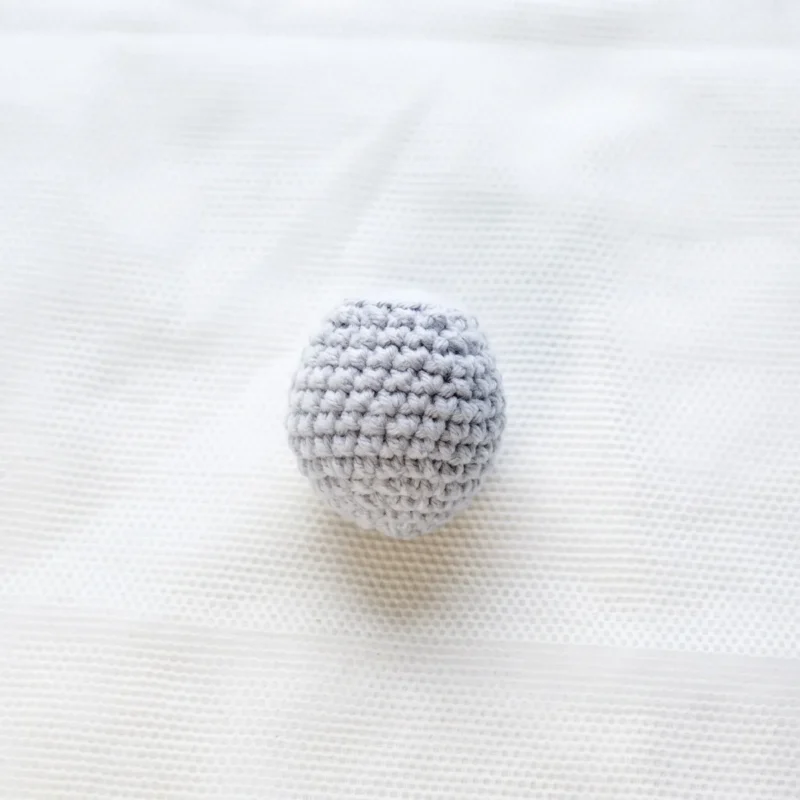
Body

Round 1

6 sc in MR. (6)

Round 2

inc, 1 sc repeat around. (9)

Round 3

inc, 2 sc repeat around. (12)

Round 4

inc, 3 sc repeat around. (15)

Round 5

inc, 4 sc repeat around. (18)

Round 6

inc, 2 sc repeat around. (24)

Rounds 7–9

sc in each st around, 3 rounds. (24)

Round 10

dec, 6 sc repeat around. (21)

Round 11

sc in each st around. (21)

Round 12

dec, 5 sc repeat around. (18)

Round 13

3 sc, dec, 2 sc, dec repeat twice. (14)Fasten off and cut the yarn. Stuff the body firmly, then sew the Head on top of it.

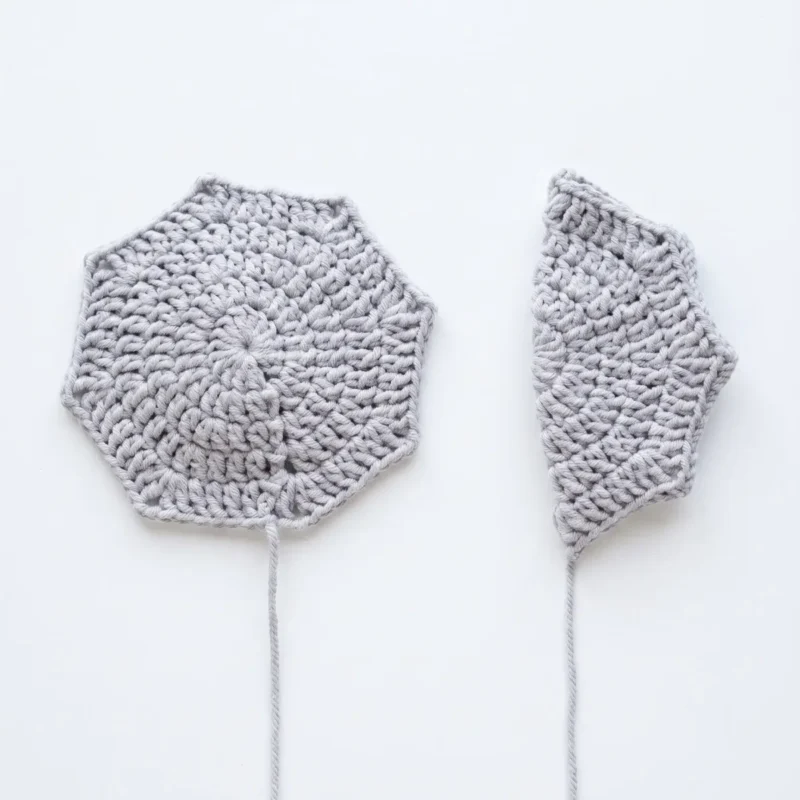
Ear (make 2)

Round 1

6 sc in MR. (6)

Round 2

3 sc in same st, 1 sc repeat around. (12)

Round 3

1 sc, 3 sc in same st, 3 sc repeat twice, 3 sc in same st, 2 sc. (18)

Round 4

2 sc, 3 sc in same st, 5 sc repeat twice, 3 sc in same st, 3 sc. (24)

Round 5

3 sc, 3 sc in same st, 7 sc repeat twice, 3 sc in same st, 4 sc. (30)

Round 6

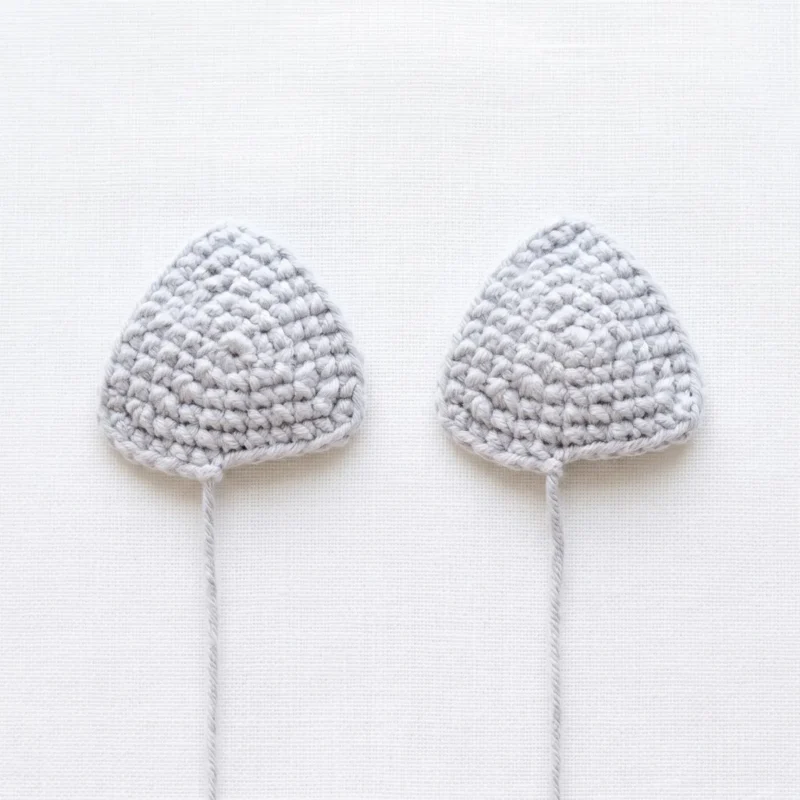
4 sc, 2 sc in same st, 9 sc repeat twice, 2 sc in same st, 4 sc. (33)Join with a slip stitch. Fasten off, leaving a long tail for sewing. Do not stuff the ears — they’re sewn on flat. Repeat for the second ear.

Wing (make 2)

Row 1

Into MR ch 3, work 15 dc, join with sl st to top of ch-3. (16)

Row 2

Ch 3, 1 dc, 1 dc, inc repeat 7 times, 1 dc, join with sl st to top of ch-3. (24)

Row 3

Ch 3, 1 dc, 2 dc, inc repeat 7 times, 2 dc, join with sl st to top of ch-3. (32)

Row 4

Ch 3, 1 dc, 3 dc, inc repeat 7 times, 3 dc, join with sl st to top of ch-3. (40)

Row 5

Ch 3, work [1 dc, ch 2, 2 dc] in same st, 4 dc, [2 dc, ch 2, 2 dc] in same st repeat 7 times, 4 dc, join with sl st to top of ch-3. (80)Fasten off, leaving a long tail. Fold the piece in half so the fanned edges meet, then sew the folded edge closed to form the wing shape. Repeat to make the second wing.

Assembly, in order

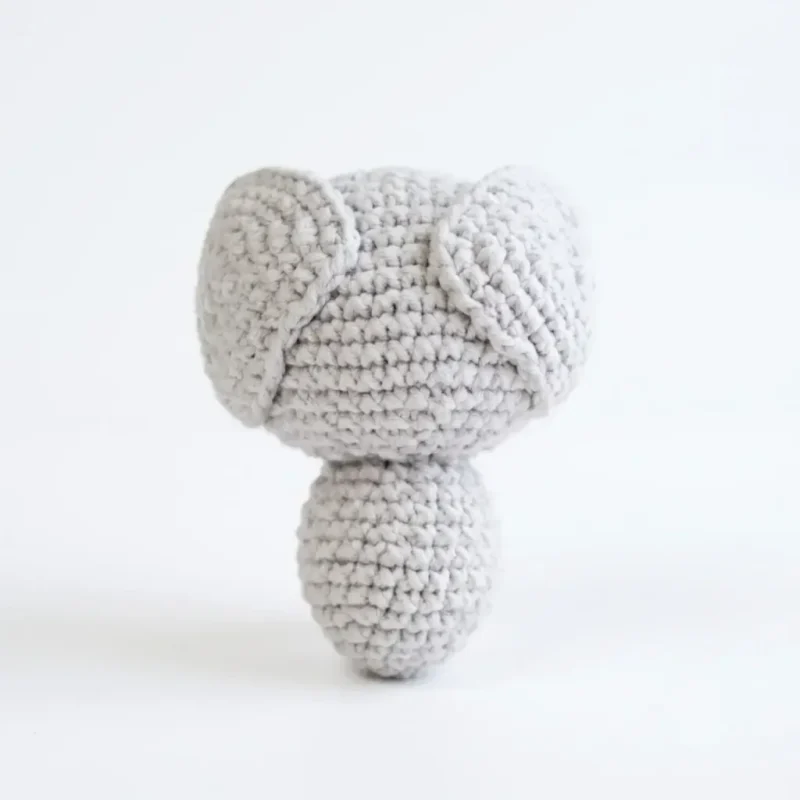
Step 1Stuff the Body firmly and sew the Head securely on top of it, keeping the safety eyes facing forward.
Step 2Position the two Ears on top of the Head, spaced evenly apart, and whipstitch them in place using their yarn tails.
Step 3Fold and sew each Wing as described in the pattern, then position them on either side of the Body so they fan outward like open bat wings. Sew each one in place along its straight edge.
Step 4Attach a keyring finding to the top of the Head or between the wings, securing it firmly with a few extra stitches of yarn.
Step 5Weave in all remaining yarn ends and trim any excess.

Check these before you start

  • Keep tension firm on the B/1 (2 mm) hook throughout; a small hook paired with loose stitches lets stuffing show through the fabric of the Head and Body. Gauge is not critical for this project since it's a small stuffed accessory, but a tighter gauge than usual is recommended to keep stuffing from showing through the stitches.
  • Move the stitch marker up at the end of every round on the Head, Body, and Ears, since these parts have no slip-stitch join to mark the round for you.
  • Stuff the Body firmly before attaching the Head, and check firmness again once the Head is sewn on, since a keychain takes more handling than a shelf toy.
  • This pattern is written in US crochet terminology.
  • If substituting yarn, stick to a similar DK-weight cotton blend — a fuzzier or thicker yarn will obscure the fanned detail in the Wings, which depends on crisp, well-defined double crochet stitches.
  • Stuff each piece firmly but evenly as you go, adding small amounts every couple of rounds, rather than waiting until the round is closed, so the fill stays even and you avoid lumps or a lopsided shape.

On one line

Rounds35
Parts4
LevelIntermediate
Time4-6 hours
Hook2 mm
YarnDK

Set-up

  • Check that the DK cotton-blend yarn is on hand in the color chosen, since head, body, ears, and wings all draw from the same skein.
  • Have a stitch marker ready before Round 1 of the Head, Body, or Ears — these three parts spiral with no join, so nothing else marks the round start.
  • Set the 8 mm safety eyes aside where they will not roll away, since they insert during the Head rounds rather than at assembly.

Finishing

  1. Weave in all yarn tails from the Head, Body, Ears, and Wings before assembly, working each one through several stitches on the wrong side.
  2. Stuff the Body firmly, then sew the Head on top with the safety eyes facing forward.
  3. Fold and sew each Wing along its straight edge, position both on either side of the Body so they fan outward, then whipstitch the Ears to the Head before securing the keyring finding to the top of the Head or between the wings.

Construction

The Body increases every round from Round 1 through Round 5 (6, 9, 12, 15, 18 stitches), adding exactly one increase per round rather than doubling, which keeps the base cone gradual instead of flaring.

Time per section

Headabout 45-60 minutes, because it runs 13 rounds with placed increases and safety eye insertion partway through
Body, Ears, and Wingsabout 60-75 minutes total, because the Body's 11 rounds and two Ears' 6 rounds each move quickly, while the two Wings need care for their joined-round shaping
Assemblyabout 30-45 minutes, because stuffing, sewing the Head and Ears in place, folding and attaching both Wings, and securing the keyring hardware all happen after the pieces are complete

Photographs of this one

Every one was taken by whoever published the pattern, in the order the source listed them.
Small crochet bat keychain amigurumi pattern — photo 2
Small crochet bat keychain amigurumi pattern — photo 3
Small crochet bat keychain amigurumi pattern — photo 4
Small crochet bat keychain amigurumi pattern — photo 5
Small crochet bat keychain amigurumi pattern — photo 6

Common questions

Why do the Head, Body, and Ears not have a joining stitch?
They are worked in a continuous spiral, which avoids a visible seam line on rounded amigurumi shapes. A stitch marker is required to track where each round begins, since there is no slip stitch to mark it.
Why do the Wings use a chain 3 and a join, unlike the rest of the bat?
The Wings work in dc rather than sc, and joined rounds keep the straight edge even for sewing to the Body. The chain 3 stands in for the first dc of each round, closed with a slip stitch.
Where does the keyring attach?
The keyring finding attaches to the top of the Head or between the Wings, secured after the Ears and Wings are sewn in place. Choose whichever spot keeps the bat balanced when it hangs.
Do I need to stuff the ears and wings?
No, the ears and wings are left unstuffed. The Ears are sewn on flat, and the Wings are folded in half and sewn along the edge to hold their fanned shape without any filling.

These answers came from whoever first published the pattern, kept word for word.