Skip to the patterns
Crochet·Rituals
Menu

Amigurumi 9 Laid out for paper No account, no download

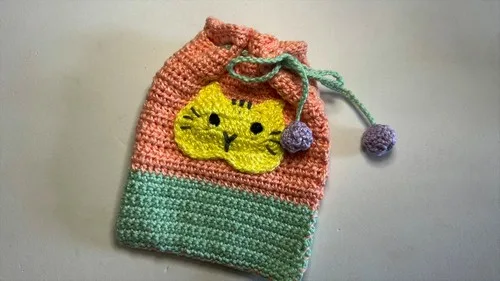
Crochet cat pouch pattern with a drawstring cord closure

A crochet cat pouch: 3 rounds for the head, 29 rows for the body, 2 mm hook, cord and ball closure.

Jump to the rounds Pin it
Crochet cat pouch pattern with a drawstring cord closure
Amigurumi · Worsted
Skill
Intermediate
Time
4-6 hours
Yarn weight
Worsted
Hook
2 mm
Rounds
9

Intermediate

What the pattern's own author called it. Nothing here is graded again.

Worsted

What the sample was worked in. Any weight works; the size moves with it.

9

Each one is typed out whole and gets its own line.

This pouch pairs a small crocheted cat face, built in three rounds from an oval base, with a flat body worked over twenty-nine rows in single and half double crochet. A drawstring cord threads through the top and finishes with two small crocheted balls. Before starting, lay out five colors of 100% cotton yarn along with black and gray for the face, a 2 mm hook, a tapestry needle, polyfill, adhesive eyes, and glue, since the face details are added after the main pieces are complete.

Common mistakes and their fixes

Miscounting the oval increases in Round 1
Count out loud through the 6 dc and 4 dc corner stitches before moving to Round 2, since an off count there skews the whole head shape.
Skipping the wrong stitches at the cord opening
Count carefully at Row 27 — skip exactly 2 stitches after the first hdc so the gap lines up for threading the cord in Row 28.

The materials list

  1. 5 different colors of 100% cotton yarn
  2. Black and gray yarn for the face
  3. Scissors
  4. Tapestry needle
  5. Plastic adhesive eyes
  6. Polyfill
  7. Glue
  8. 2 mm crochet hook

Listed by the pattern's own author, in their words.

Key to this pattern, 6 short forms

Rounds 1-3

Round 1

Slip knot, chain 11, dc in the third stitch, 1 dc in the same stitch, 7 dc, 6 dc in the last stitch, rotate and 7 dc on the other side, 4 dc in the last stitch, sl st on top of the 2 chains.

Round 2

Chain 2, 2 dc in the same stitch, repeat, 7 dc, 2 dc in the same stitch, repeat in the next 4 stitches, 2 dc in the same stitch, 1 dc, 1 hdc, 1 sc, sl st, 1 dc, 1 hdc, 1 sc, 2 dc in the next 4 stitches, sl st on top of the first dc.

Round 3

1 sl st in the next 2 stitches, 1 hdc + 1 dc in the same stitch, picot stitch (chain 2, sl st into the first chain), 1 dc + 1 hdc in the same stitch, sl st in the next 7 stitches, 1 hdc + 1 dc, 1 picot, 1 dc, 1 hdc, sl st, sl st all around, pull up a loop and cut, seamless stitch.

Rows 1-29

Row 1

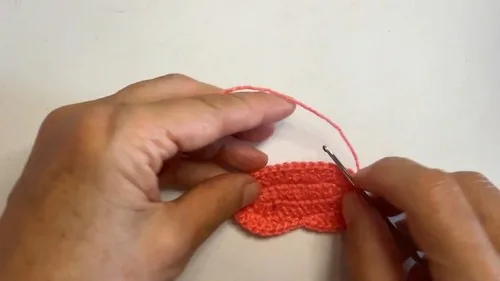
Chain 7, 1 row of sc, starting in the 2nd stitch from your hook.

Rows 2–12

Chain 1 and turn, 1 sc in each stitch across.

Rows 13–26

Switch colors, chain 2 and turn, 1 hdc in each stitch across.

Row 27

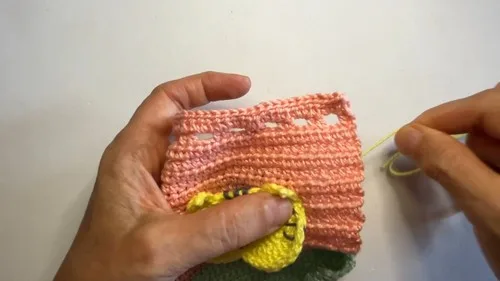
Chain 2 and turn, 1 hdc, chain 2, skip 2 stitches, 2 hdc.

Row 28

Chain 2 and turn, 1 hdc in each stitch, 2 hdc into each space across.

Row 29

Chain 1, turn, 1 sl st in each stitch, chain 1, pull up the yarn and cut. Make a second piece exactly the same.

Assembly, in order

Step 1Sew the appliqué onto one of the pouch pieces.
Step 2Join both parts together using a crochet hook or by sewing around the edges.
Step 3Cord and Ball:: Chain 100 (or desired length) for the cord, leaving a long tail.
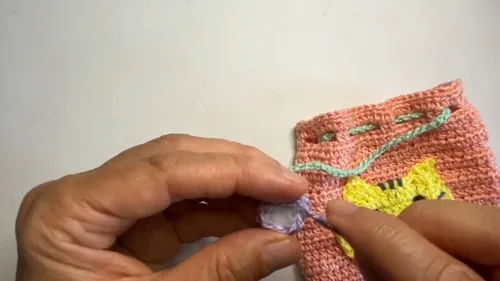
Step 4Thread the cord through the pouch.
Step 5Ball:: Magic ring, chain 1 Round 1: 6 sc, sl st
Step 6Round 2: chain 1 + 2 sc in each stitch (12 total), sl st
Step 7Round 3: chain 1 + 1 sc in each stitch (12 total), sl st, insert the cord tail, tie knots
Step 8Round 4: decrease (2 sc together), stuff it, pull up and cut, sew to close Repeat for the other side.

Check these before you start

  • The 2 mm hook produces a tight fabric on 100% cotton yarn, so keep tension even across all 29 rows to avoid a body that flares or narrows unevenly.
  • The picot detail in Round 3 (chain 2, slip stitch into the first chain) is easy to lose count on; mark the start of each picot if working without stitch markers.

On one line

Rounds9
Parts2
LevelIntermediate
Time4-6 hours
Hook2 mm
YarnWorsted

Set-up

  • Sort your five yarn colors plus the black and gray for the face so color changes at Rows 13-26 go smoothly.
  • Read Round 1 in full before picking up the hook — the 6 dc and 4 dc corner increases set the oval shape for the rest of the head.
  • Have the 2 mm hook, tapestry needle, and scissors within reach; the small hook size means frequent stops to check stitch placement.
  • Set out polyfill, glue, and adhesive eyes ahead of time, since finishing the face happens only after the pouch body is joined.

Finishing

  1. Weave in all ends left from the color changes at Rows 13-26 and from the oval base rounds before adding any face details.
  2. Attach the face: apply adhesive eyes or embroider them, add the muzzle, sew on whiskers, and add a tuft of fur above the head.
  3. Chain the cord to length, thread it through the pouch, then crochet and stuff the two small balls, tying them onto the cord tails and sewing each closed.

Construction

Round 1 begins with a chain of 11 and places 6 dc in one end stitch and 4 dc in the other, the two increase corners that turn a straight chain into an oval base for the head.

Rows 1-29 are worked flat, turning at the end of every row, rather than in continuous rounds — this lets Row 27 skip 2 stitches to open a gap, which becomes the channel the drawstring cord passes through.

Time per section

Rounds 1-3, head and face baseabout 20-30 minutes because the picot detail in Round 3 slows the stitch count even though there are only 3 rounds
Rows 1-29, pouch bodyabout 2-3 hours because of the row count and the color change partway through
Cord and ball closureabout 30-45 minutes because the chain-100 cord and two 4-round balls each need stuffing and sewing closed

Photographs of this one

Every one was taken by whoever published the pattern, in the order the source listed them.
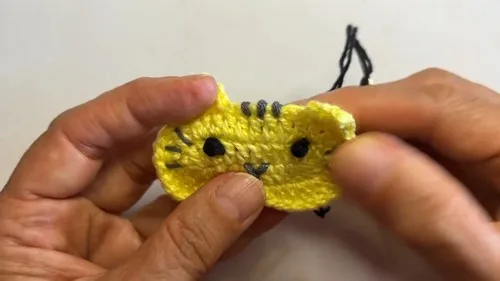
Crochet cat pouch pattern with a drawstring cord closure — photo 2
Crochet cat pouch pattern with a drawstring cord closure — photo 3
Crochet cat pouch pattern with a drawstring cord closure — photo 4
Crochet cat pouch pattern with a drawstring cord closure — photo 5

Common questions

How long should the cord be?
The pattern calls for a chain of 100, or a length you prefer. Leave a long tail on each end so there is enough to tie onto the balls once threaded.
Can the face details be changed?
Yes — the eyes can be adhesive or embroidered, and the muzzle, whiskers, and fur tuft are added as separate finishing steps. Swap black and gray for other colors if preferred.
Why is the body worked flat instead of in the round?
Working Rows 1-29 flat allows the gap at Row 27 to sit exactly where the cord needs to pass through. A continuous round would not leave that opening in the same place.

These answers came from whoever first published the pattern, kept word for word.