Skip to the patterns
Crochet·Rituals
Menu

Amigurumi 12 Laid out for paper No account, no download

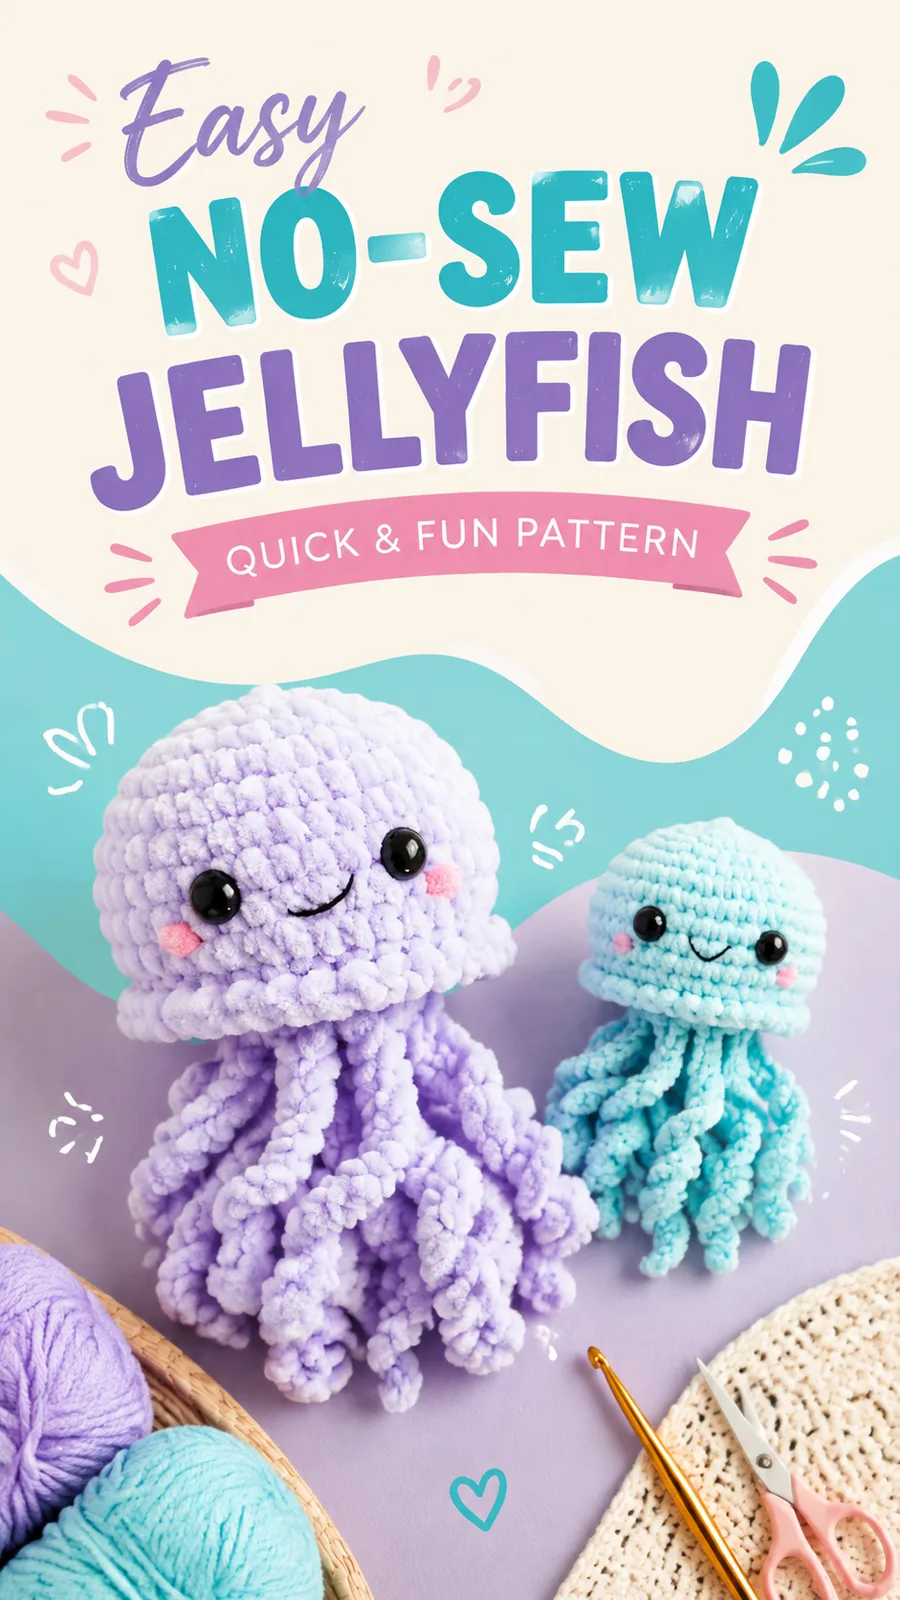
Plush crochet jellyfish with curled tentacles pattern

Amigurumi jellyfish worked in 10 rounds with a 4.5 mm hook, finished with eight curled chenille tentacles.

Jump to the rounds Pin it
Plush crochet jellyfish with curled tentacles pattern
Amigurumi · Super Bulky
Skill
Beginner
Time
3-4 hours
Yarn weight
Super Bulky
Hook
4.5 mm
Rounds
12

Beginner

What the pattern's own author called it. Nothing here is graded again.

Super Bulky

What the sample was worked in. Any weight works; the size moves with it.

12

Each one is typed out whole and gets its own line.

This amigurumi jellyfish takes shape as a rounded dome worked from the top down in continuous single crochet rounds, followed by eight separate curled tentacles chained and single crocheted flat before attaching underneath. Plush or chenille yarn gives the surface a soft, stitch-blurring texture, while a 4.5 mm hook keeps the fabric dense enough to hold polyester fiberfill without gaps. Before starting, have about 120 yards of main-color yarn, small amounts of black and pink yarn for the face, a stitch marker, and a yarn needle on hand, since the body and tentacles are built and finished separately before assembly.

Common mistakes and their fixes

Losing Track of Continuous Rounds
Because amigurumi is not joined after each round, it is easy to lose your place. Keep a stitch marker in the first stitch and count your stitches regularly.
Body Looks Too Loose
If stuffing shows through, use a smaller hook or crochet with slightly tighter tension.
Tentacles Do Not Curl
Try adding more increases along the chain or gently shape the tentacles with your fingers after sewing them in place.

The materials list

  1. Super bulky chenille or plush yarn in main color: approximately 120 yards (110 meters)
  2. Small amount of black yarn for embroidered eyes and smile
  3. Small amount of pink yarn for optional cheeks
  4. 4.5 mm crochet hook (US size 7)
  5. Polyester fiberfill stuffing
  6. Stitch marker
  7. Yarn needle
  8. Scissors

Listed by the pattern's own author, in their words.

Key to this pattern, 9 short forms

Body Construction

Important: The jellyfish body is worked in continuous rounds. Do not join rounds. Place a stitch marker in the first stitch of each round and move it upward as you work.

Round 1

Make a magic ring. Work 6 sc into the ring. (6)

Round 2

Inc in each stitch around. (12)

Round 3

(Sc in next stitch, inc in next stitch) repeat 6 times. (18)

Round 4

(Sc in next 2 stitches, inc in next stitch) repeat 6 times. (24)

Round 5

(Sc in next 3 stitches, inc in next stitch) repeat 6 times. (30)

Rounds 6–10

Sc in each stitch around. (30)

Round 11

(Sc in next 3 stitches, dec) repeat 6 times. (24)

Round 12

(Sc in next 2 stitches, dec) repeat 6 times. (18)Begin stuffing the body firmly but gently before closing the opening.

Round 13

(Sc in next stitch, dec) repeat 6 times. (12)

Round 14

Dec around. (6)Fasten off, leaving a yarn tail. Thread the tail through the front loops of the remaining stitches, pull closed, and weave in the end.

Special Stitch Explanation

Invisible decrease: Insert the hook into the front loop only of the next two stitches, yarn over, pull through both loops, yarn over again, and complete a single crochet. This creates a smoother amigurumi shape.

Tentacle Pattern

Make 8 tentacles using the same method.

Row 1

Chain 18.

Row 2

Starting in the second chain from the hook, work 2 sc in each chain across. (34 sc)Fasten off, leaving a long tail for sewing.The increases naturally create a gentle curl. For a tighter spiral effect, increase with 3 sc in each chain instead.

Assembly, in order

Step 1Arrange the eight tentacles evenly around the underside of the jellyfish body.
Step 2Sew each tentacle securely using the yarn tails.
Step 3Place safety eyes between rounds 7 and 8, approximately 6 stitches apart.
Step 4Embroider a small curved smile below the eyes.
Step 5Add tiny embroidered cheeks if desired.
Safety NotePlastic safety eyes may not be appropriate for babies or children under three. For baby-safe versions, use securely embroidered facial features instead and avoid loose decorative pieces.

Check these before you start

  • Use the 4.5 mm hook even though it reads smaller than the yarn label suggests; the tighter gauge keeps the super bulky plush yarn from gapping around the fiberfill.
  • Move the stitch marker up at the start of every round rather than joining, since the body is worked in continuous rounds throughout all 10 rounds.
  • Plush yarn hides stitch definition, so feel for each stitch with your fingers rather than relying on sight, especially when counting increases or locating the front loops for an invisible decrease.
  • Approximately 5 inches tall x 4 inches wide (13 cm x 10 cm).
  • Approximate tension: 14 single crochet stitches x 16 rounds = 4 inches (10 cm).
  • The suggested design uses a light pastel color palette, but the pattern can easily be adapted with bright colors, rainbow tentacles, or seasonal shades.
  • Beginner to Intermediate.
  • Written in US crochet terms.

On one line

Rounds12
Parts3
LevelBeginner
Time3-4 hours
Hook4.5 mm
YarnSuper Bulky

Set-up

  • Confirm you have about 120 yards of plush or chenille yarn in the main color plus small amounts of black and pink for the face before casting on.
  • Thread a stitch marker ready to place in the first stitch of Round 1 and move it upward with every round, since the body is worked continuously without joining.
  • Read through the Special Stitch Explanation for the invisible decrease before Round 1, so the front-loop-only technique is familiar when the pattern calls for it later.
  • Work a quick swatch with the 4.5 mm hook on your plush yarn to check that stitches sit close enough together to hold stuffing without gapping.

Finishing

  1. Weave in all loose ends from the body, tentacles, and face details with a yarn needle before assembly.
  2. Stuff the body evenly with polyester fiberfill, smoothing it into the dome shape and stopping short of overfilling so the rounded silhouette holds.
  3. Attach the eight tentacles and any embroidered or safety-eye face details securely underneath and onto the body, then hand wash and air dry fully before the jellyfish is handled or stored.
  4. After assembly, gently shape the jellyfish by smoothing the stuffing inside the body. Avoid overfilling because too much stuffing can stretch the stitches and change the rounded silhouette.
  5. care, hand washing is recommended for plush amigurumi items. Allow the jellyfish to air dry completely before storing. If the tentacles become flattened, lightly reshape them with your fingers.

Construction

The increase sequence moves one stitch further apart each round, Round 2 doubling 6 to 12 and Round 3 placing an increase every other stitch for 18, spreading growth evenly so the dome curves rather than peaks.

Tentacles are worked flat in rows from a starting chain of 18, with 2 single crochet worked into each chain across to reach 34 stitches, and this doubled stitch count along one flat edge is what produces the natural curl once fastened off.

To create a larger jellyfish, use thicker yarn and a larger hook while keeping the same shaping method; for a smaller version, choose lightweight yarn and reduce the number of body rounds. Rainbow tentacles made by changing colors between strands, embroidered stars or bubbles, velvet yarn for extra plush texture, and longer tentacles from extra chains before increasing are all easy ways to customize the design. Always adjust the stuffing amount when changing yarn size, since a larger jellyfish needs more filling to keep its rounded shape.

Time per section

Body Constructionabout 1 to 1.5 hours because the dome is worked in 10 continuous rounds with increases to track every round.
Tentacles (set of 8)about 1.5 to 2 hours because each of the eight tentacles starts from a chain of 18 and is worked individually before fastening off.
Face details and assemblyabout 30 to 45 minutes because the embroidered features and tentacle attachment are small, fiddly steps worked by hand.

Common questions

Why does the pattern avoid joining each round?
The body is worked in a continuous spiral rather than joined rounds, which keeps the dome surface free of a seam line down one side. A stitch marker placed in the first stitch and moved up each round keeps the round count accurate instead.
Can the tentacle curl be made tighter?
Yes, working 3 single crochet into each chain instead of 2 creates a tighter spiral along the tentacle. The standard 2 sc per chain gives the gentler curl shown in the main version.
Why use a smaller hook than the yarn calls for?
The 4.5 mm hook is smaller than usual for super bulky yarn, which tightens the single crochet fabric so stuffing does not peek through the gaps. This matters more with plush yarn, since its thick fibers can otherwise disguise loose stitches.

These answers came from whoever first published the pattern, kept word for word.