Skip to the patterns
Crochet·Rituals
Menu

Amigurumi 15 Laid out for paper No account, no download

Amigurumi chicken keychain crochet pattern for beginners

Small chicken keychain, worked in 15 rounds with a 5mm hook plus comb, beak, feet, wings.

Jump to the rounds Pin it
Amigurumi chicken keychain crochet pattern for beginners
Amigurumi · Worsted
Skill
Beginner
Time
2-3 hours
Yarn weight
Worsted
Hook
5 mm
Rounds
15

Beginner

What the pattern's own author called it. Nothing here is graded again.

Worsted

What the sample was worked in. Any weight works; the size moves with it.

15

Each one is typed out whole and gets its own line.

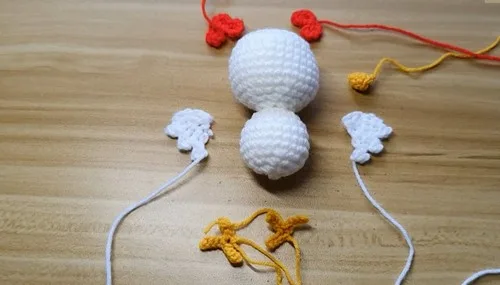
This chicken keychain builds from a single magic circle into a 15-round head and body, with a comb, beak, feet, and wings worked separately in small flat pieces and sewn on after. White, red, and yellow 4-ply acrylic cover the body, comb, and beak and feet, with a 5 mm hook throughout. Before picking up yarn, have fiber fill, a yarn needle, and scissors on hand, along with a keyring and glue gun if you plan to finish it as an accessory rather than a charm.

Common mistakes and their fixes

Losing count through the increase rounds
Place a stitch marker at the start of each round from round 2 onward, since the plain-stitch count between increases changes every round.
Underfilling the body before it closes
Add fiber fill a little at a time starting partway through the rounds rather than waiting until the opening is nearly closed.
Mismatched feet or wings
Work both pieces of a pair back to back, checking stitch counts match, before moving on to sewing them in place.

The materials list

  1. 4 ply acrylic yarn (white, red, and yellow)
  2. 5 mm crochet hook
  3. Fiber fill
  4. Scissors
  5. Yarn needle
  6. Keyring (optional)
  7. Glue gun (optional)

Listed by the pattern's own author, in their words.

Key to this pattern, 3 short forms

Head and Body

Magic Circle: Start with a magic circle and work 6 single crochets (SC).

Round 2

Increase in every stitch (2 SC in each stitch) for a total of 12 stitches.

Round 3

Work 1 SC, then increase, repeat around.

Round 4

Work 2 SC, then increase, repeat around.

Round 5

Work 3 SC, then increase, repeat around.

Rounds 6–10

Work 1 SC in every stitch (30 SC).

Round 11

Work 3 SC, then decrease, repeat around.

Round 12

Work 2 SC, then decrease, repeat around.

Round 13

Work 1 SC, then decrease, repeat around. Stuff the Head: Fill the head with fiberfill.

Round 14: Work 6 decreases.

Round 15

Increase in every stitch.

Round 16

Work 1 SC, then increase, repeat around.

Round 17

Work 2 SC, then increase, repeat around.

Rounds 18–20

Work 1 SC in every stitch (24 SC).

Round 21

Work 2 SC, then decrease, repeat around.

Round 22

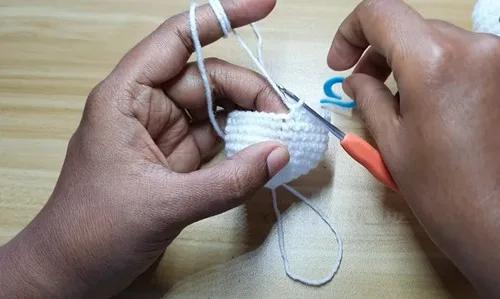
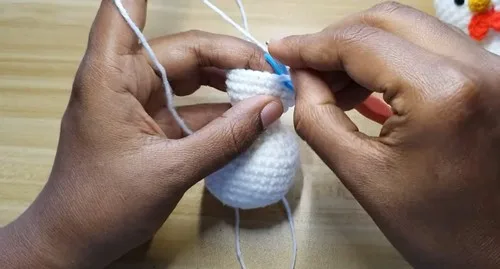
Work 1 SC, then decrease, repeat around. Stuff the Body: Fill the body with fiberfill.

Round 23

Work 6 decreases. Finish: Slip stitch, chain 1, and cut off the yarn.

Comb (Red Yarn)

Chain 6.

In the second chain from the hook, work 5 SC.

Slip stitch in the next chain.

Repeat the pattern of 5 SC and slip stitch across the chain.

Chain 1, cut off yarn, leaving a tail for sewing.

Beak (Yellow Yarn)

Make a magic circle and work 4 SC.

Work 1 SC, increase, 1 SC, increase.

Work 1 SC in every stitch.

Slip stitch, chain 1, cut off yarn, leaving a tail for sewing.

Feet (Yellow Yarn, Make Two)

Chain 5, slip stitch in the second chain from the hook.

Slip stitch in the next three chains.

Chain 4, work 4 slip stitches back to the base.

Repeat step 3 twice more.

Chain 1, cut off yarn, leaving a tail for sewing.

Wings (White Yarn, Make Two)

Make a magic circle, chain 3 (counts as a double crochet (DC)), and make 2 more DC.

Chain 3, turn, DC increase, picot (chain 3, slip stitch in the first stitch).

2 DC increase, picot.

2 DC in the top of the first chain 3, picot.

Fasten off and weave in ends.

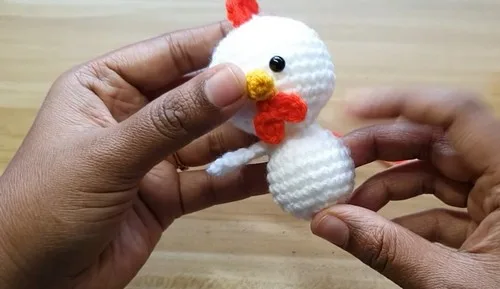
Assembly, in order

Step 1Insert the eyes between rows 8 and 9, with three stitches between them.
Step 2Sew the beak between and slightly below the eyes.
Step 3Attach the bottle at the base of the beak.
Step 4Sew the comb on top of the head.
Step 5Attach the wings to the sides of the body.
Step 6Sew the feet at the bottom.
Step 7Attach the keyring (optional).

Check these before you start

  • Use a 5 mm hook throughout; the small comb, beak, and wing pieces rely on it to keep stitches tight enough to hold their shape without stuffing.
  • The comb and beak are worked flat in rows of 5 SC with slip stitches, not in the round, so keep tension even to avoid a wavy edge.
  • Stuff the Head and Body firmly but gradually as the rounds close inward near the top, since there is no separate closing step for adding fill later.
  • The feet and wings are each made twice; keep the two pieces of each pair matched in stitch count so the finished chicken sits level.

On one line

Rounds15
Parts5
LevelBeginner
Time2-3 hours
Hook5 mm
YarnWorsted

Set-up

  • Read through the full 15 rounds of the Head and Body section before starting, so the increase pattern in rounds 2-5 is familiar.
  • Prepare a small amount of fiber fill ahead of time; the body is stuffed as you go, not after closing.
  • Count your starting 6 stitches from the magic circle carefully, since every later round's stitch count depends on it.

Finishing

  1. Weave in all ends from the Head and Body, comb, beak, feet, and wings before assembly, since no part is sewn over another.
  2. Stuff the Head and Body firmly as the final rounds close, then cut the yarn and weave in the last end at the base.
  3. Sew the comb, beak, feet, and wings on using their leftover tails, following the seven assembly steps, then attach the keyring or glue it in place if using one.

Construction

Rounds 2 through 5 increase by one plain stitch between increases each round (0, then 1, then 2, then 3), spreading the 6 original stitches outward evenly so the body rounds without puckering.

The comb and beak are each closed with a slip stitch and a chain 1 rather than joined into a continuous round, which lets them lie flat against the head once sewn on.

Time per section

Head and Bodyabout 60-75 minutes because it covers 15 rounds with shaping increases that need stitch counting
Comb, beak, feet, and wingsabout 30-40 minutes because each small piece is quick but requires a color change and a careful flat row
Assembly and finishingabout 20-30 minutes because the seven assembly steps involve precise placement of eyes, beak, and comb

Photographs of this one

Every one was taken by whoever published the pattern, in the order the source listed them.
Amigurumi chicken keychain crochet pattern for beginners — photo 2
Amigurumi chicken keychain crochet pattern for beginners — photo 3
Amigurumi chicken keychain crochet pattern for beginners — photo 4
Amigurumi chicken keychain crochet pattern for beginners — photo 5

Common questions

Can the chicken keychain be made without a keyring?
Yes, the keyring is listed as optional in the materials. The finished piece works just as well as a small stuffed charm or gift without it.
What yarn weight does this pattern use?
The pattern calls for 4-ply acrylic yarn, worked with a 5 mm hook. That hook size is larger than typical for 4-ply, which keeps the fabric slightly loose so stuffing shows through less.
Why are the comb, beak, feet, and wings worked separately?
Each small part uses its own color and a flat chain-and-slip-stitch construction rather than rounds, which is faster for tiny pieces than building them in the round. They are then sewn onto the finished body using the seven assembly steps.

These answers came from whoever first published the pattern, kept word for word.