Skip to the patterns
Crochet·Rituals
Menu

Amigurumi 37 Laid out for paper No account, no download

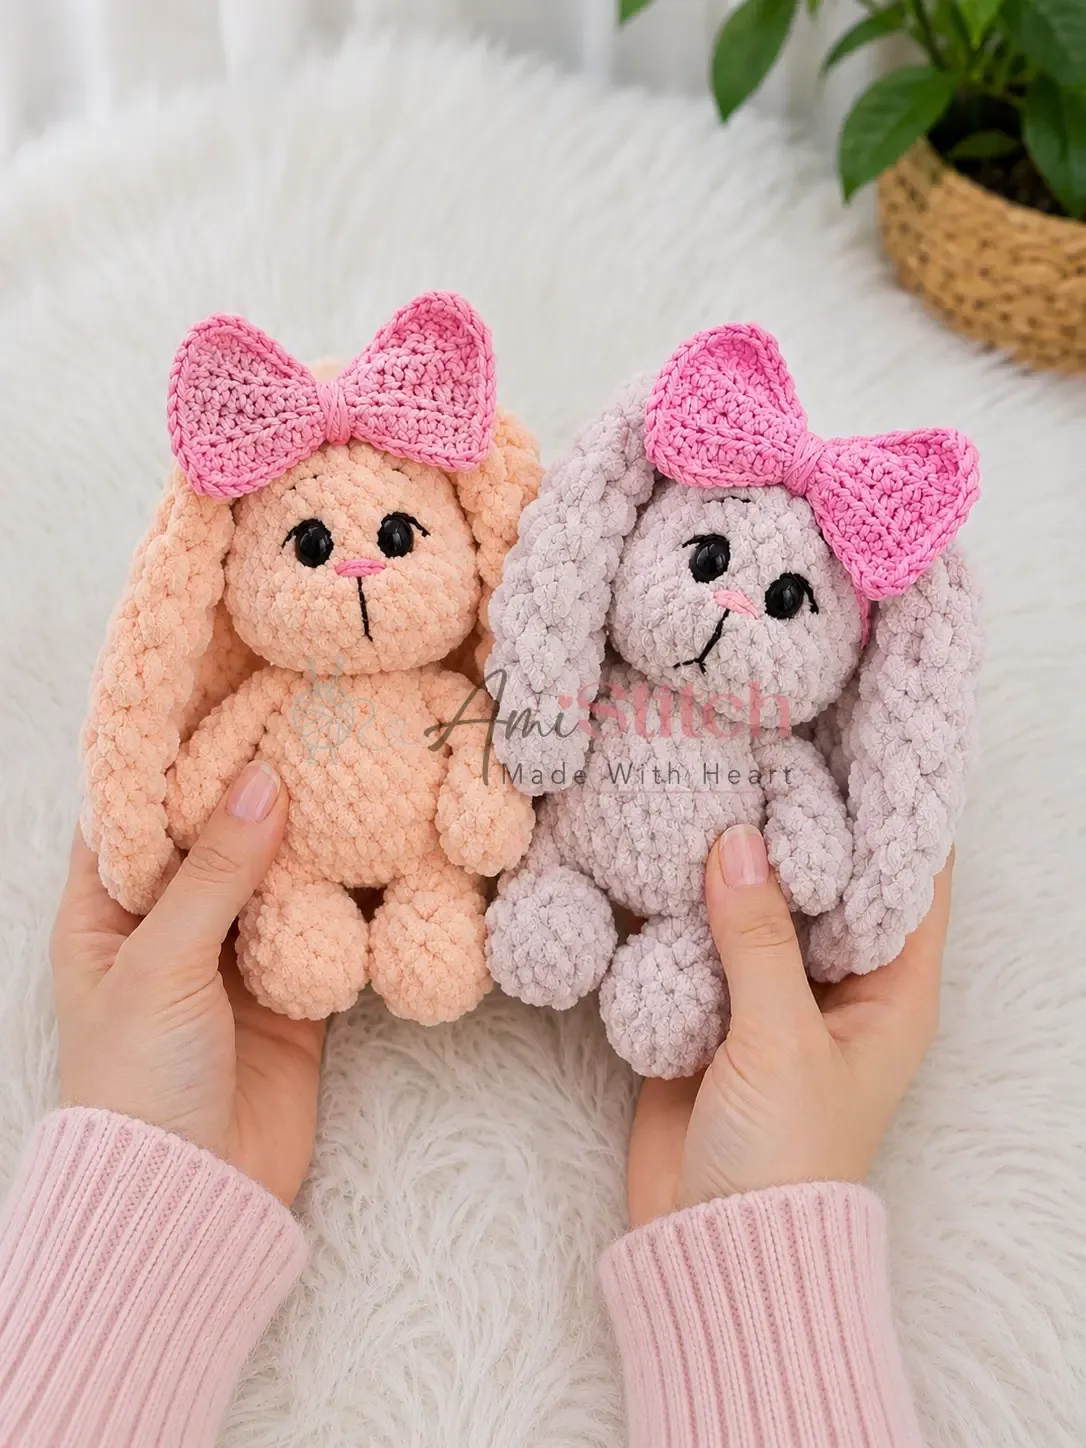
Crochet a floppy-eared plush bunny for beginners

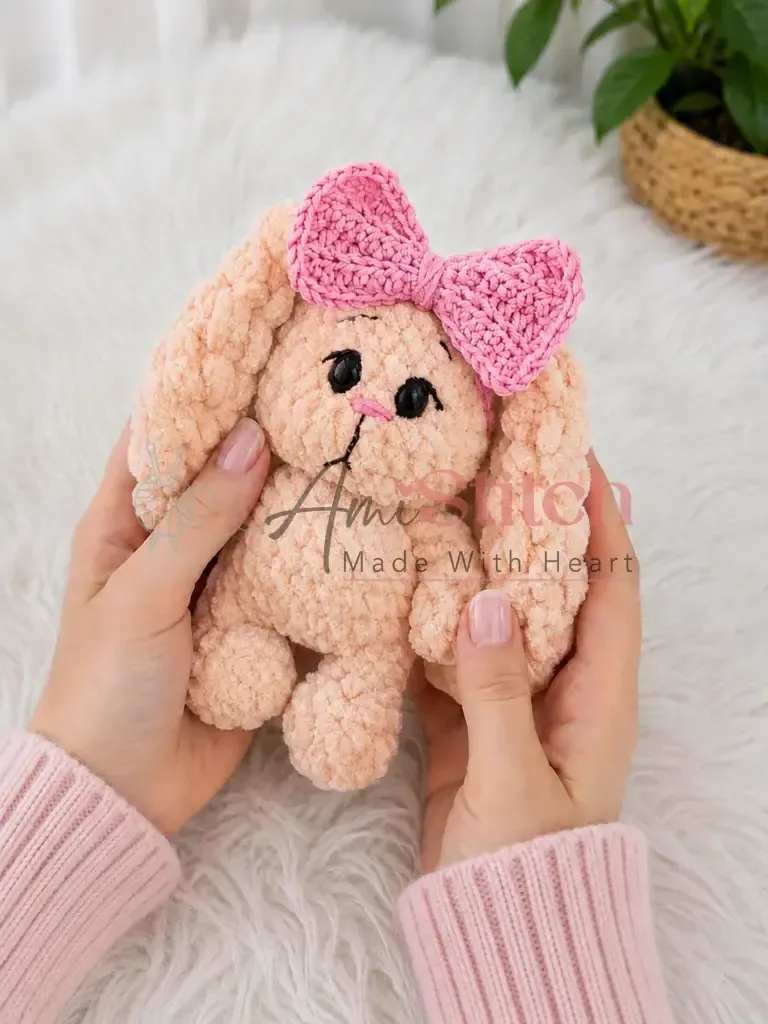
Beginner amigurumi bunny pattern: a 5.5-inch plush rabbit with a bobble tail, floppy J-10 hook ears, and a crocheted

Jump to the rounds Pin it
Crochet a floppy-eared plush bunny for beginners
Amigurumi · Worsted
Skill
Beginner
Time
4-6 hours
Yarn weight
Worsted
Hook
3.5 mm
Rounds
37

Beginner

What the pattern's own author called it. Nothing here is graded again.

Worsted

What the sample was worked in. Any weight works; the size moves with it.

37

Each one is typed out whole and gets its own line.

Beginner amigurumi bunny pattern: a 5.5-inch plush rabbit with a bobble tail, floppy J-10 hook ears, and a crocheted bow.

Common mistakes and their fixes

Losing the start of the round
The body, head, legs, and ears are all worked in a continuous spiral with no join. Move the stitch marker up at the end of every round so the increase and decrease rounds land in the right place.
Stuffing the arms
The arms are meant to stay flat and unstuffed, closed by flattening the last round and single crocheting through both layers. Add fiberfill to the legs, body, and head instead.
Working plush yarn too loose
Plush fiber is forgiving, but if your stitches are too loose the stuffing will show through. Work a little tighter than feels natural — aim for a firm, dense fabric where you can't see gaps between stitches.
Mis-timing the tail bobble
Before working Round 4 of the Body, count your stitches and mark the stitch that will be the 22nd — that's where the bobble goes. A well-placed tail is one of those small details that makes the finished bunny look polished and intentional.
Stuffing all at once
Add stuffing gradually as you decrease on the body and head, not all at once at the end. Firm, even stuffing gives the bunny a satisfying, round shape that holds up over time — pause every few rounds and check the shape from the outside.

The materials list

Yarn

  1. Plush yarn (approx. 120 m / 100 g), approximately 45 g in your main color — a soft, chunky-feel plush works best
  2. Hook size (main piece): E-4 / 3.5 mm
  3. Hook size (ears and bow tie): C-2 / 2.5 mm (bow); J-10 / 6 mm (ears)

Safety eyes

  1. 12 mm, 2 pieces

Nose

  1. 6 mm safety nose, or embroider with pink yarn

Stuffing

  1. Polyester fiberfill

Stitch markers

  1. 1–2, to track round beginnings
  2. Yarn needle / tapestry needle
  3. Scissors

Additional notions

  1. Strong thread and a long needle for eye indenting; small amount of black yarn (fingering weight) for eyelashes, brows, and mouth; small amount of pink yarn for nose embroidery

Listed by the pattern's own author, in their words.

Key to this pattern, 10 short forms

Arms (make 2)

Work in main color yarn with E-4 / 3.5 mm hook. Do not stuff.

Round 1

6 sc in MR. (6)

Round 2

sc in each st around. (6)

Round 3

sc, dec, dec, sc. (4)

Rounds 4–6

sc in each st around. (4) [Work 3 rounds total.] Flatten the piece and work 2 sc through both layers to close. Fasten off and weave in the short end. Set aside — arms will be worked into the body.

Ears (make 2)

Work in main color yarn with J-10 / 6 mm hook. Do not stuff.

Round 1

8 hdc in MR. (8)

Round 2

inc in hdc repeat 8 times around. (16)

Rounds 3–4

hdc in each st around. (16) [Work 2 rounds total.]

Round 5

2 hdc, dec in hdc repeat 4 times around. (12)

Round 6

hdc in each st around. (12)

Round 7

hdc, dec in hdc repeat 4 times around. (8)

Round 8

hdc in each st around. (8)

Round 9

2 hdc, dec in hdc repeat 2 times around. (6)

Round 10

hdc in each st around. (6)Leave a long yarn tail for sewing. Fasten off. Set aside.

Legs (make 2)

Work in main color yarn with E-4 / 3.5 mm hook. Stuff firmly as you go.

Round 1

6 sc in MR. (6)

Round 2

inc in each st around. (12)

Round 3

sc in each st around. (12)

Round 4

2 sc, dec, dec, dec, dec, 2 sc. (8)

Round 5

2 sc, dec, dec, 2 sc. (6)

Round 6

sc in each st around. (6)Make the left leg first. Fasten off and weave in ends.Make the right leg the same way, but do NOT fasten off. Work 3 sc along the inner thigh to shift your position to the joining point. Chain 3, then use a slip stitch to join the left leg. You are now ready to begin the body.

Body

Continue directly from the right leg join. Stuff firmly as you go.

Round 1

2 sc, inc repeat 6 times around. (24)

Rounds 2–3

sc in each st around. (24) [Work 2 rounds total.] The tail bobble in the next round should sit at the exact center back. Reposition your stitch marker if needed before proceeding.

Round 4

21 sc, bobble stitch (5 dc worked into 1 st with shared top closure — the tail), 2 sc. (24)

Round 5

3 sc, dec, 6 sc, dec repeat 2 times, 3 sc. (21)Work the next round partially to realign your stitch marker to the exact center back before continuing.

Round 6

18 sc. (21) [Work only 18 stitches of this round to shift the marker to center back.]

Round 7

5 sc, dec repeat 3 times around. (18)

In the next round, you will attach both arms as you crochet them in.

Round 8

4 sc, sc 2 sts while holding the first arm in place (work 1 sc through the arm and the body stitch simultaneously for each of the 2 stitches), 6 sc, sc 2 sts while holding the second arm in place, 4 sc. (18)

Round 9

sc, dec repeat 6 times around. (12)Do not fasten off. Continue to the Head.

Head

Continue directly from the body. Stuff firmly as you go.

Round 1

inc in each st around. (24)

Round 2

3 sc, inc repeat 6 times around. (30)

Rounds 3–5

sc in each st around. (30) [Work 3 rounds total.]

Round 6

3 sc, dec repeat 6 times around. (24)

Rounds 7–8

sc in each st around. (24) [Work 2 rounds total.] Install safety eyes between Rounds 6 and 7, with 3 stitches between the eye posts. Secure the washers firmly.

Round 9

2 sc, dec repeat 6 times around. (18)

Round 10

sc, dec repeat 6 times around. (12)

Round 11

dec 6 times around. (6)Fasten off, leaving a short tail. Pull tight to close the opening. Weave the tail end inside the toy.

Bow

Work with C-2 / 2.5 mm hook and a contrasting color yarn.

Bow tie (neck cord): Chain 80. Tie a knot at each end.

Bow base: Foundation Chain: Chain 16.

Row 1

Starting in the 3rd chain from the hook, work 14 hdc across. (14)Turn at the end of each row, beginning each row with 2 ch (turning chain).

Rows 2–4

hdc in each st across. (14) [Work 3 rows total.] After Row 4, chain 1 and work a sc edging all the way around the bow base, working 3 sc into each corner. Fasten off, leaving a long tail.Wrap the yarn tail tightly around the center of the bow base to gather and shape it. Lay the bow cord (the chain-80 piece) beneath the center wrap as you secure it, so the cord runs through the knot of the bow. Weave in all ends.

Assembly, in order

Step 1Using a long needle and strong thread, create gentle eye indentations by running the thread through the head and pulling slightly to give the face dimension.
Step 2Split a strand of black fingering-weight yarn in half and use it to embroider eyelashes, brows, and a mouth onto the face.
Step 3Embroider the nose using pink yarn, or install a 6 mm safety nose between the eyes.
Step 4Sew the ears onto the top of the head using the long yarn tails, positioning them symmetrically. Use a whipstitch for a secure attachment, and bury the tail ends inside the head.
Step 5Thread the bow cord around the bunny’s neck and tie it gently, positioning the bow at the front. Secure with a simple knot or a few stitches if you prefer it fixed.
Step 6Weave in any remaining yarn ends.

Check these before you start

  • Move the stitch marker up at the start of every round on the body, head, legs, and ears — these parts are worked in a continuous spiral with no joining stitch, so losing the marker means losing the round count.
  • Stuff the legs firmly as you go, round by round, rather than waiting until the piece is closed; the arms, by contrast, are left unstuffed entirely.
  • Keep the ear hook separate from the body hook — the ears call for a J-10 / 6 mm hook against the E-4 / 3.5 mm hook used everywhere else, and swapping them changes the floppy result the pattern is built for.
  • Gauge is not critical for this project, but a tighter fabric prevents stuffing from showing through.
  • This pattern is written in US crochet terminology.

On one line

Rounds37
Parts6
LevelBeginner
Time4-6 hours
Hook3.5 mm
YarnWorsted

Set-up

  • Confirm you have at least 45 g of main color plush yarn on hand before starting, since the body, head, legs, arms, and ears all draw from the same skein.
  • Set a stitch marker at round 1 before you begin the body, head, legs, or ears — all four are worked in a continuous spiral with no joining stitch to mark the start.
  • Swap hooks as you move between parts: E-4 / 3.5 mm for the body, head, arms, and legs, J-10 / 6 mm for the ears, and C-2 / 2.5 mm for the bow.
  • Read Rnd 2 of the legs and ears before casting on — both pieces increase in the second round (legs to 12 stitches, ears to 16), so the stitch count jumps early.

Finishing

  1. Weave in all short ends left from fastening off each piece — arms, legs, ears, body, head, and bow each finish with a separate tail.
  2. Create gentle eye indentations on the head using a long needle and strong thread, running it through the head and pulling slightly before placing the 12 mm eyes or embroidering with pink yarn for the nose.
  3. Sew the ears to the top of the head with the long yarn tails, positioning them symmetrically with a whipstitch, then attach the arms, legs, and bow to the body.

Construction

The arms are worked flat at the end rather than stuffed: after 4 rounds, the piece is flattened and closed with 2 sc through both layers, producing a slim paddle shape instead of a rounded limb.

The ears use the same build logic as the other pieces — a magic ring start, an increase round, then plain rounds followed by decreases — but on a J-10 / 6 mm hook instead of the E-4 / 3.5 mm hook used for the body, loosening the fabric for drape rather than firmness.

Time per section

Arms, legs, and bowabout 45-60 minutes because the arms run only 4 rounds, the legs 6 rounds, and the bow just 2 rounds, each worked quickly in single crochet
Earsabout 30-45 minutes because the 9 rounds combine an increase round with later decrease rounds on the larger J-10 / 6 mm hook
Body and head, plus faceabout 1.5-2 hours because both pieces run 8 rounds with stuffing added as you go, followed by eye indentation and embroidery of the eyelashes, brows, mouth, and nose

Photographs of this one

Every one was taken by whoever published the pattern, in the order the source listed them.
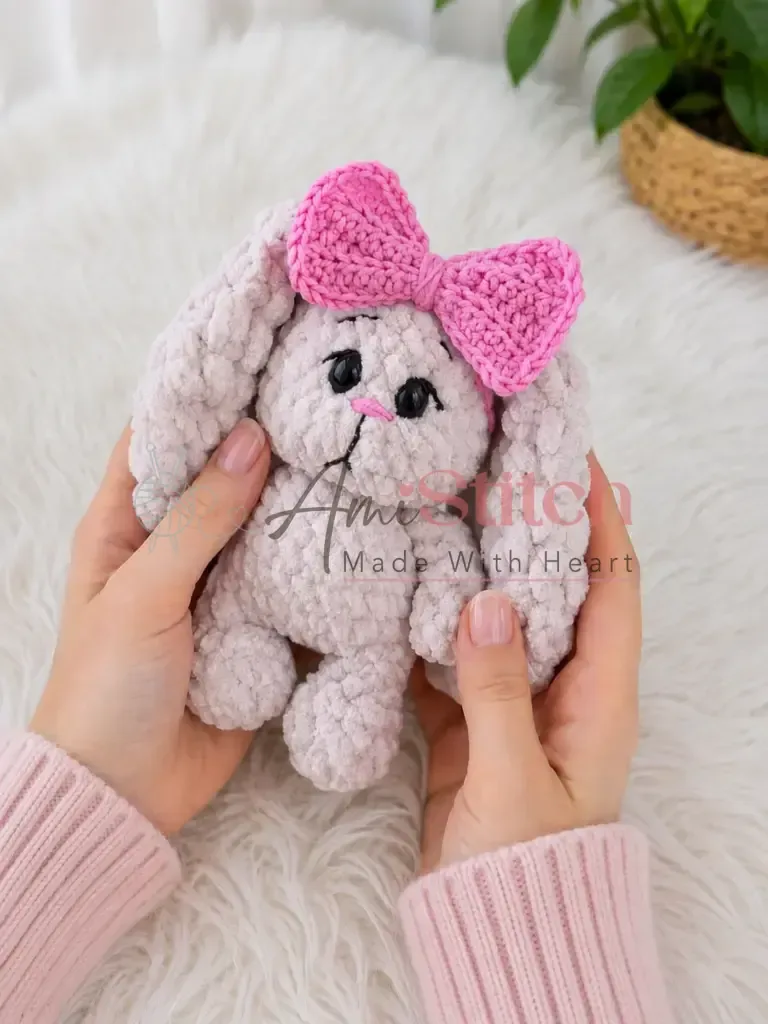
Crochet a floppy-eared plush bunny for beginners — photo 2
Crochet a floppy-eared plush bunny for beginners — photo 3

Common questions

Why are the arms left unstuffed?
The arms are flattened after 4 rounds and closed by single crocheting through both layers, so stuffing would add bulk the flat closure is not built to hold. Leaving them unstuffed keeps the paddle shape neat for attaching to the body.
Why do the ears use a different hook than the body?
The body, head, arms, and legs all use an E-4 / 3.5 mm hook, but the ears call for a J-10 / 6 mm hook. The larger hook loosens the stitches so the ears drape softly instead of standing stiff.
How much main color yarn should be set aside?
Plan on roughly 45 g of main color plush yarn from a 120 m / 100 g skein. That amount covers the body, head, arms, legs, and ears combined.

These answers came from whoever first published the pattern, kept word for word.