Skip to the patterns
Crochet·Rituals
Menu

Amigurumi 40 Laid out for paper No account, no download

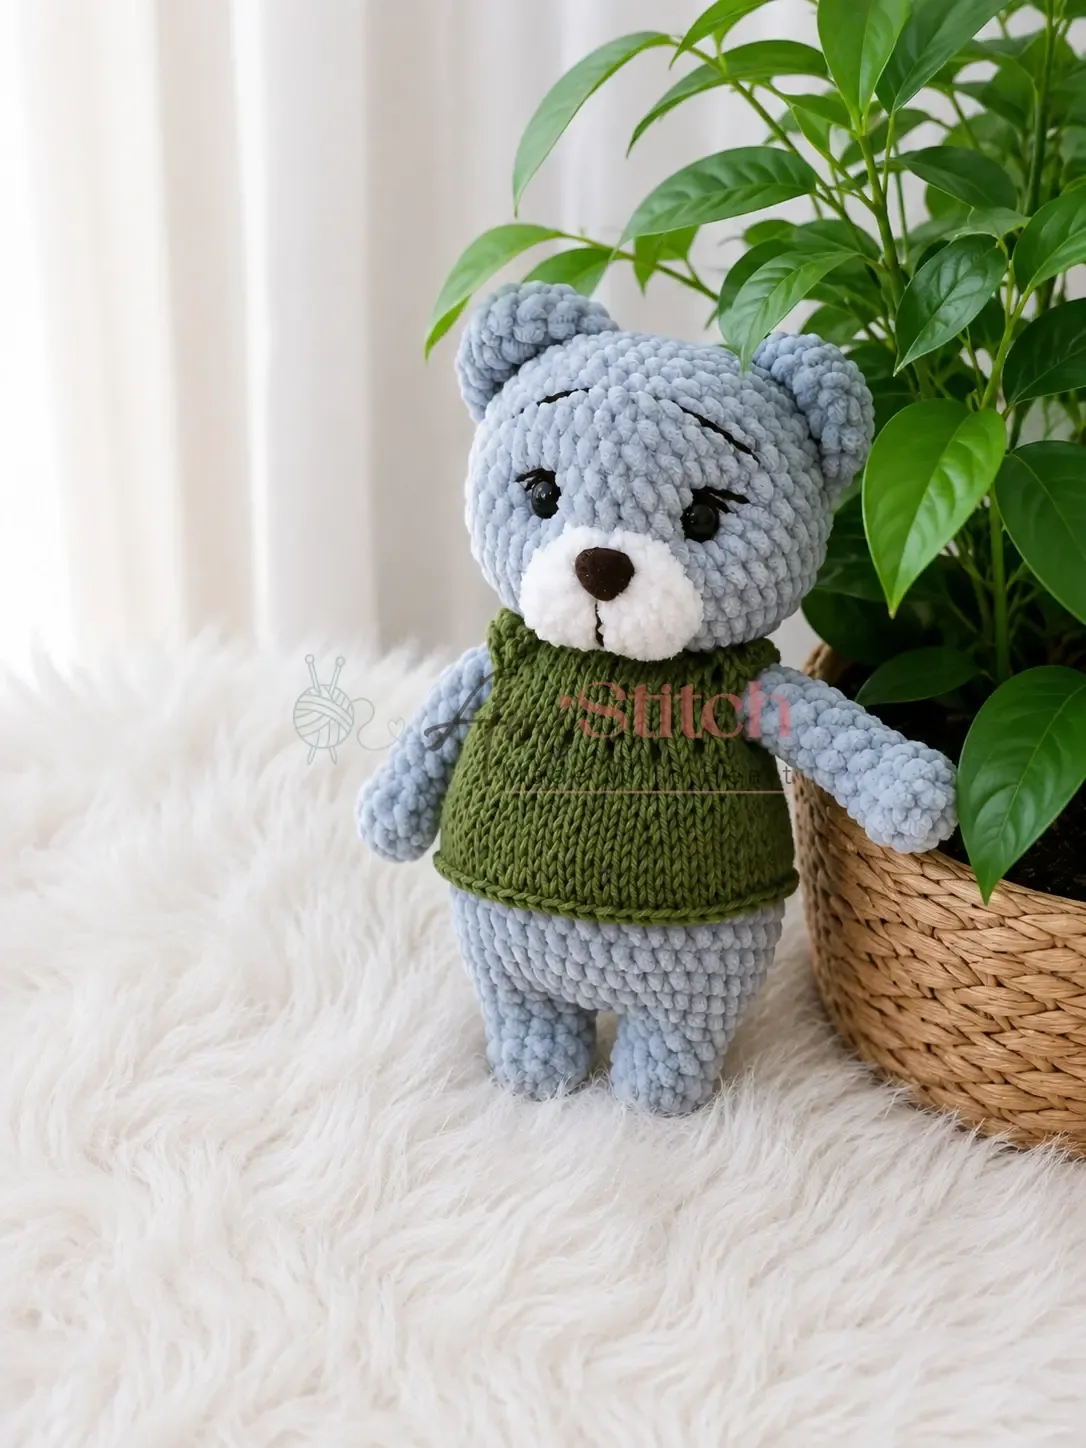
Plush teddy bear amigurumi with joined head, body, and legs

Plush teddy bear: legs, body, head in one 33-round piece. E-4/3.5mm hook, separate arms, ears, muzzle.

Jump to the rounds Pin it
Plush teddy bear amigurumi with joined head, body, and legs
Amigurumi · Worsted
Skill
Intermediate
Time
4-6 hours
Yarn weight
Worsted
Hook
3.5 mm
Rounds
40

Intermediate

What the pattern's own author called it. Nothing here is graded again.

Worsted

What the sample was worked in. Any weight works; the size moves with it.

40

Each one is typed out whole and gets its own line.

Plush teddy bear: legs, body, head in one 33-round piece. E-4/3.5mm hook, separate arms, ears, muzzle.

Common mistakes and their fixes

Stuffing the arms or ears
Arms, Ears, and Tail are flattened and sewn through both layers instead of stuffed. Leave them unstuffed as the pattern states, or the flat closure will not lie right against the body.
Losing the round start in the spiral
33 rounds worked continuously and no join, a missed stitch marker means recounting stitches to find the start. Move the marker up at the end of every round before moving on.
Loose tension letting stuffing show
Plush yarn worked at standard tension often lets fiberfill peek through. Use the smaller recommended hook (E-4/3.5 mm) and keep stitches snug throughout the body and head.

The materials list

Main yarn

  1. Plush or chenille-weight yarn (such as Himalaya Dolphin Baby or Yarnart Dolce) in your chosen bear color — approximately 1 skein

Muzzle yarn

  1. Velour or fine plush yarn (such as Himalaya Dolphin Fine or any velour yarn) in a coordinating shade — small amount

Detail yarn

  1. Smooth worsted-weight yarn (such as Yarnart Jeans) in white and black — very small amounts for facial embroidery

Hook

  1. E-4 / 3.5 mm (or 4.0 mm if your tension runs tight)

Safety eyes

  1. 12–14 mm, 1 pair

Safety nose

  1. 10 mm, 1 piece

Stuffing

  1. Polyester fiberfill
  2. Stitch markers: 1–2
  3. Yarn needle / tapestry needle
  4. Scissors

Listed by the pattern's own author, in their words.

Key to this pattern, 7 short forms

Arms

Flatten the arm and work 3 sc through both layers to close. Do not stuff. Set aside.

Pull yarn tail through remaining stitches and close. Lightly stuff before closing if desired.

Round 1

9 sc in MR. (9)

Rounds 2–3

sc in each st around. (9)Step by step: sc in each st around. (12).

Round 4

3 sc, dec, dec, 2 sc. (7)

Rounds 5–13

sc in each st around. (7)

Ears

Flatten and work 9 sc through both layers to close. Do not stuff. Set aside.

Round 1

6 sc in MR. (6)

Round 2

inc in each st around. (12)

Round 3

(sc, inc) repeat 6 times around. (18)

Round 4

sc in each st around. (18)

Muzzle

Leave a long yarn tail for sewing. Do not stuff.

Round 1

7 sc in MR. (7)

Round 2

inc in each st around. (14)

Round 3

(sc, inc) repeat 7 times around. (21)

Round 4

10 sc, inc, inc, 9 sc. (23)

Round 5

sc in each st around. (23)

Legs, Body & Head (Worked as One Piece)

Second Leg: Do not cut yarn; you will now join both legs.

First Leg: Cut yarn and fasten off after Rnd 5; set aside.

Attach the arms before Rnd 24 — have both arms ready before working this round.

After completing Rnd 34 — or partway through if the opening allows — insert safety eyes between Rounds 33 and 34, spaced 5–6 stitches apart. Insert the safety nose on the muzzle before sewing it on (see Assembly).

Stuff the body and head firmly before closing during Rnd 41. Add stuffing as the opening narrows.

Pull yarn tail through remaining 6 stitches and close after Rnd 42.

First Leg — Rnd 1: 6 sc in MR. (6)

First Leg — Rnd 2: (sc, inc) repeat 3 times around. (9)

First Leg — Rnds 3–5: sc in each st around. (9)

Second Leg — Rnd 1: 6 sc in MR. (6)

Second Leg — Rnd 2: (sc, inc) repeat 3 times around. (9)

Second Leg — Rnds 3–5: sc in each st around. (9)

Round 6

Joining the Legs into the Body Chain 3; sc across: 9 sc around the first leg, 3 sc along the chain, 9 sc around the second leg, 3 sc along the other side of the chain. (24)

Round 7

(3 sc, inc) repeat 6 times around. (30)

Round 8

(4 sc, inc) repeat 6 times around. (36)

Round 9

(5 sc, inc) repeat 6 times around. (42)

Rounds 10–14

sc in each st around. (42)

Round 15

8 sc, dec, 18 sc, dec, 12 sc. (40)

Round 16

(8 sc, dec) repeat 4 times around. (36)

Round 17

(7 sc, dec) repeat 4 times around. (32)

Round 18

(14 sc, dec) repeat 2 times around. (30)

Rounds 19–20

sc in each st around. (30)

Round 21

(3 sc, dec) repeat 6 times around. (24)

Round 22

sc in each st around. (24)

Round 23

(2 sc, dec) repeat 6 times around. (18)

Round 24

4 sc, then work 3 sc simultaneously through the next 3 sts of the body and the 3 corresponding sts at the top of the first arm to join it, 5 sc, then work 3 sc simultaneously through the next 3 sts of the body and the 3 corresponding sts at the top of the second arm to join it, 3 sc. (18)

Round 25

sc in each st around. (18)

Round 26

inc in each st around. (36)

Round 27

(5 sc, inc) repeat 6 times around. (42)

Round 28

(6 sc, inc) repeat 6 times around. (48)

Rounds 29–34

sc in each st around. (48)

Round 35

(6 sc, dec) repeat 6 times around. (42)

Round 36

sc in each st around. (42)

Round 37

(5 sc, dec) repeat 6 times around. (36)

Round 38

(4 sc, dec) repeat 6 times around. (30)

Round 39

(3 sc, dec) repeat 6 times around. (24)

Round 40

(2 sc, dec) repeat 6 times around. (18)

Round 41

(sc, dec) repeat 6 times around. (12)

Round 42

dec in each st around. (6)

Assembly, in order

Step 1Tail: Sew the tail to the center back of the body, roughly at the joining point between the legs and the lower body. Secure with several stitches and weave in the end.
Step 2Ears: Position the ears on either side of the head, roughly above the safety eyes. Sew each ear flat to the head using the yarn tail and a whipstitch. Weave in ends.
Step 3Muzzle: Before sewing, insert the 10 mm safety nose into the center-top of the muzzle piece and secure. Position the muzzle centered on the face, sitting just below the safety eyes. Sew around the full edge using the long yarn tail, adding a small amount of fiberfill as you close the last section for a lightly padded shape.
Step 4Facial embroidery: Using white and black Yarnart Jeans yarn and your tapestry needle, embroider the eye highlights and any mouth detailing directly onto the face and muzzle.
Step 5Muzzle sculpting (needle pulling): Thread a long strand of yarn onto your needle. Bring the needle out at Point 1 (center of face near muzzle), then guide it to Point 2, back to Point 3, and return to Point 1. Next, go from Point 1 to Point 4, then to Point 5, returning to Point 1. Finally, travel from Point 1 to Point 2, across to Point 6, then to Point 7, then to Point 4, and back out at Point 1. Pull gently but firmly at each pass to create the dimensional muzzle shape. If the sculpting doesn't pull deeply enough on the first pass, repeat the entire sequence a second time.
Step 6Weave in all remaining ends.

Check these before you start

  • Work every round tightly enough that fiberfill will not show through the plush yarn; the smaller hook size is intentional for this reason, not an error to correct.
  • The Arms, Ears, and Tail are worked flat at the end (closed by working sc through both layers) rather than stuffed and shaped like the body, so keep these pieces unstuffed as instructed.
  • Keep a stitch marker moving with you through all 33 rounds of the Legs, Body & Head piece — it is worked in one continuous spiral with no joins, so a dropped marker means recounting from Round 1.
  • This pattern is written in US crochet terminology.
  • All pieces are worked in a continuous spiral — do not join rounds unless stated. Use a stitch marker to track the beginning of each round.
  • Gauge is not critical for this project, but work tightly enough that no fiberfill shows through the stitches. A smaller hook than recommended for your yarn weight is intentional.
  • Stitch counts are given in parentheses at the end of each round: (##)
  • The Arms are crocheted separately and joined into the body during Round 24. Have them ready before you reach that round.
  • Insert safety eyes between Rounds 33 and 34, spaced 5–6 stitches apart, before the head is fully closed.
  • The muzzle shaping is achieved after assembly through a needle-sculpting technique described in the Assembly section.
  • Work tightly with plush yarn. Chenille and velour yarns have very little stretch, which can make it tempting to loosen your tension. Resist that urge — a snug gauge keeps the fiberfill from peeking through and gives Sammy his structured shape.
  • Use a stitch marker religiously. With plush yarn it's nearly impossible to see individual stitches, so you'll be counting by feel more than sight. Move your marker at the start of every round without exception.
  • Stage your stuffing. Don't wait until the very end to add fiberfill. Begin adding stuffing lightly from Rnd 20 onward, and firm it up as the head closes. This gives you far more control over the final shape than stuffing all at once.
  • Invisible decrease with plush yarn. The standard invisible decrease (insert hook under the front loops of the next two stitches before pulling through) is harder to see in chenille, but it's still worth doing — it prevents the pointed dips you'd get from a standard decrease and keeps the surface even.
  • Prepare the arms early. Because the arms are joined mid-body during Round 24, have both of them completely finished and sitting on your workspace before you begin the legs. Getting interrupted at that round while hunting for an unfinished arm is a real frustration.

On one line

Rounds40
Parts4
LevelIntermediate
Time4-6 hours
Hook3.5 mm
YarnWorsted

Set-up

  • Place a stitch marker at the start of Round 1 of the Legs, Body & Head piece and move it up each round; with 33 rounds worked without joining, losing the round start is easy to do.
  • Read through the Muzzle rounds once before working them — the increases land at specific points (Rnd 2 all-around, Rnd 3 spaced, Rnd 4 paired) and are easier to place correctly having seen the sequence first.
  • Check that the E-4/3.5 mm hook (or 4.0 mm if tension runs tight) matches your plush yarn's drape — plush and chenille yarns vary in thickness between brands even at the same stated weight.

Finishing

  1. Stuff the Legs, Body & Head piece firmly and evenly as you work upward, checking that no fiberfill is visible through the stitches before closing the top of the head.
  2. Insert the 10 mm safety nose into the center-top of the muzzle and secure it, then attach the 12–14 mm safety eyes to the head before any sewing begins, since both lock in place permanently.
  3. Sew the tail to the center back at the leg-to-body join, whipstitch the ears above the eyes, and sew the muzzle centered on the face; weave in every yarn tail on all five pieces last.

Construction

The Legs, Body & Head piece is worked as a single continuous spiral of 33 rounds with no joining, which means the leg-to-body transition and the neck-to-head shaping happen through increase and decrease placement alone, not through a seam.

The Ears and Muzzle both use the same increase pattern of plain round, then inc-in-each-st, then (sc, inc) spaced — this doubles the stitch count twice before any decrease, giving both pieces a domed rather than flat profile despite being closed flat at the end.

Time per section

Legs, Body & Headabout 2-3 hours, because it runs 33 rounds worked continuously with stuffing done in stages as you go
Arms, Ears, Tailabout 45 minutes total, because each is short (4 rounds) but the flat closure through both layers takes care
Muzzle and assemblyabout 1 hour, because the muzzle's shaping increases need attention and placing the safety nose, eyes, and sewing all five pieces takes time

Photographs of this one

Every one was taken by whoever published the pattern, in the order the source listed them.

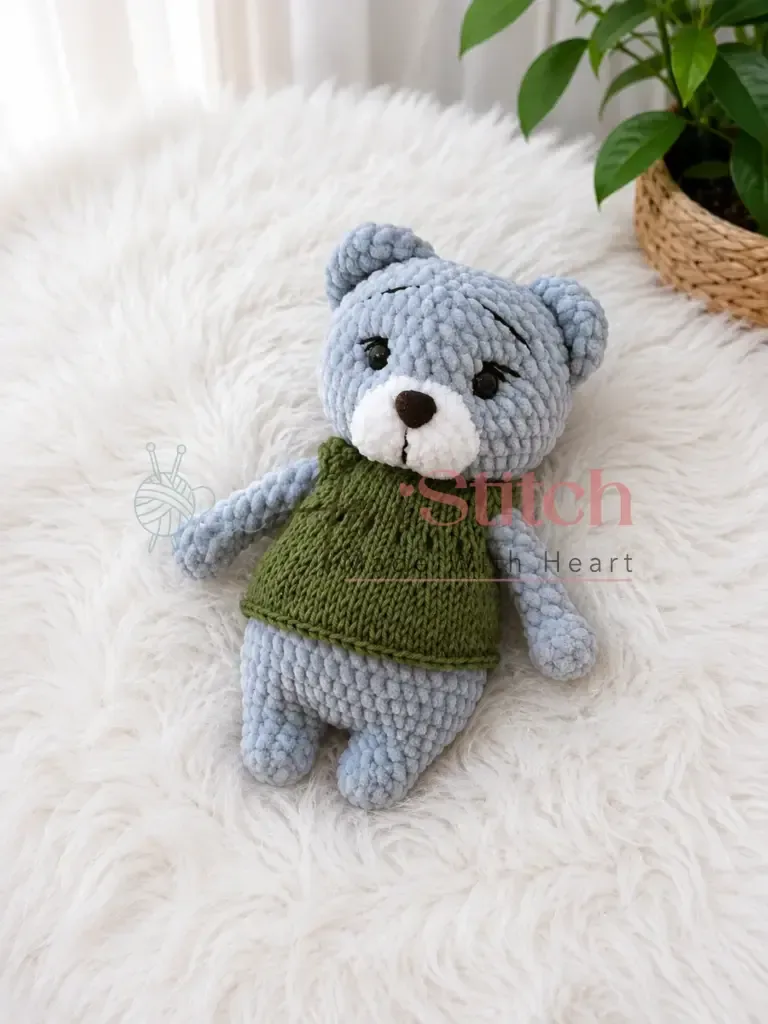
Plush teddy bear amigurumi with joined head, body, and legs — photo 2
Plush teddy bear amigurumi with joined head, body, and legs — photo 3

Common questions

Can smooth worsted-weight yarn replace the plush yarn for the whole bear?
The pattern calls for plush or chenille yarn for the main body to get its soft, rounded texture, with smooth worsted yarn reserved only for facial embroidery details. Substituting smooth yarn throughout will change the finished look considerably, so keep plush yarn for the body if that texture matters to you.
Why is the muzzle a different yarn from the body?
The muzzle uses a finer velour yarn so it reads as a distinct, slightly flatter feature against the thicker plush body. This contrast in fiber, not just color, is what makes the face stand out once sewn on.
Do the legs and body need to be sewn together?
No — the Legs, Body & Head are worked as one continuous piece across 33 rounds, so there is no seam between them. Only the Arms, Ears, Muzzle, and Tail are worked separately and sewn on afterward.

These answers came from whoever first published the pattern, kept word for word.