Skip to the patterns
Crochet·Rituals
Menu

Amigurumi 24 Laid out for paper No account, no download

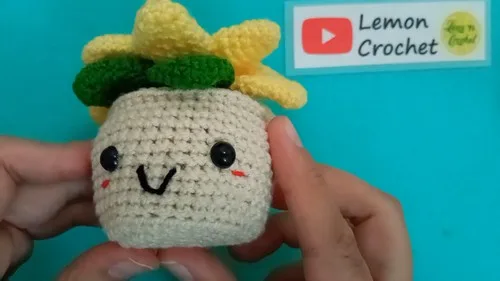
Crochet Flower Pot With Petals And A Smiling Face

Amigurumi flower pot: 12-round base, 12 sewn petals, 3-round center flower, safety-eye face.

Jump to the rounds Pin it
Crochet Flower Pot With Petals And A Smiling Face
Amigurumi · Worsted
Skill
Intermediate
Time
4-5 hours
Yarn weight
Worsted
Rounds
24

Intermediate

What the pattern's own author called it. Nothing here is graded again.

Worsted

What the sample was worked in. Any weight works; the size moves with it.

24

Each one is typed out whole and gets its own line.

This flower pot amigurumi builds from the base up: a stuffed pot worked in continuous rounds, twelve individual petals worked separately in yellow and green, and a three-round center flower finished with picot edging. Petals and flower are sewn to the top of the pot after all pieces are complete, and safety eyes with an embroidered mouth turn the pot into a face. Have stitch markers on hand for tracking rounds, stuffing ready before the pot closes, and both yellow and green yarn wound before starting the petals.

Common mistakes and their fixes

Losing the round start on the pot
Place a stitch marker at the first stitch of every round and move it forward each time, since the pot has no slip-stitch join to mark the boundary.
Petals finished at different sizes
Crochet all 10 yellow and 2 green petals through the full 7 rounds before sewing any of them together, so mismatches show up before assembly, not after.
Center flower picots pulled too tight
Keep round 3 of the center flower loose around each chain-2, or the petal points flatten instead of standing out.

The materials list

  1. Worsted weight yarn
  2. Crochet hook (size to suit your yarn)
  3. Yarn in cream (main color for the pot)
  4. Yarn in brown or dark green (contrast color for the pot rim)
  5. Yarn in yellow (for 10 petals)
  6. Yarn in green (for 2 petals/leaves)
  7. Yarn in white (for the center flower)
  8. Stuffing/fiberfill
  9. Safety eyes
  10. Darning needle (for closing rounds and sewing pieces together)

Listed by the pattern's own author, in their words.

Key to this pattern, 1 short form

Crocheting the Pot

Round 1

Create a magic ring and chain 1. Work 6 single crochets (sc) in the ring.

Round 2

Increase in each stitch for a total of 12 sc.

Round 3

(1 sc, increase) x6 for a total of 18 sc.

Round 4

(2 sc, increase) x6 for a total of 24 sc.

Round 5

(3 sc, increase) x6 for a total of 30 sc.

Round 6

(4 sc, increase) x6 for a total of 36 sc.

Round 7

Work 1 sc in the back loop of each stitch for a total of 36 sc.

Rounds 8–11

Work 1 sc in each stitch for 36 sc per round.

Round 12

(5 sc, increase) x6 for a total of 42 sc.

Rounds 13–16

Work 1 sc in each stitch for 42 sc per round. Color Change: Change the yarn color in the last sc of Round 16.

Round 17

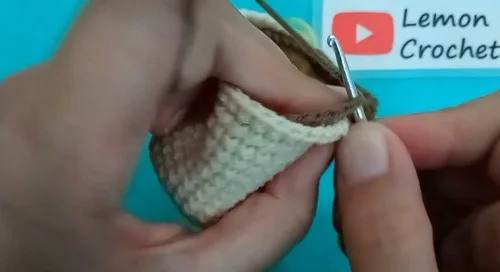
This round has two parts: First, work 1 sc in the back loop of each stitch for 42 sc using the new color (brown/dark green). Second, work 1 sc in the front loop of each stitch with the previous color (cream).

Rounds 18–20

Decrease rounds using the brown yarn, gradually reducing the stitch count.

Rounds 21–23

Continue decreasing and fill the pot with stuffing before completely closing the hole with a darning needle.

For Crocheting the Petals

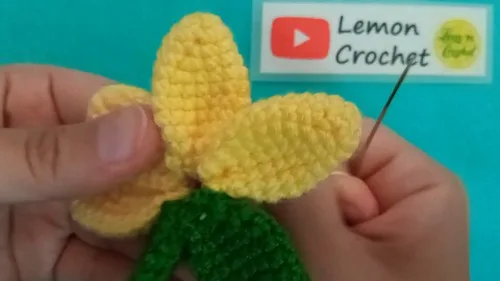
Petals (12 total): Use yellow yarn to make 10 petals and green yarn for 2 petals.

Each petal: Each petal is made in rounds, starting with a magic ring.

Round 1

Magic ring, chain 1, and work 4 sc in the ring.

Round 2

(Increase, 1 sc) x2 for a total of 6 sc.

Round 3

(Increase, 2 sc) x2 for a total of 8 sc.

Round 4

(Increase, 3 sc) x2 for a total of 10 sc.

Round 5

(Increase, 4 sc) x2 for a total of 12 sc.

Rounds 6–8

Work 1 sc in each stitch for 14 sc per round.

Rounds 9–11

Decrease rounds.

Finishing

Close the hole with 3 sc. Leave a long tail for sewing.

Crocheting the Center Flower

Center Flower (1): Use white yarn.

Round 1

Magic ring and 6 sc in the ring.

Round 2

5 sc in each stitch for a total of 30 sc.

Round 3

Work a repetitive pattern of (1 sc, 1 sc, chain 2, increase in the next stitch) to create a flower shape.Leave a long tail for sewing and cut the yarn.

Assembly, in order

Step 1Petal Assembly : Sew the petals together in the desired arrangement.
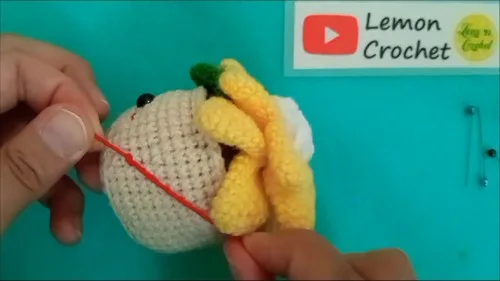
Step 2Attach Petals : Sew the completed petals and leaves to the top of the crocheted pot.
Step 3Attach Eyes and Mouth : Add the safety eyes to the pot and embroider a smiling mouth.
Step 4Final Touches : Secure all the yarn tails.

Check these before you start

  • Keep tension firm and even through the pot's rounds; the fabric needs to stay dense enough to hold stuffing without gaps showing between stitches.
  • Use a stitch marker in the working stitch for the pot's continuous rounds, since the pattern gives stitch counts but no round join to mark the boundary.
  • Work all 12 petals to the same 7-round count before assembly; a short petal in the mix will throw off the sewn arrangement around the rim.

On one line

Rounds24
Parts3
LevelIntermediate
Time4-5 hours
YarnWorsted

Set-up

  • Place a stitch marker at the start of round 1 on the pot and move it up each round; the pot is worked as one continuous piece with no slip-stitch join.
  • Read through all 7 rounds of the petal pattern before making the first magic ring, since 10 yellow petals and 2 green petals all need to match.
  • Have stuffing measured and within reach before the pot's later rounds, since the opening narrows once the stitch count settles at 30 sc.

Finishing

  1. Weave in the pot's yarn tails first, while the opening is still empty and easy to work into.
  2. Stuff the pot firmly as the final rounds close, pressing fill into the base and sides so the shape holds under the petals.
  3. Sew all 12 petals and leaves to the top of the pot in the arranged pattern, then set the safety eyes and embroider the mouth last, once the petal placement is settled.

Construction

The pot's increases are front-loaded: rounds 1 through 5 build the stitch count from 6 to 30 sc, and the remaining seven rounds hold that count steady to form the straight walls.

Each petal starts from its own fresh magic ring rather than continuing from a shared round, which is why 12 separate petals in two colors are made independently and joined only at assembly.

Time per section

Potabout 1.5-2 hours because the 12 rounds cover both the increase shaping and the straight walls.
Petalsabout 1.5 hours because 12 separate petals across 7 rounds each add up despite the small piece size.
Center flower and assemblyabout 45 minutes because the 3-round flower is quick, but sewing petals, eyes, and mouth takes a steady hand.

Photographs of this one

Every one was taken by whoever published the pattern, in the order the source listed them.
Crochet Flower Pot With Petals And A Smiling Face — photo 2
Crochet Flower Pot With Petals And A Smiling Face — photo 3
Crochet Flower Pot With Petals And A Smiling Face — photo 4

Common questions

How many petals does the finished flower pot need?
The pattern calls for 12 petals total: 10 in yellow yarn and 2 in green for the leaves. All are worked separately across 7 rounds each before assembly.
Is the pot worked in a spiral or joined rounds?
The pot is worked as one continuous piece from a magic ring, building from 6 stitches up to 30 stitches by round 5 and holding that count through the rest of its 12 rounds.
Can the yarn colors be changed?
Yes, the pot, petals, and center flower can each be worked in different colors than yellow, green, and white without changing the stitch counts or round structure.

These answers came from whoever first published the pattern, kept word for word.