Skip to the patterns
Crochet·Rituals
Menu

Amigurumi 40 Laid out for paper No account, no download

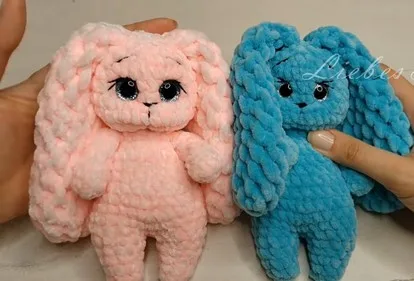
Plush amigurumi bunny crochet pattern with safety eyes

Plush bunny amigurumi: body, head, ears, arms, legs. 4mm hook, 12-round body.

Jump to the rounds Pin it
Plush amigurumi bunny crochet pattern with safety eyes
Amigurumi · Worsted
Skill
Intermediate
Time
4-6 hours
Yarn weight
Worsted
Hook
4 mm
Rounds
40

Intermediate

What the pattern's own author called it. Nothing here is graded again.

Worsted

What the sample was worked in. Any weight works; the size moves with it.

40

Each one is typed out whole and gets its own line.

This bunny is built from five separate pieces — body, head, two ears, two arms, and two legs — then joined and finished with embroidered features. Plush yarn worked at 4 mm gives the surface a soft, rounded finish that hides individual stitches, so the shape reads as smooth rather than textured. Before starting, have safety eyes, fiberfill, and a length of thin cotton yarn on hand for the face, since the embroidery step depends on the eyes being seated first. The body carries the largest round count at twelve, making it the anchor piece the rest attach to.

Common mistakes and their fixes

Losing the round marker in plush yarn
Plush fiber obscures stitch definition, so move a locking stitch marker up every round rather than trying to spot the seam by eye.
Under-stuffing before face tightening
Stuff the head firmly before pulling the cotton yarn tight for the eyes, forehead, and nose bridge, or the shaping will sink once stuffing is added later.
Skipping a test placement for the eyes
Insert the 14 mm safety eyes and check spacing against the unstuffed head before snapping the backs on, since the embroidery steps build around their position.

The materials list

  1. Plush yarn approx. ⅔ skein (100g/80m)
  2. Crochet hook 4 mm
  3. Safety eyes 14 mm
  4. Fiberfill stuffing
  5. Thin cotton yarn for face embroidery

Listed by the pattern's own author, in their words.

Key to this pattern, 3 short forms

Ears (Make 2)

Round 1

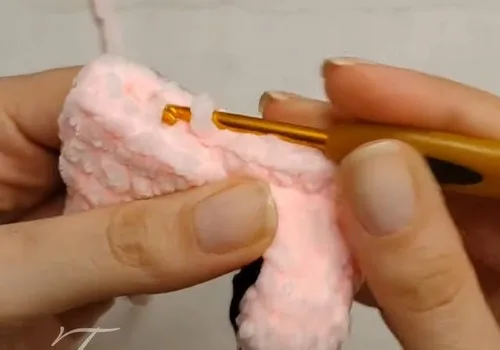
Chain 2, work 6 HDC into 2nd stitch from hook

Round 2

6 increases (12 HDC)

Round 3

(3 HDC, 1 increase) repeat 3 times (15)

Round 4

R6: 15 HDC

Round 7

(3 HDC, 1 decrease) repeat 3 times (12)

Round 8

R10: 12 HDC

Round 11

(2 HDC, 1 decrease) repeat 3 times (9)

Round 12

R13: 9 HDC

Round 14

(1 HDC, 1 decrease) repeat 3 times (6)

Round 15

6 HDC Finish: 1 SC, fold ear in half, close with 3 SC through both layers, fasten off

Arms (Make 2)

Round 1

7 SC in magic ring

Round 2

7 SC

Round 3

2 SC, 1 decrease, 3 SC (7)

Round 4

R5: 6 SC

Round 6

2 SC, 1 decrease, 2 SC (4)Finish: Fold in half, close with 2 SC through both layers, lightly stuff, fasten off

Legs (Make 2)

Round 1

6 SC in magic ring

Round 2

6 SC

Round 3

(1 SC, 1 increase) repeat 3 times (9)

Round 4

9 SC

Round 5

(2 SC, 1 increase) repeat 3 times (12)Leg 1: Fasten off Leg 2: Continue directly into body

Body

Round 6

Join legs, 28 SC around

Round 7

28 SC

Round 8

27 SC, 1 puff stitch for tail (28)

Round 9

28 SC

Round 10

(5 SC, 1 decrease) repeat 4 times (24)

Round 11

24 SC, stuff legs and body

Round 12

(4 SC, 1 decrease) repeat 4 times (20)

Round 13

20 SC

Round 14

5 SC, 1 decrease, 8 SC, 1 decrease, 3 SC (18)

Round 15

(1 SC, 1 decrease) repeat 6 times (12), stuff

Round 16

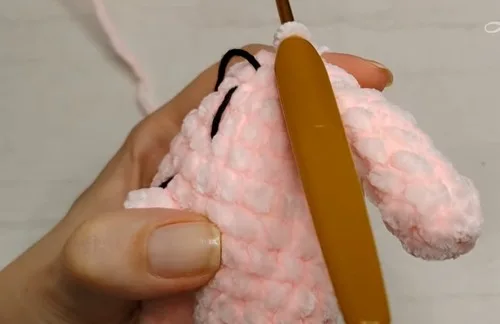
2 SC, attach arm 1 with 2 SC, 4 SC, attach arm 2 with 2 SC, 2 SC (12)

Round 17

12 SC

Head

Round 18

12 increases (24)

Round 19

(2 SC, 1 increase) repeat 8 times (32)

Round 20

R21: 32 SC, stuff neck tightly

Round 22

(6 SC, 1 decrease) repeat 4 times (28)

Round 23

(5 SC, 1 decrease) repeat 4 times (24)

Round 24

24 SC, insert safety eyes between R22 and R23, 5 SC apart

Round 25

(2 SC, 1 decrease) repeat 6 times (18)

Round 26

1 decrease, attach ear 1 with 3 SC, 4 decreases, attach ear 2 with 3 SC, 1 decrease (12), stuff headR27: 6 decreases (6), close hole and fasten off

Assembly, in order

Step 1Tighten face with cotton yarn for eye shaping, forehead, and nose bridge
Step 2Embroider eyelashes, eyebrows, and nose with cotton yarn
Step 3Youtube

Check these before you start

  • Work with the 4 mm hook throughout; plush yarn is forgiving, but a tighter gauge keeps stuffing from peeking through between stitches.
  • Stuff the head and body firmly before closing so the embroidered face sits on a solid surface — soft spots will pull the tightening stitches unevenly.
  • Place a stitch marker at the start of each round on the body's twelve rounds; plush yarn's texture makes the seam easy to lose track of.

On one line

Rounds40
Parts5
LevelIntermediate
Time4-6 hours
Hook4 mm
YarnWorsted

Set-up

  • Confirm the plush yarn skein will stretch across all five pieces — body, head, ears, arms, and legs — before dividing it out.
  • Set aside the 14 mm safety eyes and a scrap of contrast yarn to test eye placement against the head before the shell closes fully.
  • Read through the ear rounds first: the increase-then-decrease shape (R1–R7 plus five more rows) is the most shaping-dense part of the pattern.
  • Have the thin cotton yarn threaded and ready before stuffing, since face embroidery and the tightening step happen right after the head is closed.

Finishing

  1. Weave in the ends from each of the five pieces separately before joining, since plush yarn tails are harder to hide once pieces are stuffed and closed.
  2. Stuff the head and body fully, then use the cotton yarn to tighten and shape the eye sockets, forehead, and nose bridge as described in the assembly steps.
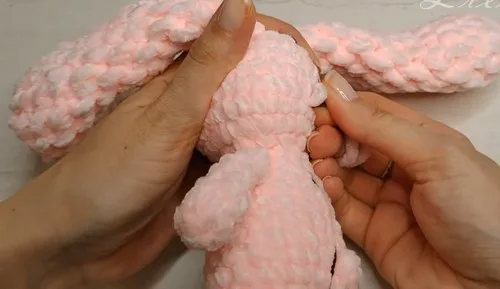
  3. Embroider the eyelashes, eyebrows, and nose with the cotton yarn once the tightening stitches are set, then attach the ears, arms, and legs to the body.

Construction

The ears increase steadily from 6 to 15 stitches across rounds 1–3, then hold flat through rounds 4–6 before decreasing back down from round 7 onward — a symmetrical increase-hold-decrease shape typical of a flat-backed ear.

The arms and legs both start from a small base (7 and 6 stitches) and shape quickly within just 5 rounds, keeping the limbs short and proportionate against the 12-round body and 8-round head.

Time per section

Bodyabout 45-60 minutes, because it runs the full 12 rounds and takes the most stuffing
Head and face embroideryabout 40-50 minutes, because the 8 rounds are followed by tightening and embroidery work with the cotton yarn
Ears, arms, and legsabout 60-75 minutes total, because six small pieces each need their own shaping rounds and finishing

Photographs of this one

Every one was taken by whoever published the pattern, in the order the source listed them.
Plush amigurumi bunny crochet pattern with safety eyes — photo 2
Plush amigurumi bunny crochet pattern with safety eyes — photo 3
Plush amigurumi bunny crochet pattern with safety eyes — photo 4

Common questions

Can a different weight of yarn replace the plush yarn?
A smooth worsted-weight yarn will work at the same 4 mm hook, though the finish will show more stitch definition than the plush version. Adjust stuffing density slightly since plush yarn tends to hide gaps that a smoother yarn will not.
Why does the head get embroidered instead of just using the safety eyes alone?
The safety eyes set the eye position, but the cotton yarn embroidery adds eyelashes, eyebrows, and a nose bridge that the eyes alone cannot provide. This embroidery step also tightens the face shape after stuffing, giving the head its rounded, expressive look.
How much of the skein does this bunny actually use?
The pattern calls for roughly two-thirds of a 100 g/80 m skein across all five pieces. Keep the remaining third in reserve in case tension runs tighter than expected on the body or head.

These answers came from whoever first published the pattern, kept word for word.