Skip to the patterns
Crochet·Rituals
Menu

Amigurumi 11 Laid out for paper No account, no download

Mini spider hero amigurumi for keys and bags

Amigurumi hero doll, worked in rounds with a magic ring start, sized for a keychain.

Jump to the rounds Pin it
Mini spider hero amigurumi for keys and bags
Amigurumi · Worsted
Skill
Intermediate
Time
4-6 hours
Yarn weight
Worsted
Rounds
11

Intermediate

What the pattern's own author called it. Nothing here is graded again.

Worsted

What the sample was worked in. Any weight works; the size moves with it.

11

Each one is typed out whole and gets its own line.

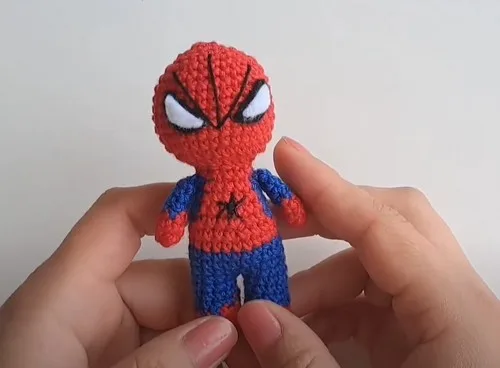
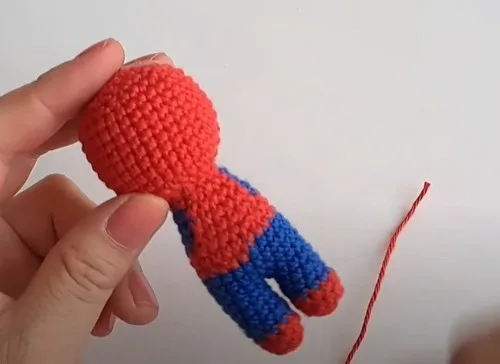
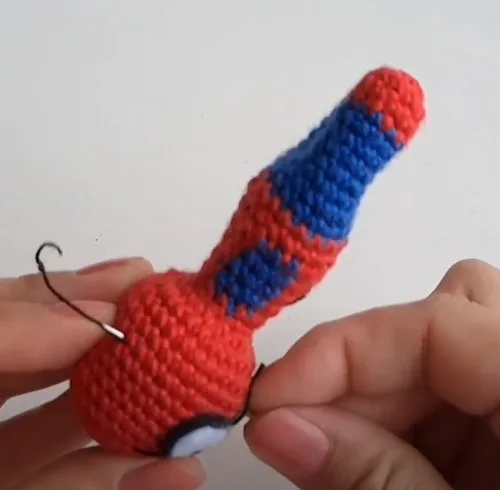
This small hero figure is built from four separate parts — two legs, a body, a head, and two arms — worked in red, blue, and white thread and joined by hand. The legs start from a magic ring and stay a flat 10 stitches for their full length, the body forms around a central chain that ties the legs together, and the head shapes up to 30 stitches before decreasing closed. Have felt for the eyes, embroidery thread for the chest web and face, and stuffing on hand before the first ring closes, since stuffing happens as each part is built rather than at the end.

Common mistakes and their fixes

Legs come out uneven lengths
Count stitches at the end of every round through rounds 2-7, since both legs are worked from the same 10-stitch magic ring and any skipped round throws off the match.
Stripe colors land in different places on each side
Start every color change at the same stitch marker point in the round so the body's side stripes line up rather than spiraling unevenly.
Head closes with visible gaps
Fill the head fully before the final decrease rounds, since the pattern calls for stuffing before closing and a thin fill will leave hollows once round 32 pulls tight.

The materials list

  1. Red, blue, and white crochet threads
  2. Crochet hook
  3. Stuffing material
  4. Felt or lency cloth for eyes
  5. Embroidery thread for detailing
  6. Scissors
  7. Tapestry needle

Listed by the pattern's own author, in their words.

Key to this pattern, 10 short forms

Legs

Repeat to make a second leg.

Round 1

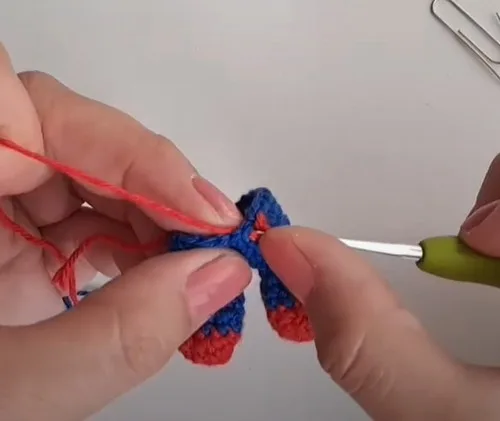
Start with red thread and make a magic ring; inside the ring, make 10 single crochets; close the ring with a slip stitch. (10)

Rounds 2–7

10 single crochets in each round. (10)

Arms

Attach and sew arms to the body using blue thread.

Round 1

Crochet arms using a magic ring with 5 single crochets. (5)

Round 2

Change color. (5)

Rounds 4–7

5 single crochets in each round. (5)

Head

Fill the head before closing.

Rounds 20–21

Increase in each stitch.

Rounds 22–29

30 stitches in each round. (30)

Round 30

Begin decreasing.

Rounds 31–32

Continue decreasing to shape the head.

Body

Stuff the legs and body as you go.

Round 1

Round: Make a central chain to join the legs.

Round 2

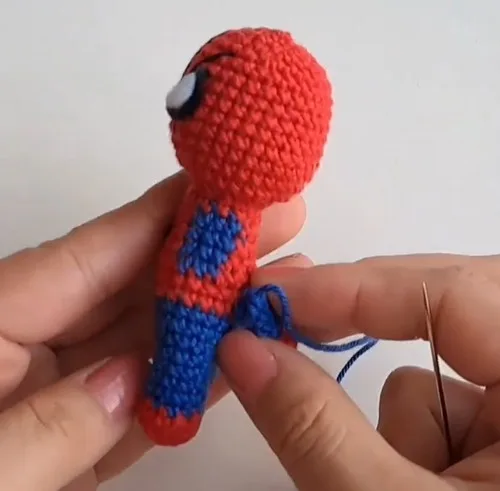
Round: Crochet around the chain to connect the legs and form the body.Round: Continue crocheting rounds with color changes to create stripes on the sides.

Assembly, in order

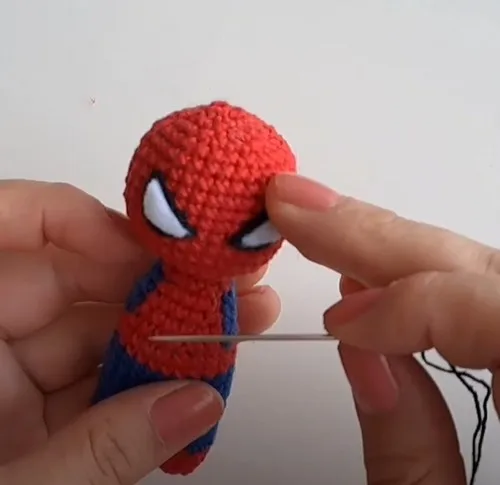
Step 1Attach felt or lency cloth eyes above row 24.
Step 2Add a spider design using embroidery thread on the chest area.
Step 3Sew the spider arms to the body.
Step 4Add additional details to the face using embroidery thread.
Step 5Attach arms and secure with stitches using blue thread.
Step 6Secure all loose ends by weaving them in using a tapestry needle.
Step 7Make any final adjustments to the shape and position of the limbs.
Step 8Add a keychain ring or attachment to turn the figurine into a keychain if desired.

Check these before you start

  • Work the legs firmly enough that 10 stitches hold their shape without a marker, since both legs are worked identically and a dropped stitch will show as a size mismatch between them.
  • Keep tension even through the body's color changes — stripes only read cleanly on the sides if each new color starts at the same point in the round.
  • Stuff as directed rather than waiting until closing; the pattern stuffs legs and body while crocheting, and the head separately before its final decrease round.
  • Watch the transition between the 2-round legs and the 3-round body chain closely; there is no stitch count given for the join, so consistency there matters more than following a number.

On one line

Rounds11
Parts4
LevelIntermediate
Time4-6 hours
YarnWorsted

Set-up

  • Check that red, blue, and white thread are wound and ready, since the body changes color mid-round and a mid-stripe pause slows the work.
  • Read through the Head section first — the increase and decrease rounds are the only shaping in the whole piece, and knowing where 30 stitches is reached avoids a miscount.
  • Cut small pieces of felt or lency cloth for the eyes before starting the head, so they are ready the moment round 24 is reached.
  • Set aside stuffing within reach of the hook, since legs and body are stuffed as the rounds are worked, not after closing.

Finishing

  1. Weave in all loose ends with a tapestry needle once both legs, the body, the head, and both arms are complete.
  2. Attach the felt eyes above round 24 and embroider the remaining face details before joining the head to the body.
  3. Sew the arms on with blue thread, stitch the spider design onto the chest, and adjust limb position before adding a keychain ring if the piece is meant to hang from keys or a bag.

Construction

The legs are worked flat at a constant 10 stitches for their full length rather than shaped, so the body's central chain does the work of holding the two legs together instead of any increase round.

All shaping in the piece is concentrated in the head: it increases up to 30 stitches by round 29, then decreases over three rounds to close, which is why the head takes twice as many rounds as the arms or legs.

Time per section

Legsabout 30-40 minutes for the pair, because each leg is only 2 rounds after the magic ring start
Headabout 1.5-2 hours, because it carries the piece's only shaping across increase and decrease rounds up to 30 stitches
Body and arms with assemblyabout 2 hours, because the body's color changes and the 8-step assembly, including embroidery and eye placement, take longer than the stitching alone

Photographs of this one

Every one was taken by whoever published the pattern, in the order the source listed them.
Mini spider hero amigurumi for keys and bags — photo 2
Mini spider hero amigurumi for keys and bags — photo 3
Mini spider hero amigurumi for keys and bags — photo 4
Mini spider hero amigurumi for keys and bags — photo 5
Mini spider hero amigurumi for keys and bags — photo 6

Common questions

Can this be made without felt for the eyes?
Lency cloth is given as the alternative to felt in the materials list, so either works. Choose whichever is easier to cut cleanly into small shapes for a piece this size.
Why are the legs so short compared to the head?
The legs are only 2 rounds worked flat at 10 stitches, while the head runs 4 rounds up to 30 stitches with full shaping. The proportion is intentional for a keychain-sized figure, where the head carries the design focus.
When should the keychain ring be added?
It comes last, after all limbs are attached and adjusted and loose ends are woven in. Adding it earlier risks catching thread ends or pulling the assembly out of shape.

These answers came from whoever first published the pattern, kept word for word.