
Intermediate
What the pattern's own author called it. Nothing here is graded again.
 Crochet·Rituals
Amigurumi 11 Laid out for paper No account, no download
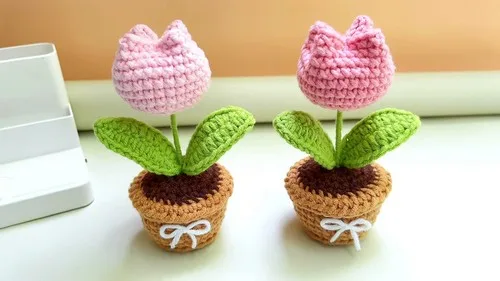
Mini tulip in a pot: amigurumi flower pot in rounds, wired leaves, small hook, quick desk decor.
Crochet Rituals · retyped from the source and laid out for print · added 1 Oct 2026
What the pattern's own author called it. Nothing here is graded again.

What the sample was worked in. Any weight works; the size moves with it.

Each one is typed out whole and gets its own line.
This mini tulip in a pot is built in three separate pieces: a flower top worked from a magic ring with two rounds of increases, a pot worked from its own magic ring through a run of increase and plain rounds, and a pair of wired leaves worked flat along a length of chain. Have both pieces of yarn, a length of 15 cm wire, and a yarn needle ready before you start, since the leaves are reinforced as you crochet them rather than after. The finished piece stands upright on its own and sits well on a shelf or desk.
Listed by the pattern's own author, in their words.
Key to this pattern, 5 short forms
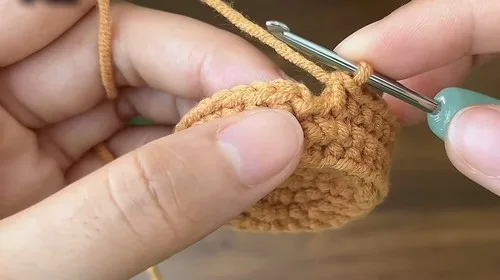
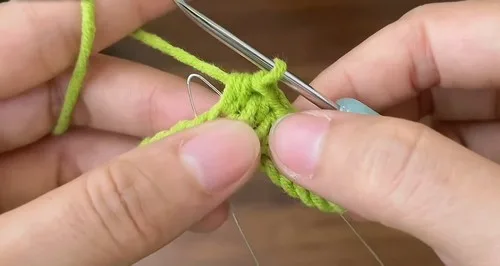
Create a magic ring. Make 6 single crochets (sc) into the ring. Pull the yarn tightly and slip stitch (sl st) into the first stitch.
Chain (ch) 1. Increase in all stitches (2 sc in each stitch) — total 12 stitches.Sl st into the first stitch.For Row 3: Ch 1.1 sc, 1 increase — repeat 6 times (18 stitches).Sl st into the first stitch.
Ch 1. 2 sc, 1 increase — repeat 6 times (24 stitches). Sl st into the first stitch.
Ch 1. In back loops only: 1 sl st in each of the 24 stitches. Sl st into the first stitch.For Row 6: Ch 1.3 sc, 1 increase — repeat 6 times (30 stitches).Sl st into the first stitch.
Ch 1. 1 sc in each stitch (30 stitches total). Sl st into the first stitch.
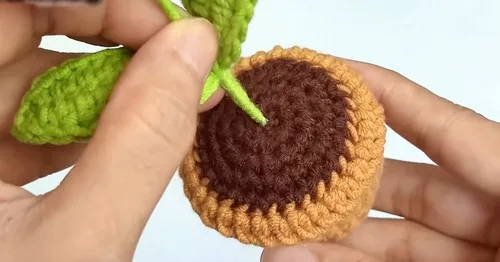
Repeat Row 7 (4 rows of 30 sc each). For Row 12: Ch 2. In front loops only: 1 half double crochet (hdc) in each stitch.Sl st into the first stitch and fasten off.Soil Make a magic ring and crochet 6 sc into it.Tighten the loop, leaving a small hole in the center.Sl st into the first stitch.Repeat the first 4 rows from the Pot section.Fasten off and leave a long tail for sewing.Stuff the pot with cotton.Sew the soil into the pot using the tail.
Tulip Bud
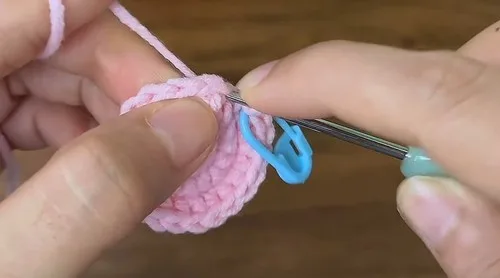
Create a magic ring. Crochet 7 sc into the ring.
In continuous rounds: make 1 increase in each stitch (14 stitches). For Row 3: 1 sc, 1 increase — repeat 7 times (21 stitches).
2 sc, 1 increase — repeat 7 times (28 stitches).
1 sc in each stitch (28 total).
Repeat Row 5. Make a sl st to the first stitch. Ch 1 and fasten off, leaving a long tail.Stuff with cotton.Sew a cross stitch in the last row for added shape.
Make a slip knot and ch 12.
Insert a 15 cm wire and crochet around it.
In the second chain from the hook: make 1 sc.
In the next chain: make 1 hdc.
In the next 7 chains: make 1 hdc in each.
In the final 2 chains: make 1 sc in each.
Ch 2 and make another sc in the same stitch.
1 sc in the next stitch.
1 hdc in each of the next 8 stitches.
1 sc in the last stitch.
Sl st to the first stitch and fasten off.
Wrap yarn around the wire to cover it.
Make two leaves total.
Assembling the Tulip Apply glue to the wire and wrap green yarn around it to form the branch.
Insert the wire through the tulip bud's center and secure with hot glue.
Continue wrapping yarn down the stem for 3–4 cm.
Attach leaves to the branch and wrap yarn over them to secure.
Apply glue to the end and finish wrapping yarn neatly.
| Rounds | 11 |
|---|---|
| Parts | 4 |
| Level | Intermediate |
| Time | 4-6 hours |
| Yarn | Worsted |
The flower's increases are spaced evenly across each round — 6 to 12, then 1 sc plus 1 increase repeated 6 times to reach 18 — so the shape widens gradually rather than flaring at one point.
The leaves are worked flat along a straight chain of 12 with wire inserted as you go, which lets them hold a curved or bent shape once finished instead of lying flat like the crocheted rounds.
| Main Pattern (flower) | about 30-45 minutes because it runs 6 rounds with two increase rounds to track |
|---|---|
| Part 2 (pot) | about 1-1.5 hours because 5 distinct rounds build up to 28 stitches before the plain rounds repeat |
| Leaves | about 30-45 minutes because working stitches around the wire is slower than plain crochet |
Every one was taken by whoever published the pattern, in the order the source listed them.
These answers came from whoever first published the pattern, kept word for word.