Skip to the patterns
Crochet·Rituals
Menu

Amigurumi 91 Laid out for paper No account, no download

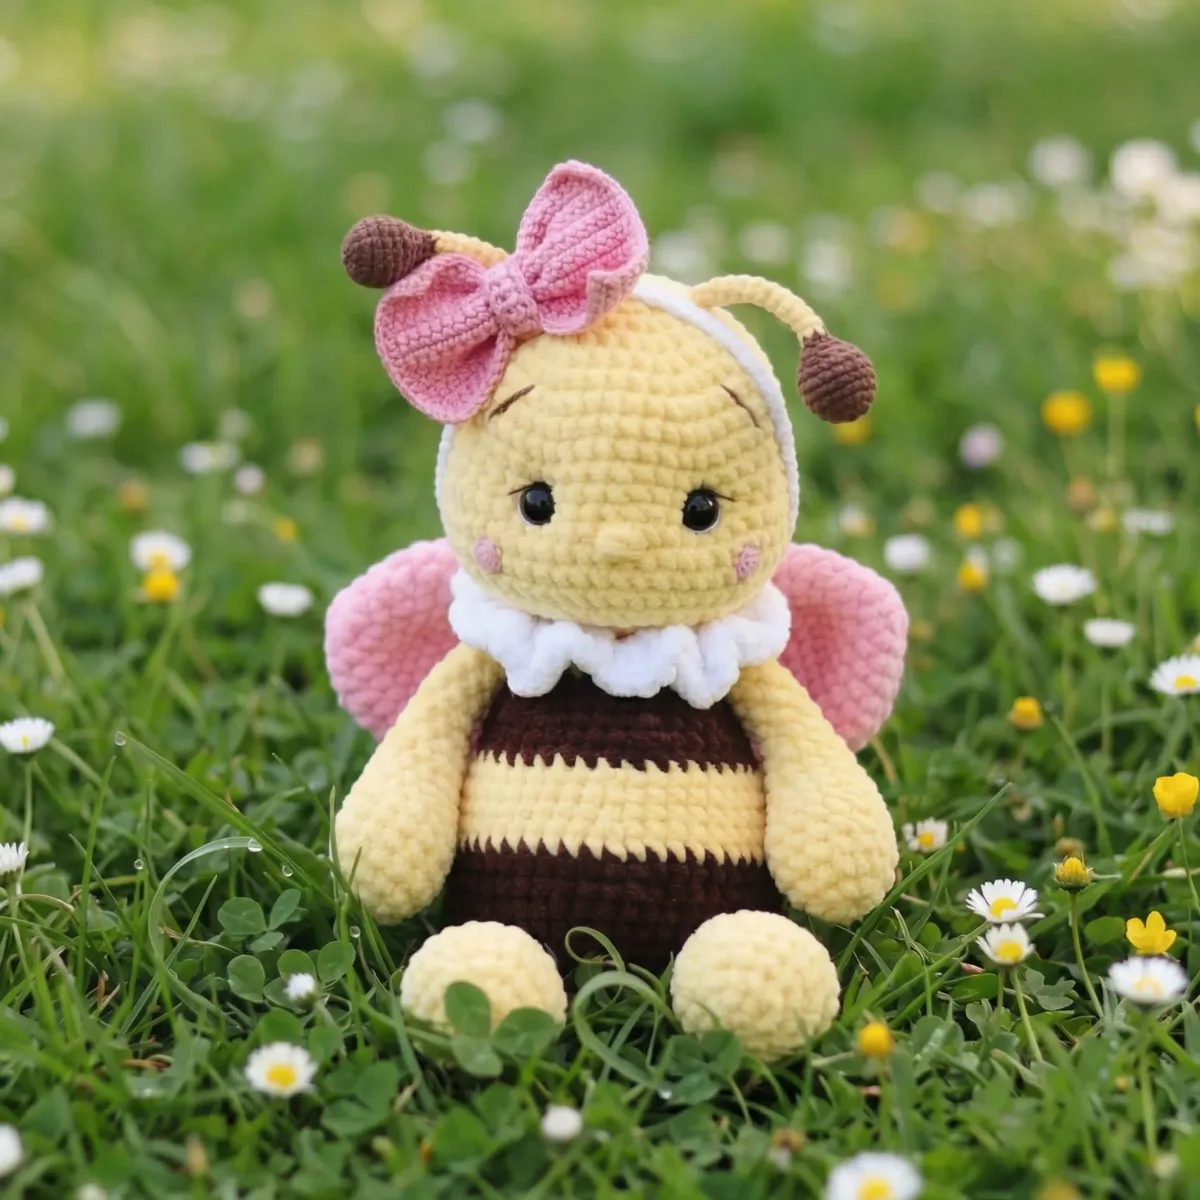
How to crochet a plush bee amigurumi

Plush bee amigurumi: 16-round head, 20-round body, 4mm hook, plus fine hooks for bow and antennae.

Jump to the rounds Pin it
How to crochet a plush bee amigurumi
Amigurumi · Bulky
Skill
Intermediate
Time
3-5 hours
Yarn weight
Bulky
Hook
4 mm
Rounds
91

Intermediate

What the pattern's own author called it. Nothing here is graded again.

Bulky

What the sample was worked in. Any weight works; the size moves with it.

91

Each one is typed out whole and gets its own line.

Plush bee amigurumi: 16-round head, 20-round body, 4mm hook, plus fine hooks for bow and antennae.

Common mistakes and their fixes

Stuffing the whole limb
Stuff only the lower hand and foot sections of the arms and legs; leave the upper sections empty so the limb attaches flat against the body.
Losing the round start point
Since parts are worked in a continuous spiral with no join, move a stitch marker into the first stitch of every new round as you go.
Eyes sitting too shallow
Pull the strong thread firmly and evenly on both passes when indenting each eye, and mark the exact position with a stitch marker before stuffing the head.

The materials list

  1. Plush yarn — yellow and brown for the body; pink or blue for the wings; white for the collar (e.g., Himalaya Dolphin Baby 100g/175m)
  2. Cotton or cotton-blend yarn — yellow, pink, and brown for the antennae, eyebrows, cheeks, and bow headband (e.g., YarnArt Jeans 50g/165m; Alize Cotton Gold 100g/330m)
  3. Crochet hooks — 4 mm (plush yarn), 2 mm (bow), 1.75 mm (antennae)
  4. Sew-on eyes — 15 mm diameter, x2
  5. Strong cotton thread in body color — for sewing parts and eye indentation
  6. Thin black and white thread — for eye detailing (e.g., Alpina Xenia 50g/240m)
  7. Polyfill stuffing — polyester fiberfill or soft ball stuffing
  8. Tapestry needle, stitch markers, scissors

Listed by the pattern's own author, in their words.

Key to this pattern, 9 short forms

Head

Work in yellow plush yarn.

Round 1

6 sc in mr (6)

Round 2

inc x6 (12)

Round 3

(sc, inc) x6 (18)

Round 4

(2 sc, inc) x6 (24)

Round 5

(3 sc, inc) x6 (30)

Round 6

(4 sc, inc) x6 (36)

Round 7

(5 sc, inc) x6 (42)

Round 8

(6 sc, inc) x6 (48)

Rounds 9–13

48 sc (5 rounds)

Round 14

sc, 3 inc (place Marker 1 in the last stitch of the third increase) , 16 sc, 3 inc (place Marker 2 in the first stitch of the first increase) , 25 sc (54)

These markers guide eye placement.

Rounds 15–17

54 sc (3 rounds)

Round 18

(7 sc, dec) x6 (48)If using safety eyes, insert them between Rnds 12–13 now: place the left eye 4 stitches to the left of Marker 2, and the right eye 4 stitches to the right of Marker 1. Begin stuffing the head and continue stuffing as you work.

Round 19

(6 sc, dec) x6 (42)

Round 20

(5 sc, dec) x6 (36)

Round 21

dec x18 (18)

Round 22

18 sc Fasten off and weave in ends.

Arms

Work in yellow plush yarn. Make 2.

Round 1

6 sc in mr (6)

Round 2

inc x6 (12)

Round 3

(3 sc, inc) x3 (15)

Rounds 4–6

15 sc (3 rounds)

Round 7

7 sc, dec, 6 sc (14)

Round 8

6 sc, dec, 6 sc (13)

Round 9

5 sc, dec, 6 sc (12)

Round 10

5 sc, dec, 5 sc (11)

Round 11

5 sc, dec, 4 sc (10)Stuff the hand portion firmly (through Rnd 8). Leave the remainder unstuffed.

Round 12

4 sc, dec, 4 sc (9)

Round 13

4 sc, dec, 3 sc (8)

Rounds 14–18

8 sc (5 rounds) Fasten off and leave a long tail for attachment.

Legs

Work in yellow plush yarn. Make 2.

Round 1

ch 5, starting in the 2nd ch from hook: 3 sc, 3 sc in last ch, continue along opposite side of chain: 2 sc, inc (10)

Round 2

inc, 2 sc, inc x3, 3 sc, inc (15)

Round 3

sc, inc, 3 sc, inc, sc, inc, sc, inc, 5 sc (19)

Round 4

inc, 6 sc, inc, 2 sc, inc, 2 sc, inc, 4 sc, inc (24)

Rounds 5–6

24 sc (2 rounds)

Round 7

6 sc, dec x6, 6 sc (18)

Round 8

3 sc, dec x6, 3 sc (12)

Round 9

4 sc, dec x2, 4 sc (10)Stuff the foot section firmly (through Rnd 9). Leave the remainder unstuffed.

Rounds 10–17

10 sc (8 rounds) Fasten off and leave a long tail for attachment.

Body

Begin in yellow plush yarn.

Round 1

6 sc in mr (6)

Round 2

inc x6 (12)

Round 3

(sc, inc) x6 (18)

Round 4

(2 sc, inc) x6 (24)

Round 5

(3 sc, inc) x6 (30)

Round 6

(4 sc, inc) x6 (36)

Round 7

Join legs in this round. Fold each leg flat and crochet through both layers. 5 sc along left leg and body, inc, (5 sc, inc) x2, 5 sc along right leg and body, inc, (5 sc, inc) x2 (42)Switch to brown yarn.

Round 8

2 sc, inc, 20 sc, inc, 9 sc, inc x2, 7 sc (46)

Rounds 9–12

46 sc (4 rounds) Switch to yellow yarn.

Round 13

46 sc

Round 14

2 sc, dec, 9 sc, dec, 9 sc, dec, 10 sc, dec, 8 sc (42)

Rounds 15–16

42 sc (2 rounds)

Round 17

(5 sc, dec) x6 (36)

Rounds 18–19

36 sc (2 rounds)

Round 20

(4 sc, dec) x6 (30)

Rounds 21–22

30 sc (2 rounds) Switch to yellow yarn.

Round 23

(3 sc, dec) x6 (24)

Round 24

Join arms in this round. Fold each arm flat and crochet through both layers. The decrease sections should be at the front of the arm. Ensure arms are symmetrically positioned relative to the legs; work extra offset stitches if needed.sc, 4 sc along left arm and body, 8 sc, 4 sc along right arm and body, 7 sc (24)

Round 25

(2 sc, dec) x6 (18)

Round 26

18 sc Fasten off and stuff the body firmly.

Wings

Work in plush yarn in your chosen color (pink shown). Make 2.

Round 1

6 sc in mr (6)

Round 2

inc x6 (12)

Round 3

(sc, inc) x6 (18)

Round 4

(2 sc, inc) x6 (24)

Round 5

(3 sc, inc) x6 (30)

Rounds 6–10

30 sc (5 rounds)

Round 11

(dec, 13 sc) x2 (28)

Round 12

(dec x2, 10 sc) x2 (24)

Round 13

(dec x2, 8 sc) x2 (20)

Round 14

(dec, 8 sc) x2 (18)

Round 15

(dec, 7 sc) x2 (16)

Round 16

(dec, 6 sc) x2 (14)

Round 17

(dec, 5 sc) x2 (12)Fasten off and weave ends inside the wing. Wings are not stuffed.

Stinger

Work in brown plush yarn.

Round 1

4 sc in mr (4)

Round 2

(sc, inc) x2 (6)

Round 3

6 sc

Round 4

(2 sc, inc) x2 (8)Fasten off and stuff lightly.

Antennae

Work in brown cotton-blend yarn. Make 2.

Round 1

6 sc in mr (6)

Round 2

inc x6 (12)

Round 3

(sc, inc) x6 (18)

Rounds 4–6

18 sc (3 rounds)

Round 7

(4 sc, dec) x3 (15)

Round 8

(3 sc, dec) x3 (12)

Round 9

(2 sc, dec) x3 (9)Stuff the tip section (through Rnd 9). Leave the remainder unstuffed.

Round 10

(sc, dec) x3 (6)Switch to yellow cotton-blend yarn.

Rounds 11–22

6 sc (12 rounds) Fasten off, leaving a long tail for sewing. 🔥 On Sale amigurumicorner

Collar

Work in white plush yarn.

Round 1

ch 22; starting in the 5th ch from hook: sc, (ch 3, skip 1 ch, sc) — repeat to end of chain; turn.

Round 2

(ch 2, 4 dc under ch-3 arch, ch 2, sl st in sc of previous row) x8, ch 2, 4 dc under ch-4 arch, ch 2, sl st under same arch.Fasten off, leaving a long tail for attaching collar to neck.

Bow (for Girl Bee version)

Work in pink cotton-blend yarn with 2 mm hook.

Round 1

ch 24; starting in 2nd ch from hook: 23 sc; ch 1, turn.

Rounds 2–17

23 sc (16 rows)

Round 18

Border round — do not fasten off. Turn work 90°. ch 1, 16 sc along short side, ch 1, 23 sc along long side, ch 1, 16 sc along short side, ch 1, 12 sc.Fasten off, leaving a long tail. Pinch the rectangle at the center accordion-style and wrap the tail thread around the middle to secure. Fasten and trim.

Bow Center Wrap

Round 1

ch 4; starting in 2nd ch from hook: 3 sc; ch 1, turn.

Rounds 2–13

3 sc (12 rows) Fasten off, leaving a long tail. Sew center wrap over the gathered middle of the bow.

Headband

Round 1

ch 3; starting in 2nd ch from hook: 2 sc; ch 1, turn. Continue working flat rows of 2 sc until the strip reaches the circumference of the bee’s head (approximately 78 rows) .Fasten off, leaving a long tail. Thread the headband through between the bow and the center wrap; sew the ends together, ensuring the band is not twisted.

Cheeks

Work in pink cotton-blend yarn. Make 2.

6 sc in mr, sl st to close. Fasten off, leaving a long tail for sewing.

Assembly, in order

Step 1Attach head to body. Sew the head to the top of the body, keeping the stitch markers at the front. Before completing the final stitches, firmly stuff the neck area.
Step 2Attach and indent the eyes. Using strong thread, insert the needle at the base of the head front (near the neck), exit at the right eye position, thread the eye onto the needle, re-enter at the same point, and exit 1 stitch to the right of the entry point. Pull both thread ends until the eye sinks to the desired depth; knot securely and hide ends inside the head. Repeat for the left eye.
Step 3Add eye detail. Embroider the upper eyelid with thin black thread and the lower eyelid with white thread to create a lively expression.
Step 4Embroider the nose. Using yellow plush yarn, embroider a nose between Rnds 14–15, spanning approximately 2 stitches wide.
Step 5Attach antennae. Sew antennae to the top of the head, evenly spaced.
Step 6Embroider eyebrows. Use brown cotton-blend yarn to embroider arched eyebrows above the eyes.
Step 7Attach the collar. Sew the collar around the neck junction between head and body.
Step 8Sew on cheeks. Position cheeks on either side of the nose and sew securely.
Step 9Attach the stinger. Sew the stuffed stinger to the lower back of the body.
Step 10Attach the wings. Sew each wing through both folded layers onto the bee’s back. Add one extra anchoring stitch through the inner face of each wing so they lie flat against the body.
Step 11(Optional) Add bow headband. Place the headband around the head with the bow at the front or side.

Check these before you start

  • Match hook to yarn throughout: 4mm for all plush-yarn parts, 2mm for the bow, and 1.75mm for the antennae, so smaller pieces hold their shape without gaps.
  • Every part is worked in a continuous spiral with no joins or turning chains, so keep a stitch marker in the first stitch of each round to avoid losing your place.
  • Stuff the head and body gradually as rounds are completed, but stuff the arms and legs only in their lower hand and foot sections, leaving the upper portions unstuffed.

On one line

Rounds91
Parts12
LevelIntermediate
Time3-5 hours
Hook4 mm
YarnBulky

Set-up

  • Check yarn amounts against every part before casting on: the plush yarn covers head, body, arms, legs, wings, and stinger, while cotton yarn covers antennae, eyebrows, cheeks, and the bow set.
  • Set out stitch markers ahead of time to track spiral round starts and to mark eye placement on the head before stuffing.
  • Work a small swatch in plush yarn on the 4mm hook first to confirm the stitches sit tight enough to hide stuffing.
  • Read through the Legs round 1 before starting it, since it begins from a chained oval rather than the magic ring used for the other parts.

Finishing

  1. Weave in all loose ends left from color and hook changes across the head, body, arms, legs, wings, stinger, and antennae before assembling.
  2. Firmly stuff the neck area of the body just before working the final stitches, then sew the head into place with stitch markers kept at the front for orientation.
  3. Attach and indent the eyes last: sink each 15mm eye with strong cotton thread pulled evenly on both passes, then knot securely at the base of the head.

Construction

The head increases by six stitches every round through round four (6, 12, 18, 24), the standard spiral-sphere shaping that rounds out the skull before later rounds taper toward the neck.

The legs start from a chained oval worked around both sides to 10 stitches rather than a magic ring, which gives each foot a flattened base instead of a rounded point.

Time per section

Headabout 45-60 minutes because the 16 rounds include shaping, stuffing, and eye indenting
Body, arms, and legsabout 1.5-2 hours because the body runs 20 rounds and the arms and legs are each made twice

Photographs of this one

Every one was taken by whoever published the pattern, in the order the source listed them.
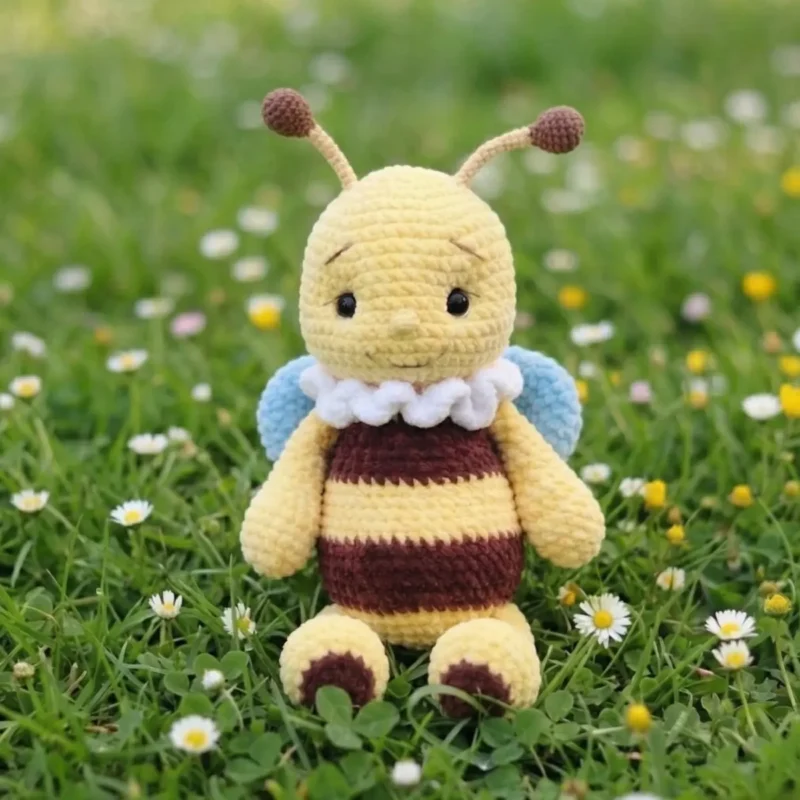
How to crochet a plush bee amigurumi — photo 2
How to crochet a plush bee amigurumi — photo 3

Common questions

Why does the head take so many more rounds than the arms?
The head is worked over 16 rounds compared with 12 for each arm because its larger diameter needs more rounds to shape the curve and hold stuffing evenly. The extra rounds also allow room for the eye indentation and facial detail work.
What changes for a boy bee instead of a girl bee?
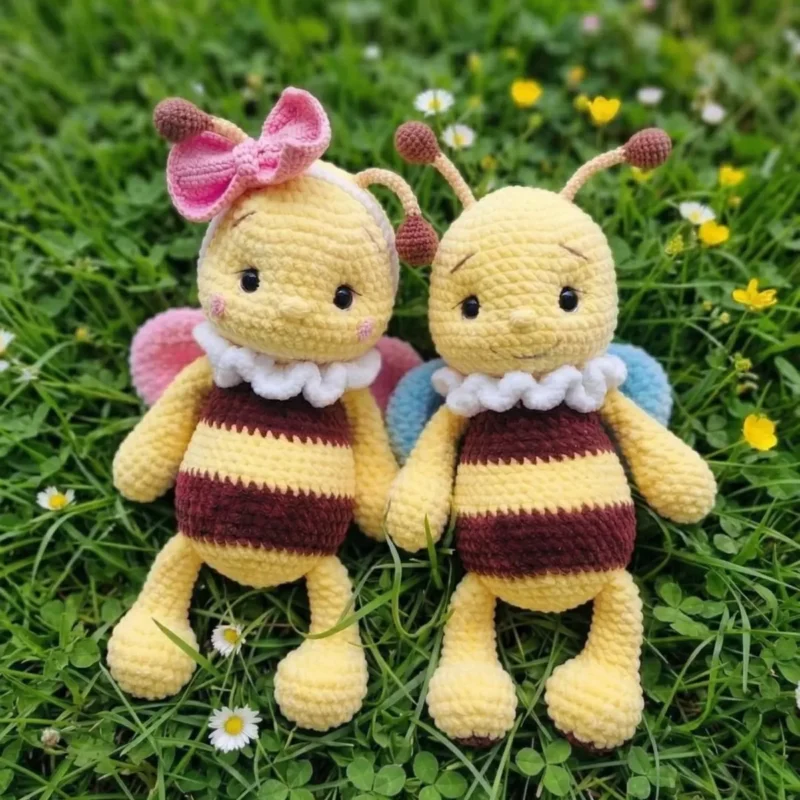
The bow, bow center wrap, and headband belong only to the girl bee version, so skip those three small parts for a boy bee. The collar, antennae, and cheeks remain the same for either version.
Why does the pattern call for three different hook sizes?
The 4mm hook matches the plush yarn used for the head, body, limbs, wings, and stinger, while the 2mm and 1.75mm hooks match the finer cotton yarn used for the bow and antennae. Using a smaller hook on thinner yarn keeps those small pieces tight enough to hold their shape.

These answers came from whoever first published the pattern, kept word for word.