Skip to the patterns
Crochet·Rituals
Menu

Amigurumi 12 Laid out for paper No account, no download

One-piece crochet bunny keychain amigurumi pattern

A 12-round, top-down bunny keychain worked with a 4mm, 3mm, or 2mm hook. No sewing on parts.

Jump to the rounds Pin it
One-piece crochet bunny keychain amigurumi pattern
Amigurumi · Worsted
Skill
Intermediate
Time
4-6 hours
Yarn weight
Worsted
Hook
4 mm
Rounds
12

Intermediate

What the pattern's own author called it. Nothing here is graded again.

Worsted

What the sample was worked in. Any weight works; the size moves with it.

12

Each one is typed out whole and gets its own line.

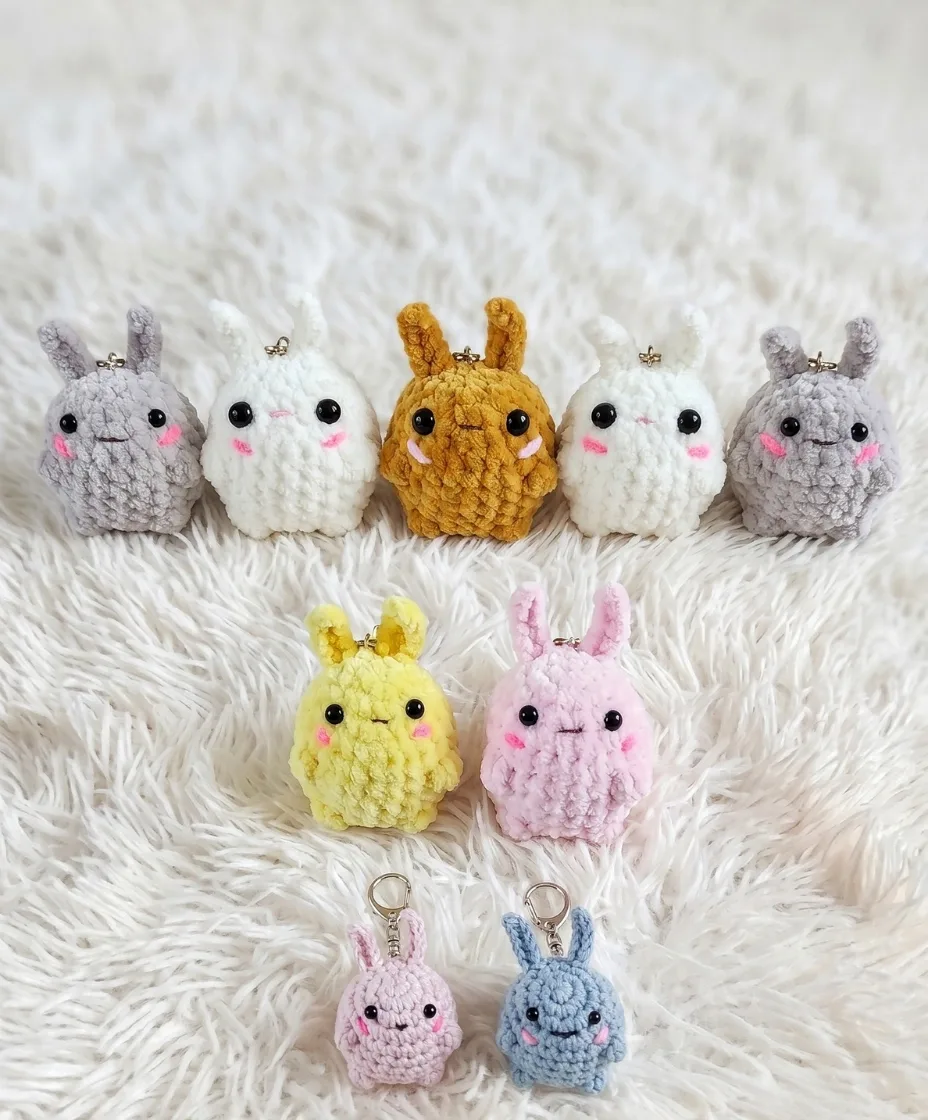
This bunny keychain is worked top-down as a single continuous piece — no separate parts to sew on later. Ears form directly from the head rounds using front-loop chains, and the body closes into a small stuffed shape over 12 rounds. Choose a yarn and matching hook: 4 mm for a full-size keychain, 3 mm for a smaller version, or 2 mm for a mini using cotton. Have fiberfill, bead or post eyes, pink yarn for the face, a keyring, and craft adhesive ready before starting.

Common mistakes and their fixes

Losing count during the ear chains
Treat the ear instruction in Round 3 as a pause in the round, not a new round — return to the stated stitch count once the ear is complete.
Working both loops instead of front loop only
Check Round 3 and Round 4 for FLO and BLO callouts before working; using both loops there flattens the ear base and skews the shaping.
Closing Round 12 before stuffing is even
Press the stuffing through the opening and check the shape from all sides before drawing the final 6 stitches shut, since there is no access afterward.
Pulling clusters too loosely
When working the 3-dc cluster for the paws and tail, draw the final loop through all 4 loops on the hook with a confident tug — a hesitant pull leaves the cluster looking flat instead of a rounded, toe-like bump.
Inserting the keychain loop off-center
Before knotting the loop through the button, fold it in half and hold it behind the bunny to confirm it falls directly between the two ears — an off-center loop makes the bunny hang sideways on the ring.

The materials list

Bulky plush option

  1. Dolphin Baby (120 m / 100 g) or Softy Plus (115 m / 100 g) — use a US G-6 / 4 mm hook

Medium velvet option

  1. Dolphin Fine (160 m / 100 g) or YarnArt Velour (170 m / 100 g) — use a US D-3 / 3 mm hook

Mini option

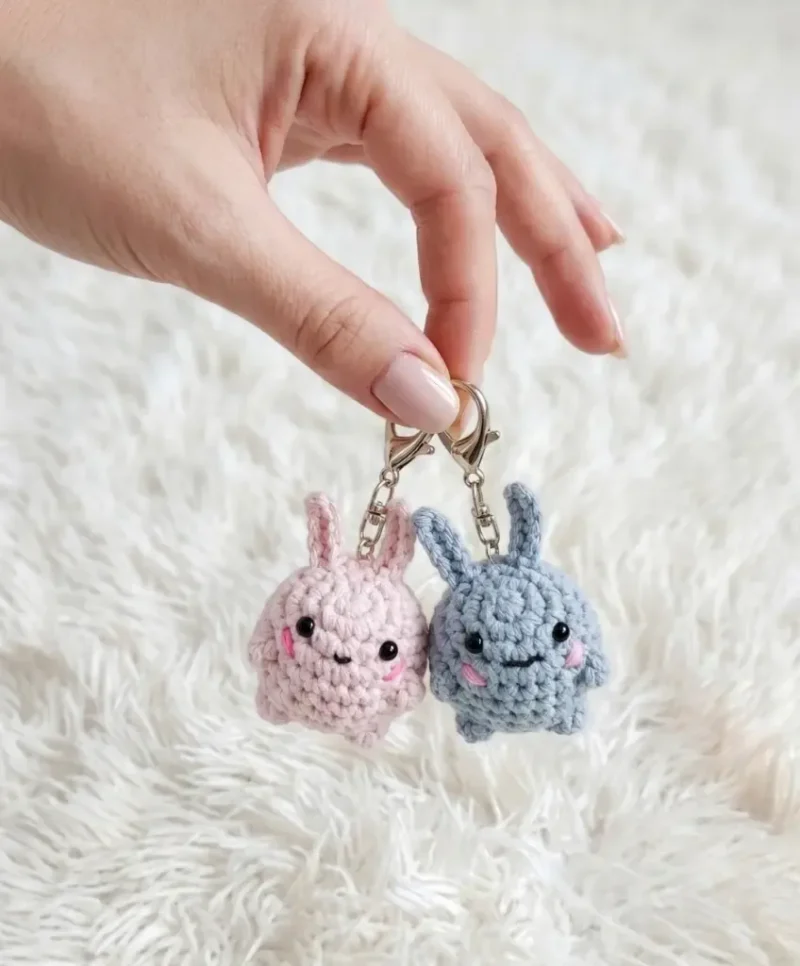
  1. YarnArt Jeans or any cotton yarn — use a US 4 / 2 mm hook (or 1.75 mm)
  2. Small amount of pink yarn for embroidering cheeks and mouth
  3. Small amount of cotton or cotton-blend yarn in body color for the keychain loop attachment — use a US 8 / 1.5 mm hook
  4. Fiberfill / stuffing
  5. Bead eyes or post-style eyes with adhesive:
  6. 3 mm for the mini (Jeans yarn) version
  7. 6 mm for the Fine / Velour version
  8. 8–10 mm for the Baby / Softy Plus version

Button

  1. 8–15 mm (size depends on yarn weight)
  2. Keyring / keychain ring
  3. Craft adhesive (gel or crystal formula) for securing the button knot
  4. Yarn needle / tapestry needle
  5. Scissors
  6. Stitch marker

Listed by the pattern's own author, in their words.

Key to this pattern, 10 short forms

Body (worked top-down as one continuous piece)

Keychain Loop To make the attachment loop, chain 23. Thread both yarn tails through the button hole and tie tightly. Apply a small drop of craft adhesive to the knot to secure it permanently. Set this aside and return to it at Round 10.

Round 1

6 sc in MR. (6)

Round 2

inc in each st around. (12)

Round 3

inc, sc 3 times — (6 sts worked); [sl st in FLO, ch 6, starting from the 2nd ch from hook: 1 sl st, 3 sc, 1 sl st, sl st into base st] — Ear made ; inc; [sl st in FLO, ch 6, starting from the 2nd ch from hook: 1 sl st, 3 sc, 1 sl st, sl st into base st] — Ear made ; inc, sc. (18)

Round 4

2 sc, inc 3 times; 2 sc, inc in BLO 2 times; 2 sc, inc. (24)

Round 5

sc in each st around. (24)

Round 6

1 sc; [3-dc cluster in next st] — Paw ; 7 sc; [3-dc cluster in next st] — Paw ; 14 sc. (24)

Round 7

sc in each st around. (24)

Round 8

sc in each st around. (24)

Round 9

3 sc; [3-dc cluster in next st] — Paw ; 4 sc; [3-dc cluster in next st] — Paw ; 15 sc. (24)Before working Round 10: insert the prepared keychain loop with button between Rounds 2 and 3, centered between the two ears. Begin adding fiberfill now.

Round 10

2 sc, dec 4 times; 1 sc; [3-dc cluster in next st] — Tail ; dec; 2 sc; dec. (18)

Round 11

dec, sc 6 times. (12)

Round 12

dec 6 times. (6)Close the opening by weaving the yarn tail through the remaining 6 stitches and pulling tight.

Assembly, in order

Step 1After closing the opening in Round 12, use your yarn needle and tail to weave through the final 6 stitches and draw them shut completely.
Step 2Position the eyes on either side of the face, between Rounds 4 and 5. Apply a small amount of craft adhesive to each post and press into place. Allow to dry fully before handling.
Step 3Using pink yarn and a yarn needle, embroider small circular cheeks below the eyes. Add a small V-shaped stitch for the mouth between the cheeks.
Step 4Confirm the keychain loop is securely knotted through the button and that the adhesive on the knot has fully cured.
Step 5Weave in all remaining yarn ends.

Check these before you start

  • Gauge is not critical for a keychain, but tighter tension produces firmer, neater results — go down a hook size if your fabric feels loose, so stuffing doesn't show through the stitches on a small piece.
  • The ears are formed in Round 3 through front-loop-only slip stitches and chains; work into the front loop only as instructed so the back loop stays free for the following round.
  • Stuff as you go rather than waiting until Round 12 closes — once the final stitches are drawn shut, there is no way back into the body.
  • This pattern is written in US crochet terminology, and stitch counts are given at the end of each round in parentheses, e.g. (##).

On one line

Rounds12
LevelIntermediate
Time4-6 hours
Hook4 mm
YarnWorsted

Set-up

  • Match your hook to your chosen yarn weight — 4 mm for Dolphin Baby or Softy Plus, 3 mm for Dolphin Fine or Velour, 2 mm for Jeans or cotton.
  • Read Round 3 before beginning it — the ears are made mid-round from front-loop chains, and it helps to know where they interrupt the stitch count.
  • Select eye size to match your yarn choice: 3 mm for the mini, 6 mm for Fine or Velour, 8-15 mm for Baby or Softy Plus.
  • Set a stitch marker at the start of Round 1 and move it up each round — with no joins or turns, it is the only way to track where a round begins.

Finishing

  1. Weave in the starting tail from Round 1 before adding any stuffing, since it becomes hard to reach once the body is filled.
  2. Stuff firmly through the remaining opening after Round 12, working small amounts in at a time so the shape stays round rather than lumpy.
  3. Close the final 6 stitches with the tail and yarn needle, drawing them shut completely, then secure the keychain loop and attach eyes and embroidered face as the last steps.

Construction

Increases are placed asymmetrically through Rounds 3 and 4 — inc appears between plain stitches on one side and in back-loop-only on the other, which shapes the head to taper differently on each edge.

The ears are worked as a flat chain-and-slip-stitch detour inside Round 3 rather than as separate pieces, so the round count keeps rising even though two ears are formed along the way.

The paws (Rounds 6 and 9) and tail (Round 10) are all formed the same way — a 3-dc cluster worked into a single stitch — so mastering the technique once in Round 6 makes the later rounds faster.

Time per section

Rounds 1-4 (head shaping and ears)about 30-40 minutes because of the mid-round ear chains and mixed FLO/BLO increases
Rounds 5-12 (body, arms, tail)about 45-60 minutes because of the plain rounds combined with continued shaping
Assembly and faceabout 20-30 minutes because eyes need adhesive drying time before embroidery

Photographs of this one

Every one was taken by whoever published the pattern, in the order the source listed them.
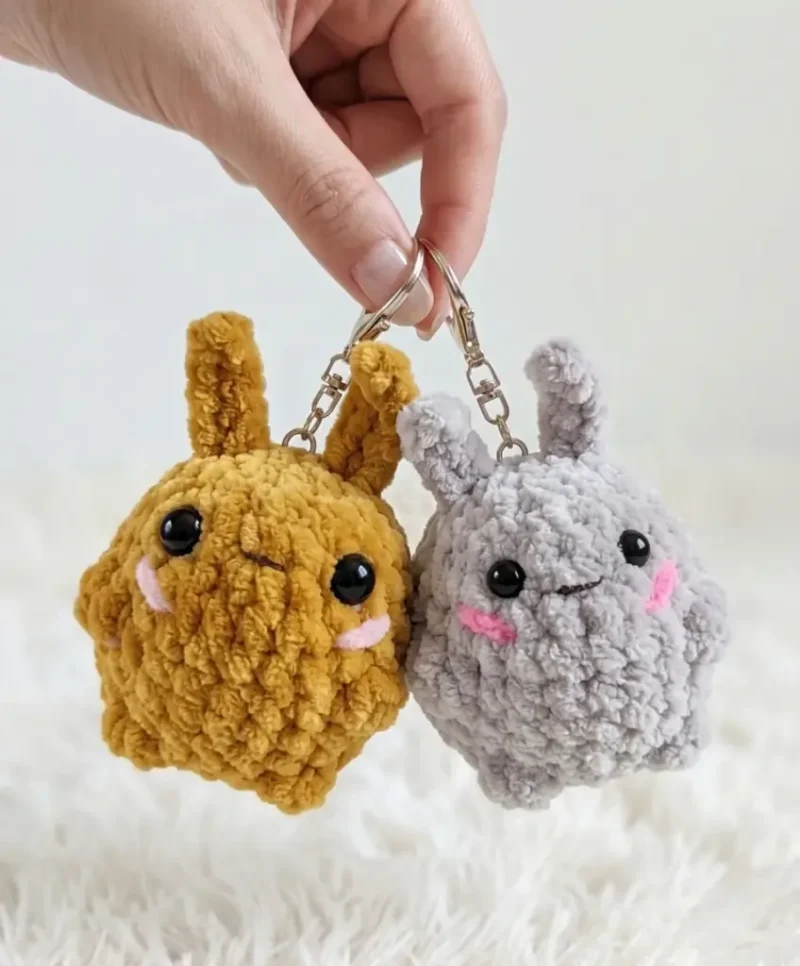
One-piece crochet bunny keychain amigurumi pattern — photo 2
One-piece crochet bunny keychain amigurumi pattern — photo 3

Common questions

Can I use safety eyes instead of bead eyes for this bunny keychain?
Yes, safety eyes work well for the larger versions of this bunny made with Dolphin Baby or Softy Plus yarn. Insert the safety eyes and attach the backing washers before you begin stuffing in Round 10, since you will not be able to reach inside once the opening is closed. For the mini Jeans yarn version, the opening is too small for standard safety eye posts, so beads with adhesive are the better choice.
Why is the bunny worked top-down as a single piece instead of separate parts?
Working top-down in one piece eliminates the need to crochet and sew on separate ears, arms, and legs — which saves time and produces cleaner results on a small project like a keychain. The ears are formed with a slip-stitch chain in Round 3, and the paws and tail are shaped using clusters within the main body rounds. This means your finishing work is minimal: just close the opening, add the eyes, and embroider the face.
How do I keep the paws symmetrical in Round 6 and Round 9?
The pattern notes that stitch alignment can shift depending on your working style. To keep the paws evenly spaced, place a stitch marker at the center stitch of the round before you begin. Count the same number of stitches outward from the center in each direction to find the correct paw placement points. This is especially helpful if you are not using the same decrease method as the original pattern.
What is the best way to attach the keychain loop so it holds up with everyday use?
plush yarn versions, crocheting a small loop and inserting it into the body before closing is the most secure method, since plush yarn is not as strong under tension as cotton. For cotton or cotton-blend yarn, you can thread the chain loop directly through the body and tie it tightly to the button — cotton yarn is strong enough to hold the weight of the keychain with daily use. Whichever method you use, apply a drop of gel adhesive to the button knot and let it cure fully before attaching the keyring.

These answers came from whoever first published the pattern, kept word for word.