
Easy to confident beginner
What the pattern's own author called it. Nothing here is graded again.
 Crochet·Rituals
Crochet Bags 14 Laid out for paper No account, no download
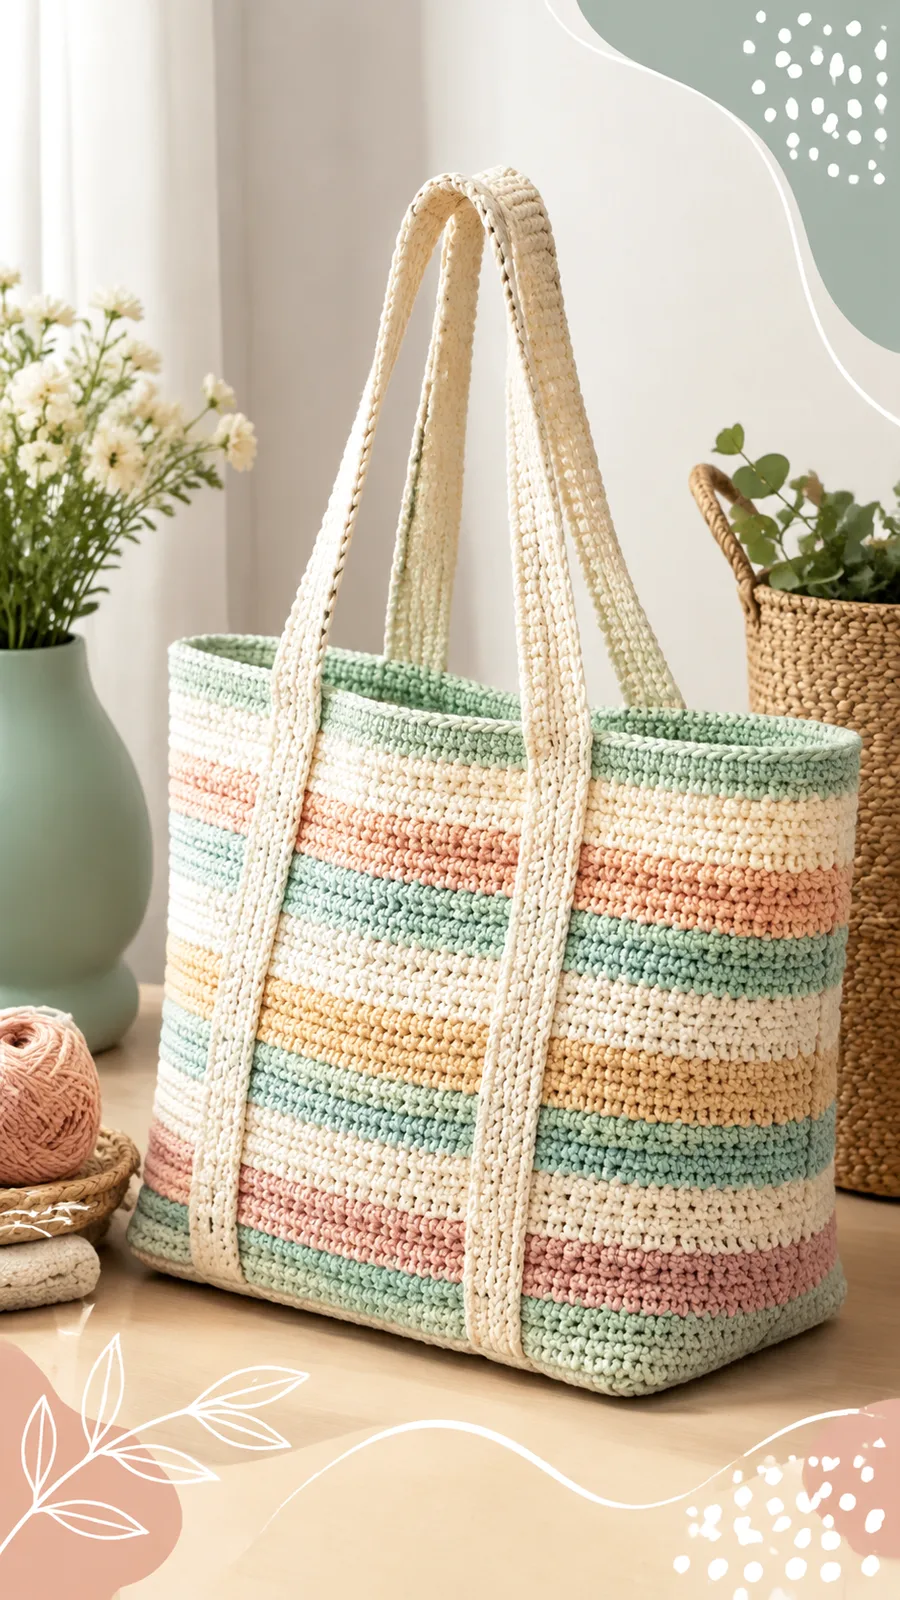
Pastel striped crochet tote: flat base, 144-st joined rounds, sc/hdc body, 4.5mm hook.
Crochet Rituals · retyped from the source and laid out for print · added 16 Oct 2026
What the pattern's own author called it. Nothing here is graded again.

What the sample was worked in. Any weight works; the size moves with it.

Each one is typed out whole and gets its own line.
This tote starts flat: a rectangular base of 60 stitches worked back and forth for twelve rows, giving the bottom a stable shape before anything is joined. The body is picked up directly from the base edges and worked in joined rounds of 144 stitches, moving between single crochet and half double crochet as the color changes. Two flat straps are worked separately and sewn on last. Before starting, have 900 yards of medium-weight cotton in four colors, a 4.5 mm hook, stitch markers, and a yarn needle within reach.
Listed by the pattern's own author, in their words.
Key to this pattern, 10 short forms
With Color A, ch 61. The base is worked back and forth in rows to build a stable rectangular bottom. The turning chain does not count as a stitch, and slip stitches are not counted as stitches either. Once the base is complete, do not fasten off — stitches are picked up around all four edges of the rectangle to begin the joined-round body.
Sc in 2nd ch from hook and across. Turn. (60 sts)
Ch 1, sc across, turn. (60 sts) Do not fasten off. Continue around the rectangle edge.
Use a stitch marker to mark the first stitch of each round, since slip stitches used to join are not counted as stitches. The body is worked upward in joined rounds picked up directly from the base edges, moving between single crochet and half double crochet and changing colors every few rounds to build the horizontal pastel stripes.
Ch 1. Sc around all four edges of the base. Place approximately 12 sc along each short side and 60 sc along each long side. Join with sl st to first sc. (144 sts)
Ch 1, sc in each stitch around. Join. (144 sts)
Hdc in each stitch around. Join. (144 sts) Change to Color B.
Hdc in each stitch around. Join. (144 sts) Change to Color C.
Sc in each stitch around. Join. (144 sts) Change to Color A.
Hdc in each stitch around. Join. (144 sts) Change to Color D.
Sc in each stitch around. Join. (144 sts) Change to Color B.
Hdc in each stitch around. Join. (144 sts) Fasten off and weave in ends.
Make two identical handles. With Color A, ch 121. Straps are worked flat rather than in the round, which keeps them single-layer and leaves a long yarn tail on each one for sewing it to the bag body afterward.
Sc in 2nd ch from hook and across. Turn. (120 sts)
Ch 1, sc across. Turn. (120 sts) Fasten off, leaving a long yarn tail for sewing.
Join Color A to the top edge.
Sc evenly around the opening. Join with sl st.
Sc in each stitch around. Join. Fasten off and weave in all ends.
| Rounds | 14 |
|---|---|
| Parts | 4 |
| Level | Easy to confident beginner |
| Time | 4-6 hours |
| Hook | 4.5 mm |
| Yarn | Medium (Worsted/Cotton) |
The base is worked flat because a back-and-forth rectangle gives a firm, square bottom; the body then picks up stitches around all four edges of that rectangle (about 12 along each short side, 60 along each long side) and joins into rounds, which is the point where the bag changes from flat fabric to a tube.
The handles are worked as flat strips of 120 stitches rather than in the round, since a flat strap sewn on afterward keeps the strap single-layer and lets the sewing tail double as the attachment method.
| Base | about 30-40 minutes because it is twelve straightforward rows of single crochet at a fixed 60-stitch count |
|---|---|
| Body | about 2-2.5 hours because it covers many joined rounds at 144 stitches each, with several color changes to track |
| Handles and finishing | about 45-60 minutes because two flat straps need to be worked, then sewn on and the bag blocked |
These answers came from whoever first published the pattern, kept word for word.