Skip to the patterns
Crochet·Rituals
Menu

Hats & Beanies 4 Laid out for paper No account, no download

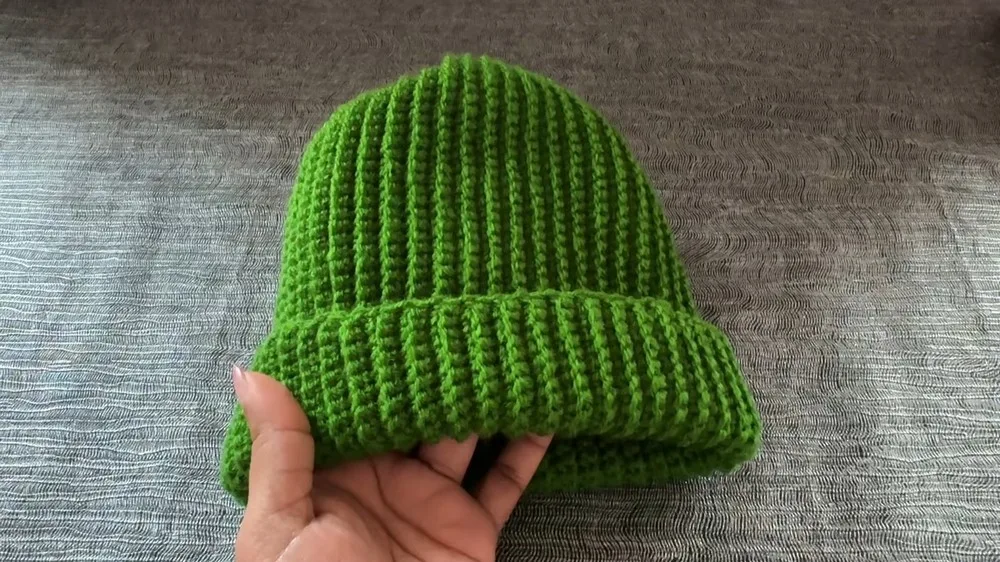
Ribbed crochet beanie hat worked flat, three sizes

Ribbed beanie worked flat in single crochet rows, 4 mm hook, three sizes.

Jump to the rounds Pin it
Ribbed crochet beanie hat worked flat, three sizes
Hats & Beanies · DK
Skill
Intermediate
Time
4-6 hours
Yarn weight
DK
Hook
4 mm
Rounds
4

Intermediate

What the pattern's own author called it. Nothing here is graded again.

DK

What the sample was worked in. Any weight works; the size moves with it.

4

Each one is typed out whole and gets its own line.

This beanie is not worked in the round. A long strip of single crochet, ribbed by working every row through the back loop only, is built up over four-row repeats until it reaches the head circumference, then the short edges are seamed to close the tube. Chain 50 for medium, 47 for small, or 53 for large, and keep 40-50 grams of DK yarn and a 4 mm hook on hand. A yarn needle finishes the crown and the seam.

Common mistakes and their fixes

Working into both loops
Check the back loop only on every row, not just the first, since one row worked into both loops flattens the rib at that point.
Losing stitch count on row 2
Slip stitch rows are easy to undercount; stop at the end of Row 2 and confirm 50 slip stitches before turning.
Gathering the crown too loosely
Pull the tail firmly when closing the top opening and secure with a few extra stitches, or the crown will show a gap.

The materials list

  1. 40-50 grams of double knitting yarn
  2. 4 mm crochet hook
  3. Yarn needle for sewing
  4. Scissors

Listed by the pattern's own author, in their words.

Key to this pattern, 3 short forms

Main Pattern

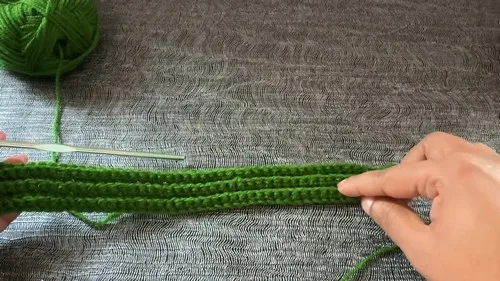
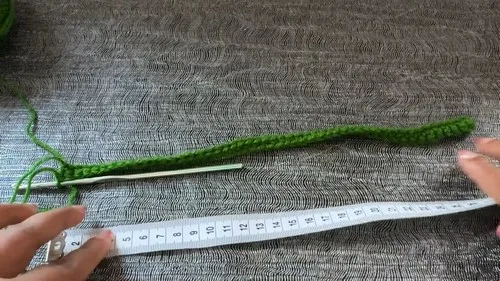
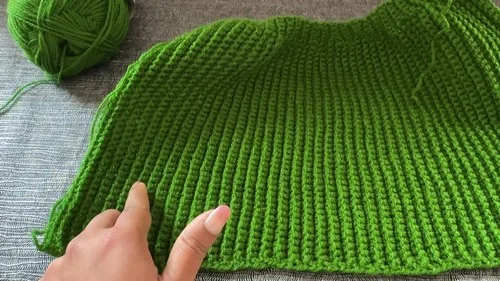
Repeat Rows 1 to 4 to create the ribbed texture until the piece measures around 46 cm (medium size); repeat for a total of 86 rows for small, 94 rows for large.

Starting Chain Begin with a slip knot on your hook, then make the foundation chain: chain 50 for a medium-sized beanie (47 for small, 53 for large).

Row 1

Chain 50 for a medium-sized beanie (47 for small, 53 for large); skip the first chain from the hook, single crochet into the second chain; single crochet in each chain to the end. (50 sc)

Row 2

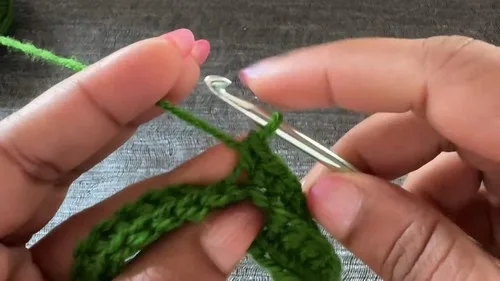
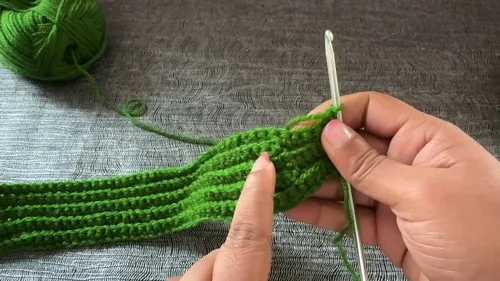
Chain 1 and turn; starting in the first stitch, slip stitch in the back loop only of each stitch across. (50 sl st)

Row 3

Chain 1 and turn; single crochet in the back loop only of each stitch across. (50 sc)

Row 4

Chain 1 and turn; single crochet in the back loop only of each stitch across. (50 sc)

Assembly, in order

Step 1Place the first row edge to the last row edge and use a yarn needle to stitch both sides together with the whip stitch or mattress stitch.
Step 2Cut the yarn, leaving a long tail. Using a yarn needle, weave the tail through the stitches at the top of the beanie, pull tight to gather, and secure the yarn.
Step 3Attach a pom pom if desired (optional).

Check these before you start

  • Every row after the foundation chain is worked into the back loop only; skipping a loop even once breaks the ribbed line and shows in the finished strip.
  • Row 2 uses slip stitch, not single crochet, so keep an even hand there or the strip will pull tighter at that row than the single crochet rows around it.
  • Chain 1 at the start of each row counts only as a turning chain, not a stitch, so the stitch count stays at 50 (or 47/53) across every row.
  • Working through the back loop for most of the stitching gives the beanie its ribbed appearance.

On one line

Rounds4
LevelIntermediate
Time4-6 hours
Hook4 mm
YarnDK

Set-up

  • Chain the correct starting length for the size: 47 for small, 50 for medium, 53 for large.
  • Confirm the DK yarn and 4 mm hook give a fabric that lies flat and stretches slightly, since the ribbing relies on even back-loop tension.
  • Work one full four-row repeat first and check the ridge pattern is visible before continuing to length.
  • Set aside a long tail at the start or plan to leave one at the end, since the crown closure needs it.

Finishing

  1. Seam the first row edge to the last row edge with a yarn needle, using whip stitch or mattress stitch to join the strip into a tube.
  2. Weave the tail through the stitches at the top opening, pull tight to gather the crown closed, and secure with a few small stitches.
  3. Attach a pom pom to the gathered crown if wanted; this step is optional.

Construction

The strip is worked flat rather than in the round, which is what allows the back-loop-only technique to produce ribbing on both faces once the seam joins the two short edges into a tube.

The seam running from first row to last row becomes the single vertical join in the finished beanie, and the gathered top take the place of crown increases you would otherwise expect in a top-down hat.

Time per section

Foundation chain and Row 1about 10-15 minutes, because it sets the stitch count for the whole strip
Ribbed strip, Rows 2-4 repeatedabout 3-5 hours, because the medium size repeats the four-row pattern to 46 cm, with more rows for small (86 total) or large (94 total)
Seaming and crown closureabout 20-30 minutes, because the whip or mattress stitch seam and the gathered top both need a steady hand

Photographs of this one

Every one was taken by whoever published the pattern, in the order the source listed them.
Ribbed crochet beanie hat worked flat, three sizes — photo 2
Ribbed crochet beanie hat worked flat, three sizes — photo 3
Ribbed crochet beanie hat worked flat, three sizes — photo 4
Ribbed crochet beanie hat worked flat, three sizes — photo 5
Ribbed crochet beanie hat worked flat, three sizes — photo 6

Common questions

How do I know when the strip is long enough?
the medium size, measure the strip flat and stop once it reaches around 46 cm. For small or large, count rows instead: 86 rows total for small, 94 for large.
Why does Row 2 use slip stitch instead of single crochet?
The slip stitch row through the back loop only creates the recessed line that gives the rib its texture. Skipping it or substituting single crochet there removes the ribbed effect.
Can I seam the strip with a different stitch than whip or mattress stitch?
Either whip stitch or mattress stitch is intended for this seam, since both keep the join flat against the ribbing. A bulkier seam stitch will show through the thin DK fabric.

These answers came from whoever first published the pattern, kept word for word.