Skip to the patterns
Crochet·Rituals
Menu

Amigurumi 13 Laid out for paper No account, no download

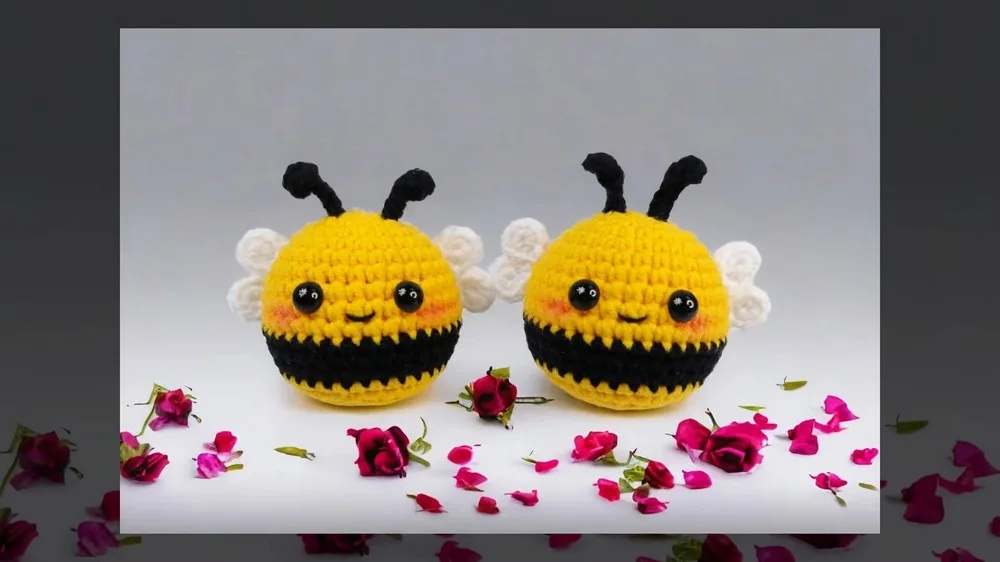
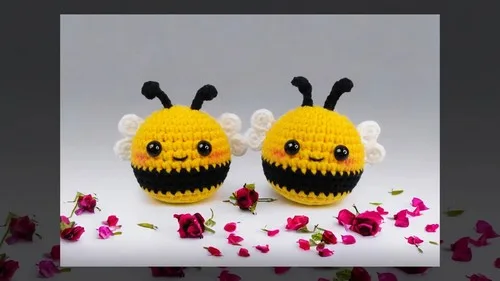
Striped bumblebee amigurumi body pattern in rounds

Amigurumi bee body built in single crochet rounds to 36 sts, striped, with 8mm safety eyes and wings.

Jump to the rounds Pin it
Striped bumblebee amigurumi body pattern in rounds
Amigurumi · Worsted
Skill
Intermediate
Time
4-6 hours
Yarn weight
Worsted
Hook
8 mm
Rounds
13

Intermediate

What the pattern's own author called it. Nothing here is graded again.

Worsted

What the sample was worked in. Any weight works; the size moves with it.

13

Each one is typed out whole and gets its own line.

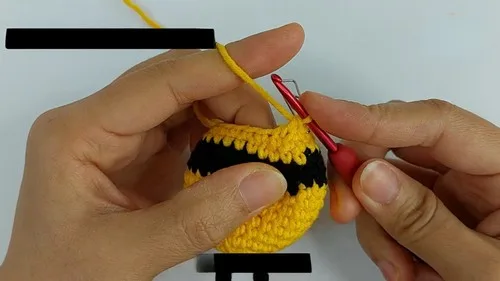
This bumblebee amigurumi is built from a single body piece, starting at a magic ring and increasing in continuous rounds to 36 stitches before the color work and shaping begin. Main color, black, and yellow yarn alternate in bands across the body, so stripes form as you crochet rather than being sewn on after. Wings are worked separately from their own magic ring and attached once the body is complete. Before starting, have your hook, all three yarn colors, a yarn needle, scissors, fiberfill, and 8mm safety eyes within reach, along with a stitch marker to track the start of each round.

Common mistakes and their fixes

Losing the start of the round
Place a stitch marker in the first stitch and move it up at the start of every round, since the body is worked in a continuous spiral with no joining stitch to mark the spot.
Eyes placed too far apart or too late
Count 5 stitches between the eye positions and insert both safety eyes between round 8 and round 9 before working further rounds over that section.

The materials list

  1. Crochet Hook
  2. Yarn in multiple colors (as mentioned in your pattern: main color, black, yellow)
  3. Stitch marker (optional)
  4. Scissors
  5. Yarn needle
  6. 8mm safety eyes
  7. Filling material (fiberfill)

Listed by the pattern's own author, in their words.

Key to this pattern, 1 short form

Main Pattern

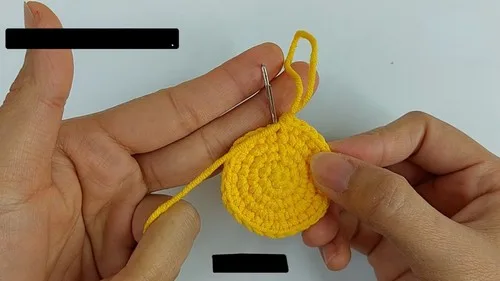
Round 1

6 single crochet in magic ring [6 sts]

Body

Round 2

6 increase [12 sts]

Round 3

(1 single crochet, 1 increase) repeat 6 times [18 sts] For Round 4: (1 single crochet, 1 increase, 1 single crochet) repeat 6 times [24 sts]

Round 5

(3 single crochet, 1 increase) repeat 6 times [30 sts]

Rounds 6–7

30 single crochet [30 sts] For Round 8: (2 single crochet, 1 increase, 2 single crochet) repeat 6 times [36 sts]

Rounds 9–10

36 single crochet [36 sts]

Color Change to Black

Round 11

36 single crochet [36 sts] in black yarn

Decreases Start

Round 12

(2 single crochet, 1 decrease, 2 single crochet) repeat 6 times [30 sts]

Round 13

30 single crochet [30 sts] Change to Yellow Yarn:

Round 14

30 single crochet [30 sts] in yellow yarn

Round 15

(3 single crochet, 1 decrease) repeat 6 times [24 sts] For Round 16: (1 single crochet, 1 decrease, 1 single crochet) repeat 6 times [18 sts]

Round 17

(1 single crochet, 1 decrease) repeat 6 times [12 sts]

Finishing

Round 18

6 decrease [6 sts] Cut the yarn, leaving a tail. Thread the tail through a yarn needle and close the hole. Secure and weave in the end.

Assembly, in order

Step 1Round 18:: 6 decrease [6 sts]
Step 2Cut the yarn, leaving a tail. Thread the tail through a yarn needle and close the hole. Secure and weave in the end.
Step 3Eyes and Wings:
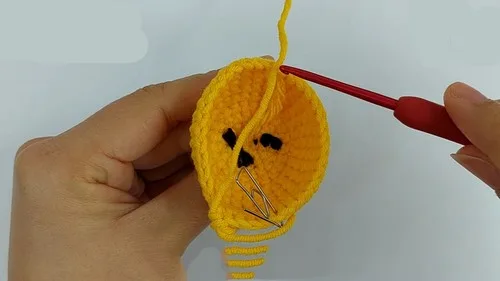
Step 4Insert Eyes:: Place 8mm safety eyes between round 8 and 9 from the start, ensuring they are 5 stitches apart.
Step 5Wings:: It seems there might be a separate instruction for wings, which mentions "8 single crochet in magic ring, 2 single crochet in next stitch" - this likely refers to the start of a wing, but further instruction is needed to complete them.
Step 6Sew the wings at round 8 and 9.

Check these before you start

  • Keep tension even and firm through the increase rounds at the start of the body, since a loose fabric here will show through once the piece is stuffed.
  • Move the stitch marker up at the start of every round rather than joining with a slip stitch, since the whole body is worked in a continuous spiral.

On one line

Rounds13
Parts5
LevelIntermediate
Time4-6 hours
Hook8 mm
YarnWorsted

Set-up

  • Check that you have enough yarn in each of the three colors, since the body changes from main color to black and then to yellow partway through.
  • Place a stitch marker in the first stitch of Round 1 and plan to move it up each round, since rounds are worked continuously without a joining slip stitch.
  • Read through the decrease sequence once before you reach it, since the repeats shift from three stitches down to one between rounds and the stitch count drops quickly.
  • Set the 8mm safety eyes aside and have them ready before you reach the gap between rounds 8 and 9, where they need to be inserted before work continues.

Finishing

  1. Insert the 8mm safety eyes between round 8 and round 9, spacing them 5 stitches apart, before working any further rounds over that area.
  2. Stuff the body firmly as the decrease rounds bring the stitch count down from 36 to 6, since the opening narrows quickly and access gets harder with each round.
  3. Cut the yarn leaving a tail, thread it through a yarn needle, close the final opening, secure the end, and weave in every tail left by the color changes.

Construction

Increases are spaced evenly through rounds 2 to 9-10, moving from a single plain stitch between increases to three, which spreads the growth from 6 to 36 stitches into a smooth, round body rather than a pointed one.

The decrease sequence mirrors the increase sequence in reverse, stepping the stitch count from 36 down to 24, 18, 12, and finally 6, which closes the top of the body on the same lines it was built on.

Time per section

Main Pattern and Body (magic ring to 36 sts)about 45-60 minutes, because the rounds build quickly from 6 to 36 stitches and need even increase placement
Decreases, stuffing, and closingabout 45 minutes, because stuffing gets fiddly as the opening narrows through the decrease rounds

Photographs of this one

Every one was taken by whoever published the pattern, in the order the source listed them.
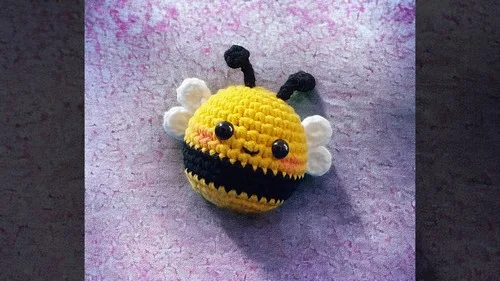
Striped bumblebee amigurumi body pattern in rounds — photo 2
Striped bumblebee amigurumi body pattern in rounds — photo 3
Striped bumblebee amigurumi body pattern in rounds — photo 4
Striped bumblebee amigurumi body pattern in rounds — photo 5
Striped bumblebee amigurumi body pattern in rounds — photo 6

Common questions

Why isn't each round joined with a slip stitch?
The body is worked in a continuous spiral, not in joined rounds, which keeps the surface smooth with no seam line. A stitch marker moved up each round is the only way to track where one round ends and the next begins.
When should the safety eyes go in?
Insert the 8mm safety eyes between round 8 and round 9, spacing them 5 stitches apart, before continuing with later rounds. Placing them later makes it harder to position them accurately from the inside.
Do the wings get crocheted onto the body directly?
No, the wings start from their own magic ring and are worked as separate pieces. They are attached to the finished body afterward rather than being built into the main rounds.

These answers came from whoever first published the pattern, kept word for word.